Add and verify a provider
Connect a vendor for push, email, SMS, RCS, WhatsApp or webhook delivery, verify the credentials and choose the default.
A provider is one configured vendor account for one channel, for example "Firebase production" for push or "SES primary" for email. Nothing can send on a channel until it has an active provider.
Before you start
- You need permission to manage channels. If Add provider is missing, ask an Owner or Admin.
- Have the vendor credentials ready. Providers belong to one environment, so add them in Test and again in Live, or promote a verified Test provider.
- Credentials are encrypted when saved. Nothing is sent to the vendor until you select Verify.
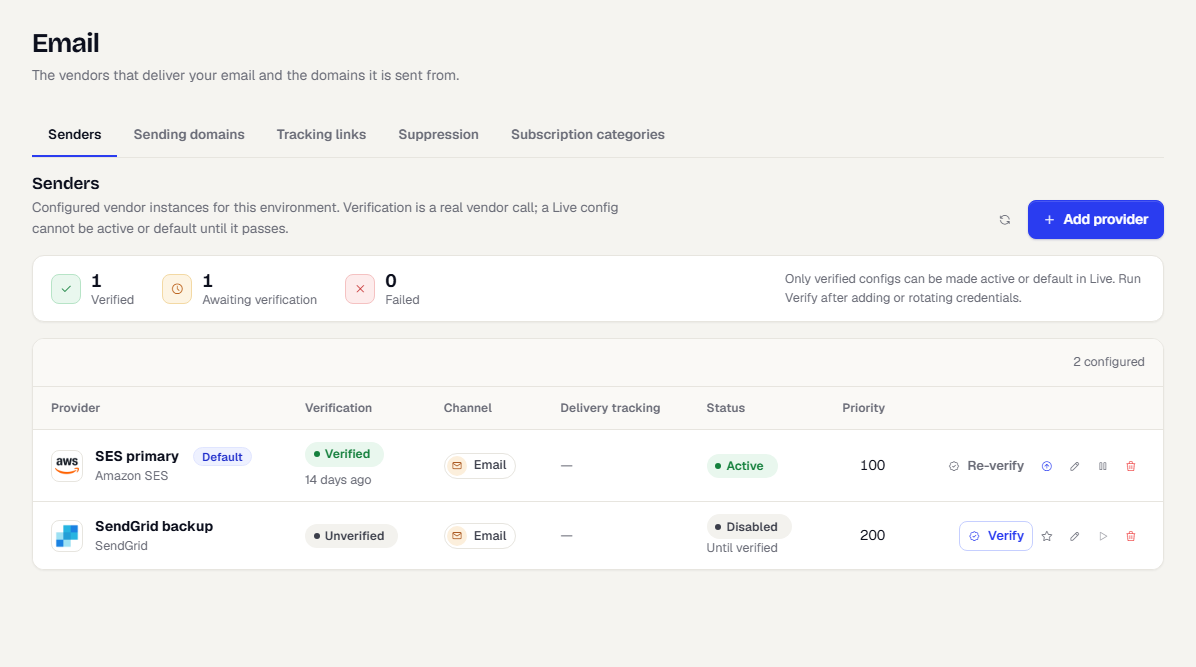
Add a provider
- In the sidebar, open Channels, then the channel you are adding (Push, Email, SMS & RCS or WhatsApp). Providers are listed on its Senders tab.
- Select Add provider. On the Push, Email, SMS & RCS and WhatsApp pages the channel is already chosen, so the dialog opens on the vendor step. On Advanced, Other senders, under Which channel does this provider send?, choose a channel and select Next. One provider serves one channel. To use the same vendor on a second channel, add a second provider.
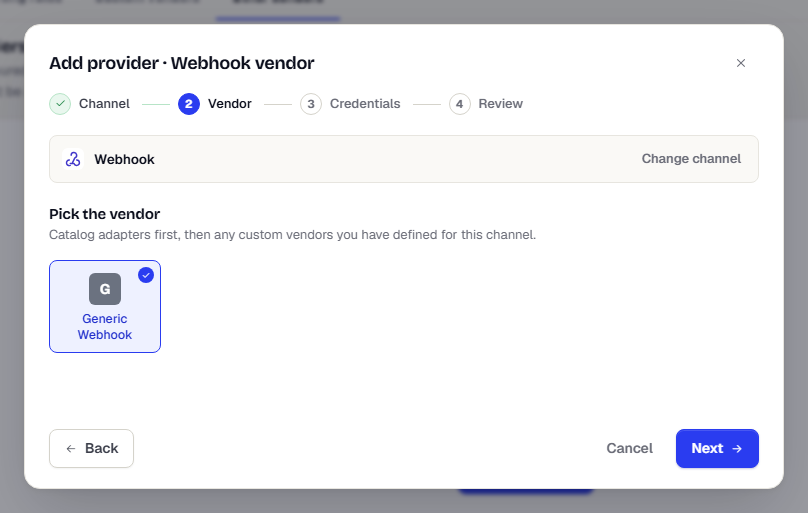
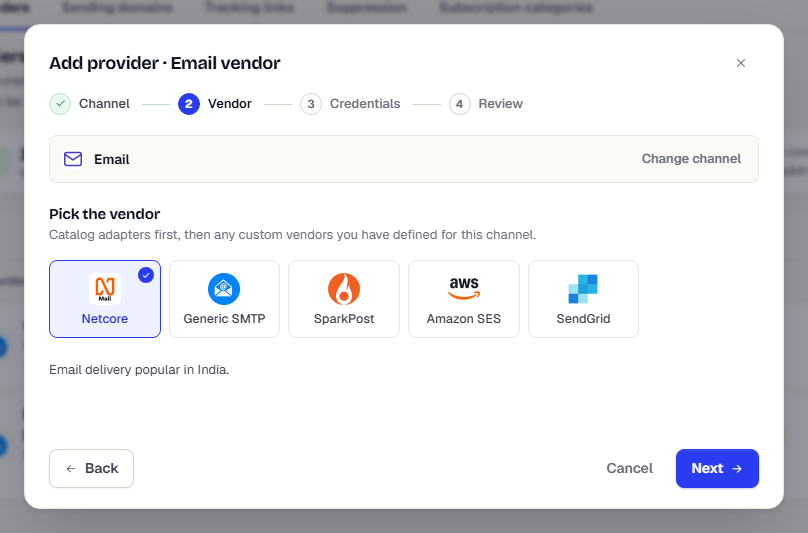
- Under Pick the vendor, choose a vendor and select Next. A short description and a Vendor documentation link appear under the tiles. Vendors you defined yourself appear after the built-in ones. See Add a custom provider.
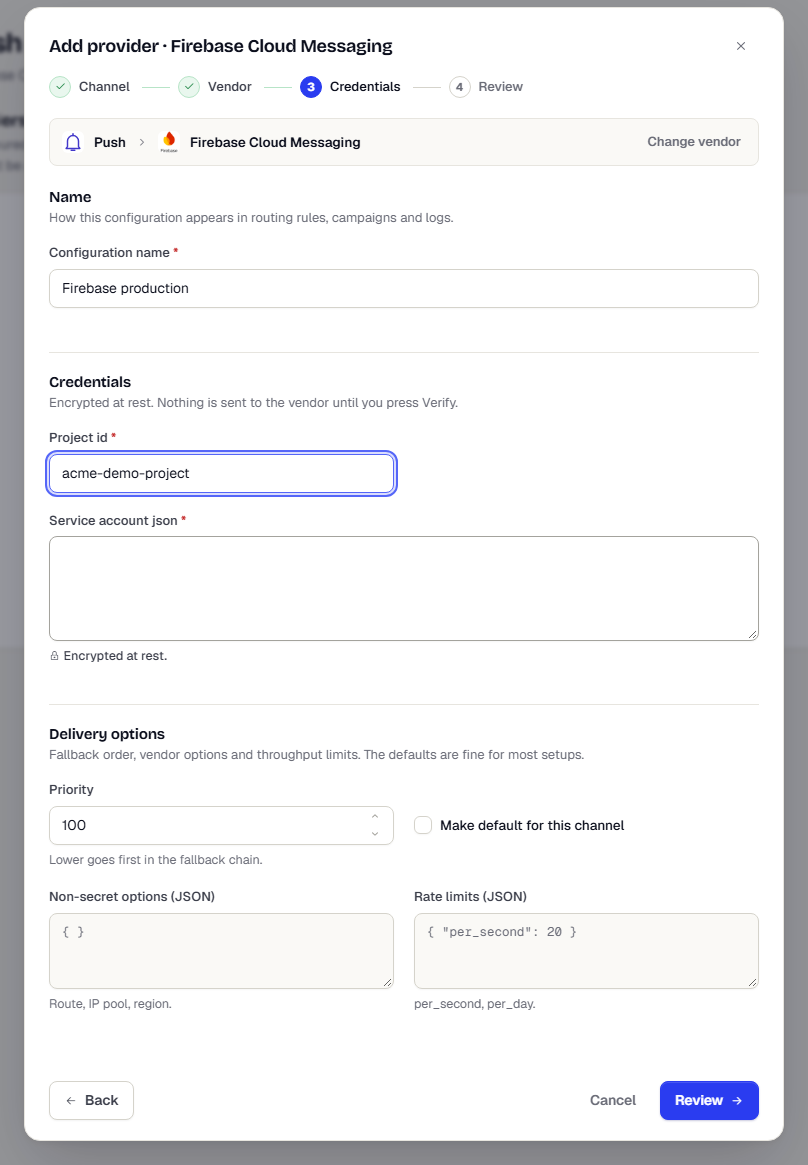
- Enter a Configuration name. It appears in routing rules, campaigns and logs, for example "Gupshup primary".
- Fill in the Credentials. The fields depend on the vendor. See Credentials by channel.
- For email, fill in Senders: the From addresses this provider may send as. Each row has a From email, a From name and a Reply-to. Each From address must be a verified identity at the vendor. The sender marked Default is used when a template does not name its own From. Select Add sender for more.
- Under Delivery options, set Priority (lower goes first in the fallback chain). If needed, add Non-secret options (JSON) and Rate limits (JSON), for example
{ "per_second": 20 }. The defaults suit most setups. - Select Make default for this channel if this provider should send when no routing rule matches.
- Select Review, check the summary and select Create provider. The provider starts as unverified.
Verify a provider
Verification makes a real call to the vendor with the saved credentials and records the result. It sends no message to your users.
- On the provider row, select Verify. After a provider is verified, the button reads Re-verify.
- Read the result toast. Verified means the vendor accepted the credentials. Verification failed shows what the vendor said.
- Select the provider row to open its panel. Verification history lists each attempt with the vendor's reply and how long it took.
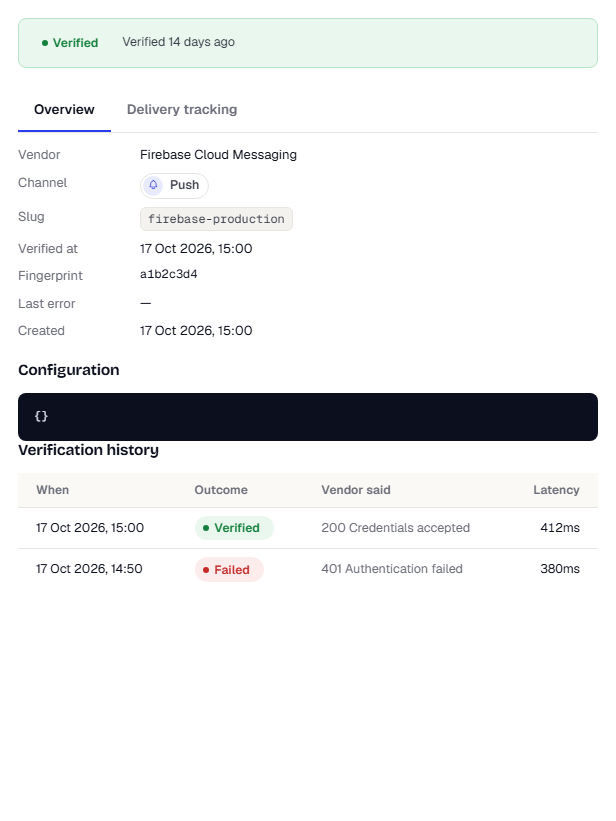
The strip above the table counts providers as Verified, Awaiting verification and Failed.
Vendors that carry a Beta badge, such as Karix and AiSensy for WhatsApp, are built from the vendor's published documentation and are not yet confirmed against live traffic. Their verification only checks that the fields are filled in. Send a Test message first.
Set up delivery tracking
The Delivery tracking column on the list shows whether your vendor is reporting delivery for each sender. Select the chip, or open a sender and choose its Delivery tracking tab, to copy the callback URL and see the steps for your vendor. See Track delivery for a sender.
If you edit a provider and change any credential, verification is cleared and the row shows Credentials changed. Verify again. When editing, leave a stored secret blank to keep it.
Choose the default provider
Each channel has one default. It sends whenever no routing rule matches.
- On a provider row, select the star icon (Make default).
- The row shows a Default badge. The previous default loses it.
In Live, a provider must be verified before it can be active or the default. Live refuses an unverified default, so verify first. In Test you can set a default before verifying, but sends fail until the credentials work.
Promote a Test provider to Live
- In Test, verify the provider.
- On its row, select the up-arrow icon (Promote to Live) and confirm Promote.
- Switch to Live. The copy is there with the same vendor, options and credentials. It stays disabled until it verifies in Live.
Select Promote again later to update the Live copy.
Enable, disable, edit and delete
| Icon | Action |
|---|---|
| Pencil | Edit: change the name, credentials, priority, options and rate limits. |
| Pause or play | Disable or Enable. Enabling needs a verified provider. |
| Sync | Sync vendor templates, for vendors that support it. |
| Trash | Delete. |
Use the All channels filter above the table to show one channel.
Credentials by channel
The table rows show the fields on the credentials form. Required fields must be filled or the vendor rejects the config. Labels follow the vendor's own field names.
Push
| Vendor | Required | Optional |
|---|---|---|
| Firebase Cloud Messaging (Android and web push) | Project id, Service account json | |
| Apple Push Notification service (iOS) | Key id, P8 key, Team id, Bundle id | Production (on by default; turn off for sandbox builds) |
For Firebase, paste the contents of the service account file from Firebase console > Project settings > Service accounts > Generate new private key.
Push is one channel. The same provider list serves web, Android and iOS devices; TrueEngage picks the vendor from the device's platform.
Web push key
Browsers need the Web Push public key (VAPID key) from Firebase to register for web push. You find it under Project settings > Cloud Messaging > Web configuration > Web Push certificates. Pass it to the web SDK as described in Set up web push.
| Vendor | Required | Optional |
|---|---|---|
| Amazon SES | Region, and either SMTP username and SMTP password or Access key id and Secret access key (pick one under Credential type: smtp or api) | Configuration set |
| SendGrid | Api key | Ip pool, Webhook public key |
| SparkPost | Api key, From email | From name |
| Netcore | Api key, From email | From name |
| Generic SMTP | Host, Port, Username, Password, From email | Use tls |
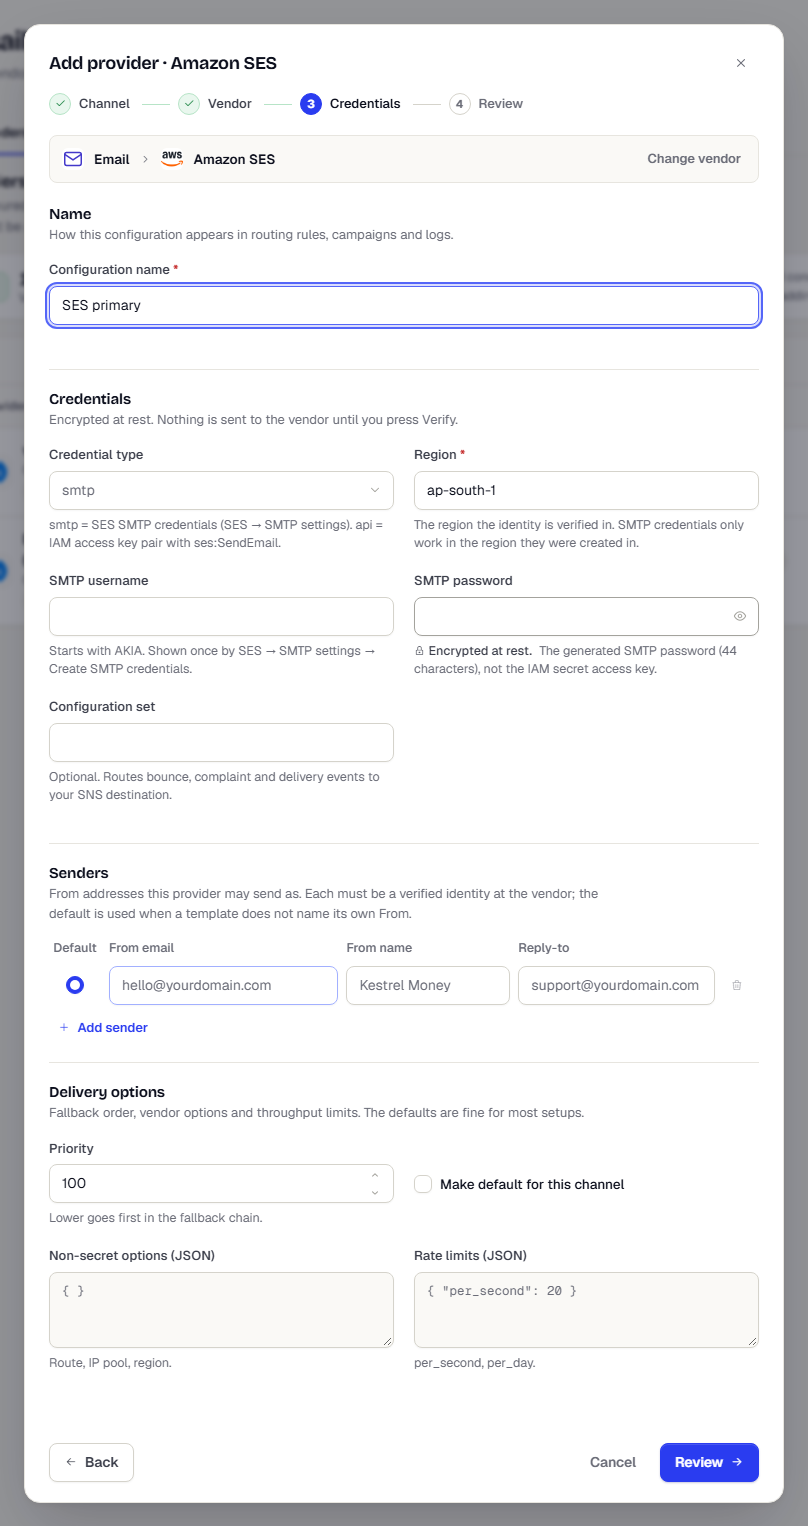
Further down the same step, Senders lists the From addresses.
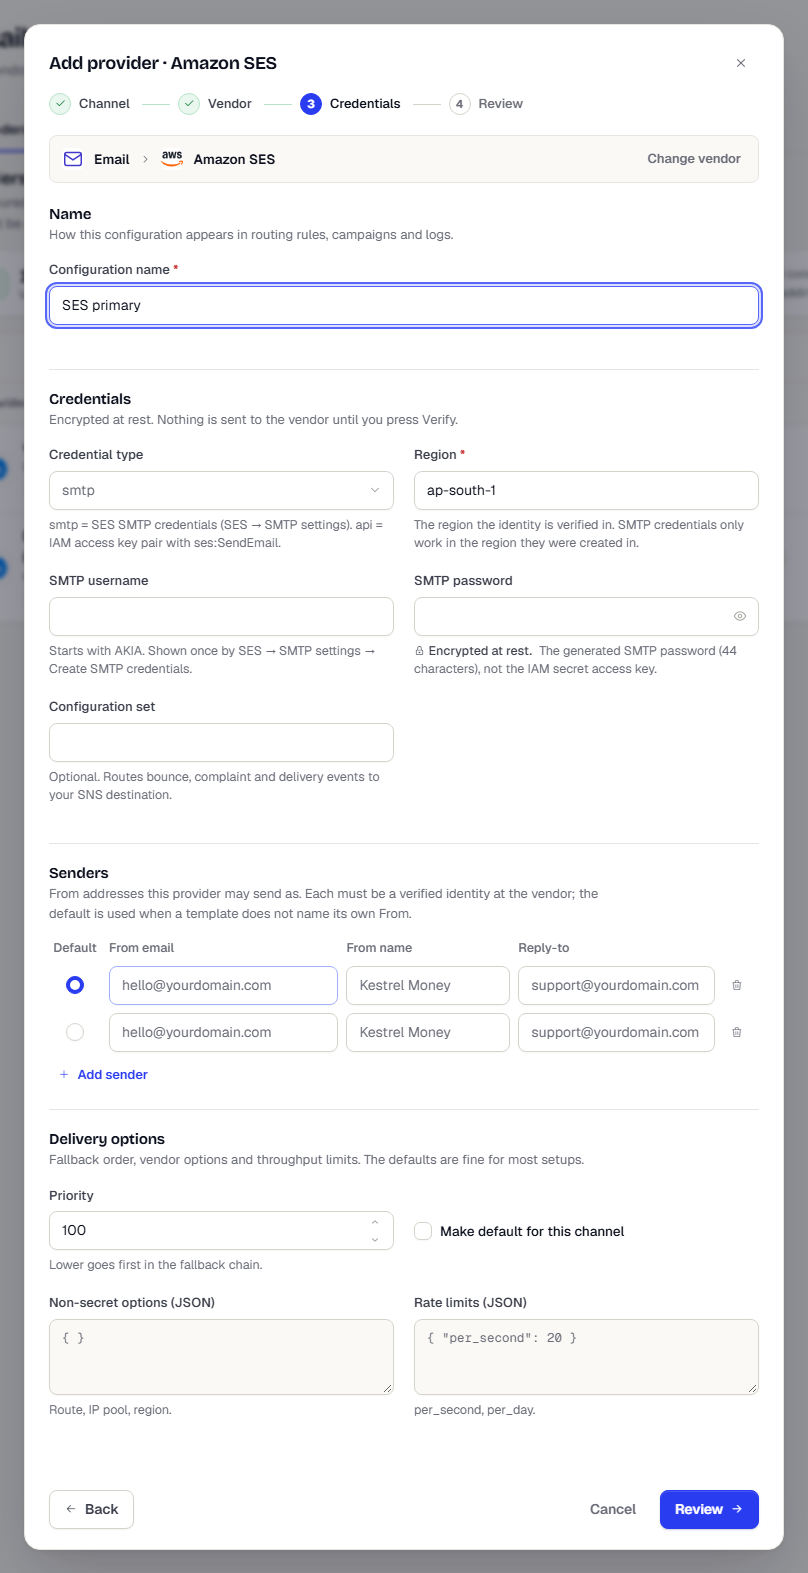
Amazon SES needs API credentials (IAM access keys) to manage sending domains. SMTP credentials can send mail but cannot create domain identities. Email also needs a verified sending domain before Live sends go out.
SMS
| Vendor | Required | Optional |
|---|---|---|
| Gupshup | Userid, Password | Principal entity id |
| MSG91 | Auth key, Sender id | Route, Dlt entity id |
| ValueFirst | Username, Password | Sender id, Success codes, Principal entity id |
| Kaleyra | Sid, Api key | |
| Vibgyor | Api key | Sender id, Dlt entity id |
| Infobip | Api key, Base url | Sender id |
| Twilio | Account sid, Auth token | Messaging service sid, Callback url |
| Sinch | Service plan id, Api token | Sender id |
For India, carriers require DLT registration. Ask your vendor which entity ID field they need.
RCS
| Vendor | Required |
|---|---|
| Google RCS Business Messaging | Agent id, Service account json |
| Sinch India (RCS) | Agent id, Api token |
| ValueFirst (RCS) | Agent id, Username, Password |
| Gupshup (RCS) | Agent id, Api key |
| Kaleyra RCS | Sid, Api key, Agent id |
| Vendor | Required | Optional |
|---|---|---|
| WhatsApp Cloud API (Meta) | Waba id, Access token, Phone number id | App secret, Webhook verify token |
| Twilio (WhatsApp) | Account sid, Auth token, Whatsapp number | Callback url |
| Infobip (WhatsApp) | Api key, Base url | Sender |
| Gupshup WhatsApp | Gupshup API: enterprise (User id, Password, Source number) or self_serve (Api key, App name, Source number) | App id, Gateway url |
| ValueFirst WhatsApp | Username, Password, Source number | |
| Karix WhatsApp (Beta) | Api key, Source number | |
| AiSensy WhatsApp (Beta) | Api key | Default recipient name |
Webhook
| Vendor | Required | Optional |
|---|---|---|
| Generic Webhook | None | Secret |
What happens next
- With a verified default provider, campaigns on that channel can send.
- To send some recipients through another vendor, add a routing rule.
- For email, register a sending domain.
- For a vendor that is not listed, add a custom provider.
- Give the vendor the callback URL so messages report delivery. See Track delivery for a sender.
- For WhatsApp, bring in your approved templates. See Set up WhatsApp.
Was this page helpful?