API keys
The kinds of key, how to create one, and how to reveal, regenerate or revoke it.
API keys let your apps and servers talk to TrueEngage. Each key belongs to one environment (Test or Live).
Key kinds
| Kind | Where it runs | Credential | Use it for |
|---|---|---|---|
| SDK app key | Inside your app or website | App key only (test_… or live_…). Not a secret. |
Events, identify and push tokens from the SDK |
| Server key | Your backend | App key plus a secret | Server events, transactional sends, business events, flow entry, identity promotion |
| Data API key | Your backend, or a browser from allowed origins | App key plus a secret | Server events and identity promotion |
The SDK app key is created with the workspace. You create server and Data API keys yourself.
A key can never hold more access than the person who creates it.
Create a key
Before you start: you need permission to manage API keys.
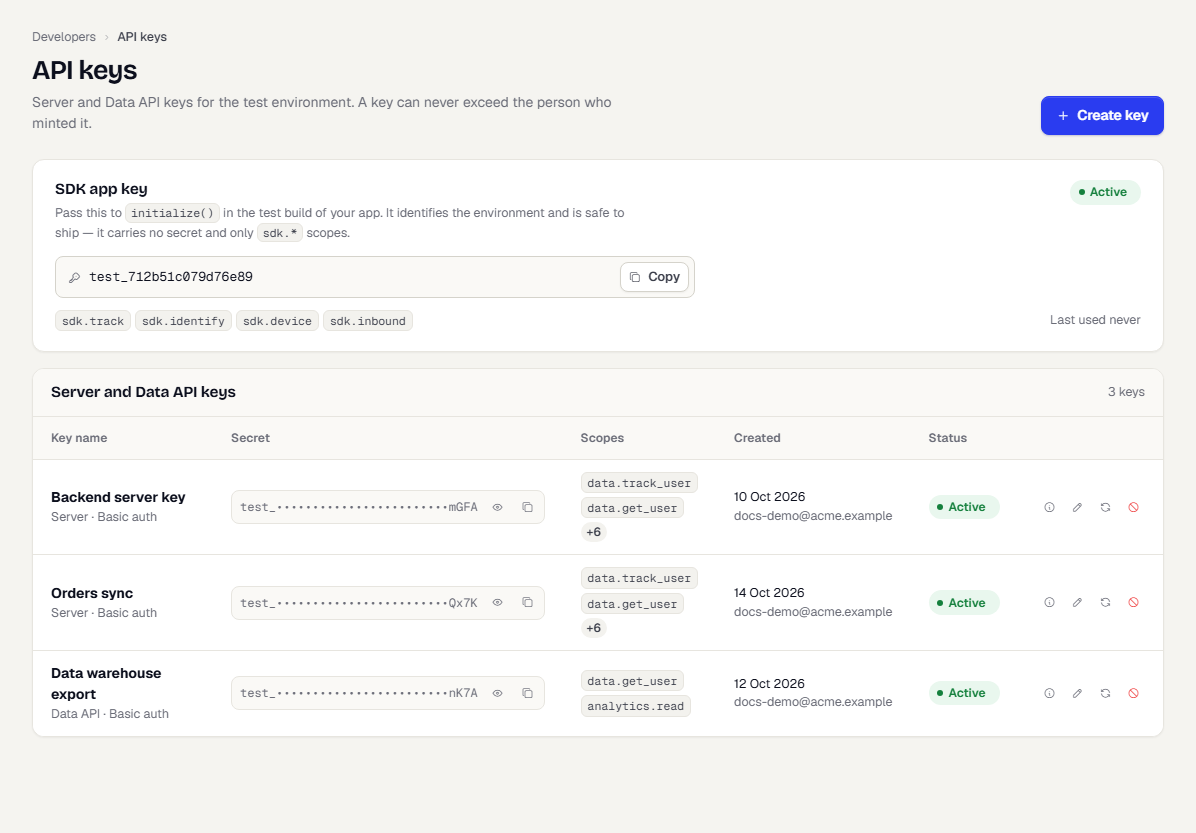
- In the sidebar, open Developers, then API Keys.
- Select Create key. The Create API key dialog opens with four steps: Details, Access, Restrictions and Copy secret.
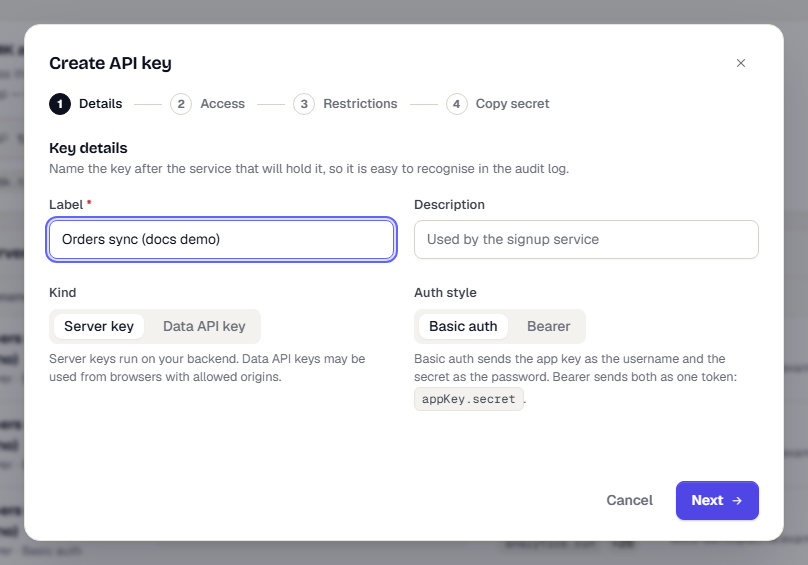
Step 1. Details
- Enter a Label. Name it after the service that will hold it, such as
Orders sync (docs demo). Add an optional Description. - Choose the Kind: Server for your backend, or Data API for keys that may be used from browsers on allowed origins.
- Choose the Auth style: Basic auth or Bearer. See Auth style.
- Select Next.
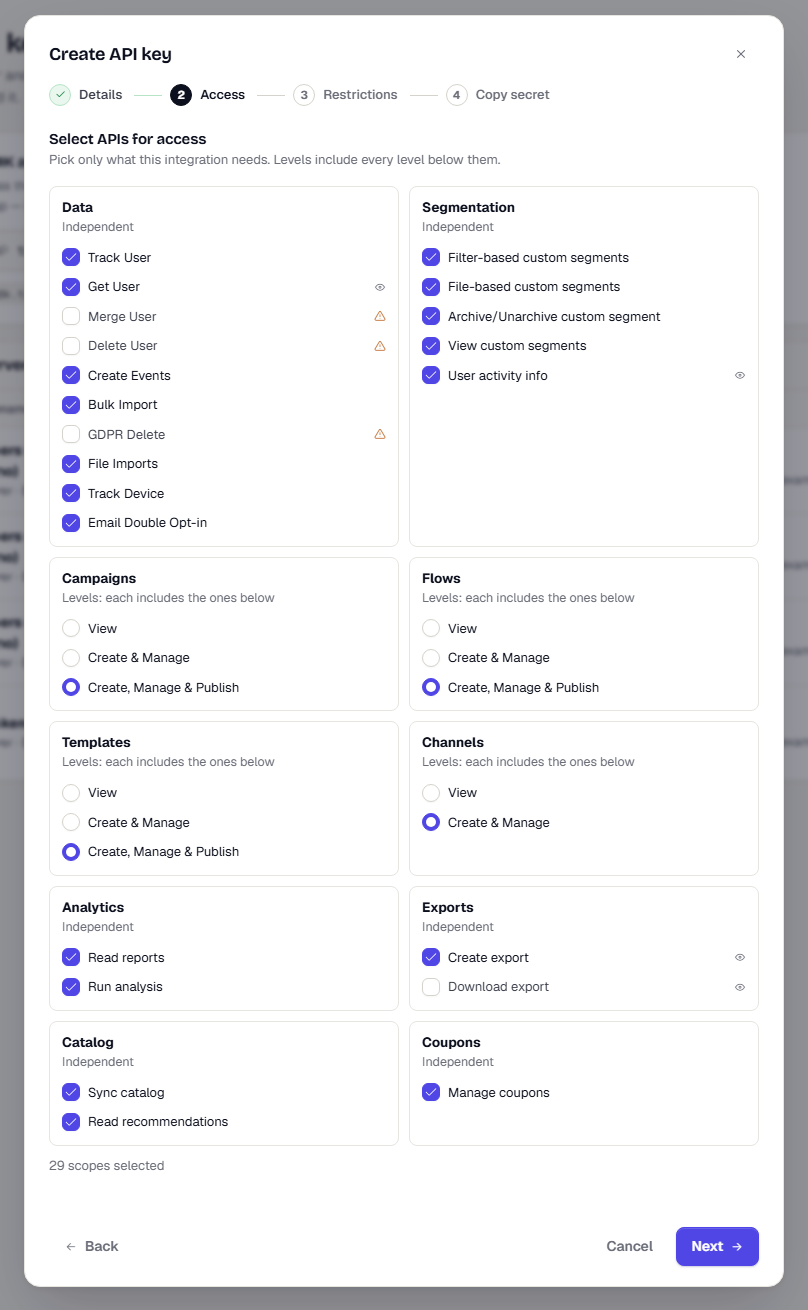
Step 2. Access
- Pick the scopes this integration needs. Each group is either Levels (each level includes every level below it) or Independent checkboxes. Hover a scope for its description. An eye icon marks scopes that read personal data, and a warning icon marks destructive scopes.
- Some scopes start selected. Clear what the integration does not need, and keep at least one. The count of selected scopes shows below the list.
- Select Next.
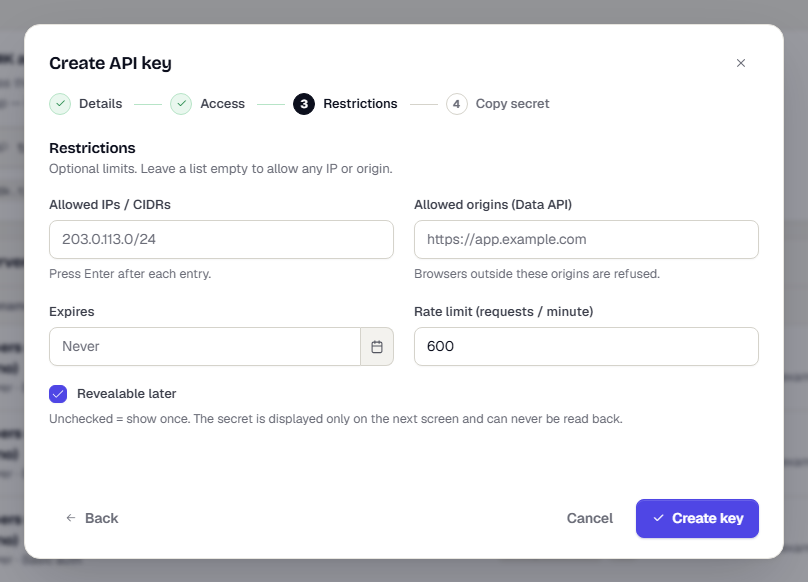
Step 3. Restrictions
- Optionally limit where the key works: Allowed IPs / CIDRs (press Enter after each), Allowed origins (Data API), Expires, and a Rate limit (requests / minute). Leave a list empty to allow any IP or origin.
- Leave Revealable later checked if you may need to read the secret again. Uncheck it for a show-once key.
- Select Create key.
Step 4. Copy secret
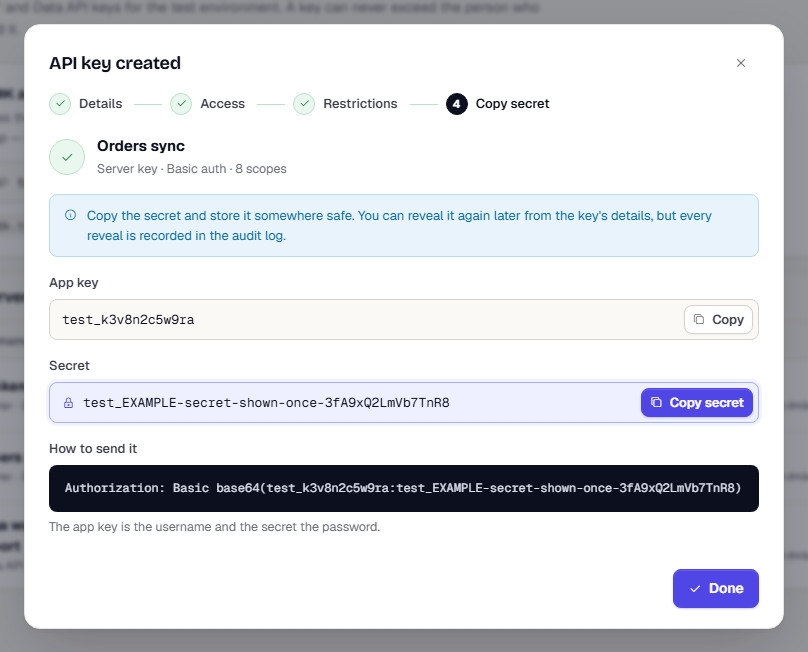
- Copy the App key and the Secret. How to send it shows the exact header for your auth style.
- Select Done.
Auth style
- Basic auth. Send
Authorization: Basic base64(appKey:secret). - Bearer. Send
Authorization: Bearer <appKey>.<secret>. Both halves are needed.
See Authentication for examples.
The secret is shown once
For a show-once key, the secret appears only on the last step of creation. It cannot be read back. If you lose it, regenerate the key.
For a revealable key, you can show the secret again from the key's row. Every reveal is recorded in the audit log.
Reveal a secret
- In the key list, find the key in Server and Data API keys.
- Select the eye icon in the Secret column. The secret shows in place. Select the icon again to hide it.
- Select the copy icon to copy it.
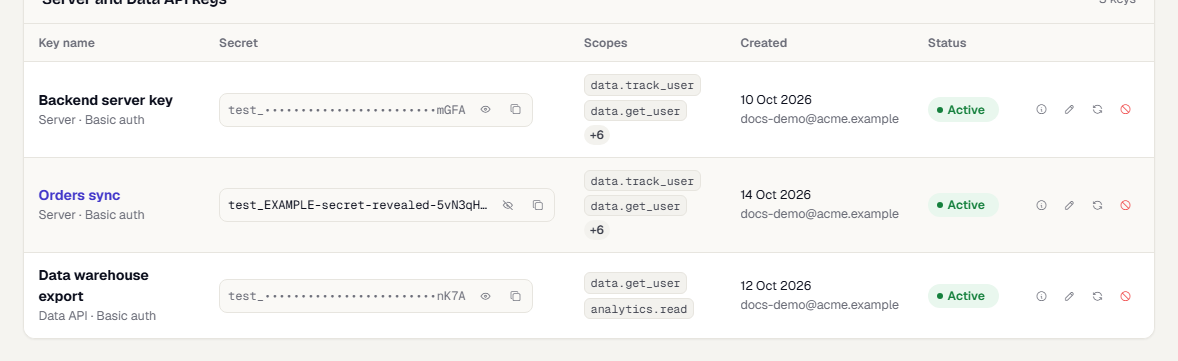
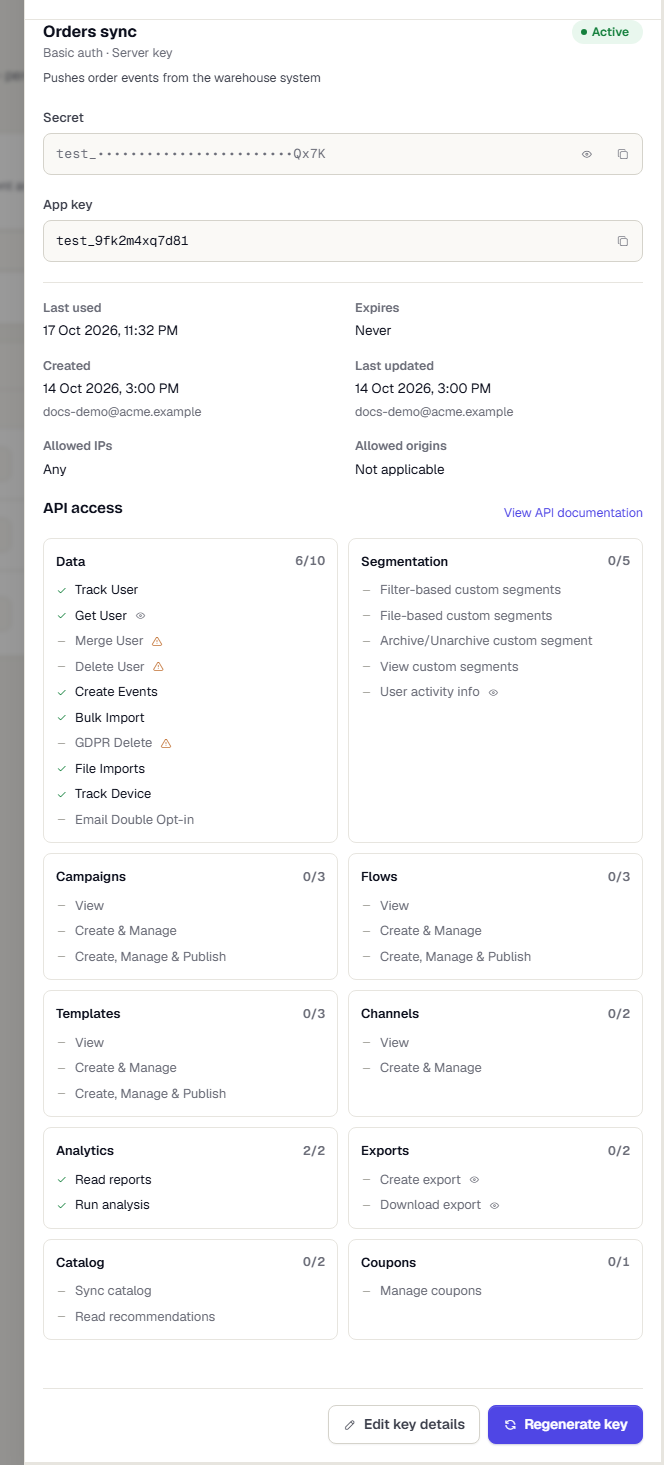
Reveals are limited to five per hour, and a show-once key cannot be revealed. Select a row, or the info icon on it, to open Key details. It shows the app key, last use, expiry, allowed IPs and origins, and an API access tree of the scopes granted, with recent events for the key. It also has Edit key details and Regenerate key buttons.
Edit a key
Change a key's label, scopes or restrictions without changing its secret.
- Select the pencil icon on the key's row, or open Key details and select Edit key details.
- The Edit key dialog has the same Details, Access and Restrictions steps as creation. Kind, Auth style and Revealable later are fixed when the key is created, so they do not appear.
- Select Save changes.
Only active keys can be edited. A revoked key is read-only.
Regenerate a key
Regenerate when a secret leaks or you want to rotate it.
- Select the refresh icon on the key's row.
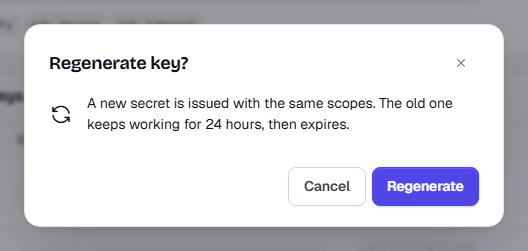
- In Regenerate key?, select Regenerate.
- Copy the new secret from the New secret issued dialog.
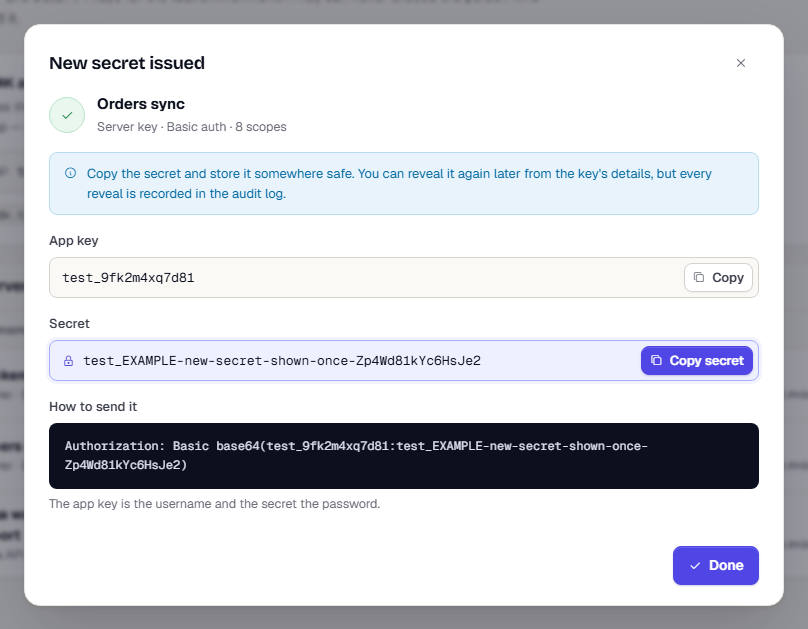
The new secret has the same scopes. The old secret keeps working for 24 hours, then expires. Use that window to roll your deployment.
Revoke a key
- Select the ban icon on the key's row.
- In Revoke key?, select Revoke. Select Keep to leave the key as it is.
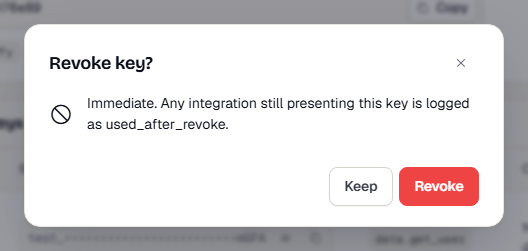
Revoking is immediate. Anything still using the key is refused.
What happens next
- Use the key in your API calls.
- Keep secrets in your secret manager, never in source control or in an app build.
Was this page helpful?