Import users or events from a CSV
Create a one-time CSV import in four steps, check it with a dry run, then import.
Use the import wizard to load a CSV file of users or events. You pick what you are importing, upload the file, map its columns, and review before anything runs.
Before you start
- You need permission to manage data.
- Decide the type. A Users import creates or updates profiles, one row per user, and columns become attributes. An Events import adds events to users, one row per event, and columns become event properties.
- Your file needs a header row and one column that identifies each user, such as a customer ID or email. A small sample,
acme-loyalty-october.csv, has the columnscustomer_id,email,first_name,city,loyalty_tier,points_balanceandjoined_at.
Step 1. Details
- In the sidebar, open Data, then Data Imports, and select Import.
- Enter an Import name you will recognise in the run history, such as
Loyalty members - October. - Choose the Import type: Users, Events or Ad tracking. Ad tracking records where existing users came from. See Import past ad tracking data.
- Under Matching, choose Identify users by. This is how each row finds its user.
- For an events import, enter the Event name. Leave it empty if the file has a column with the event name on each row.
- Check Time zone for dates without an offset. A value like
2026-09-13 11:32is read in this zone. Values withZor an offset keep their own.
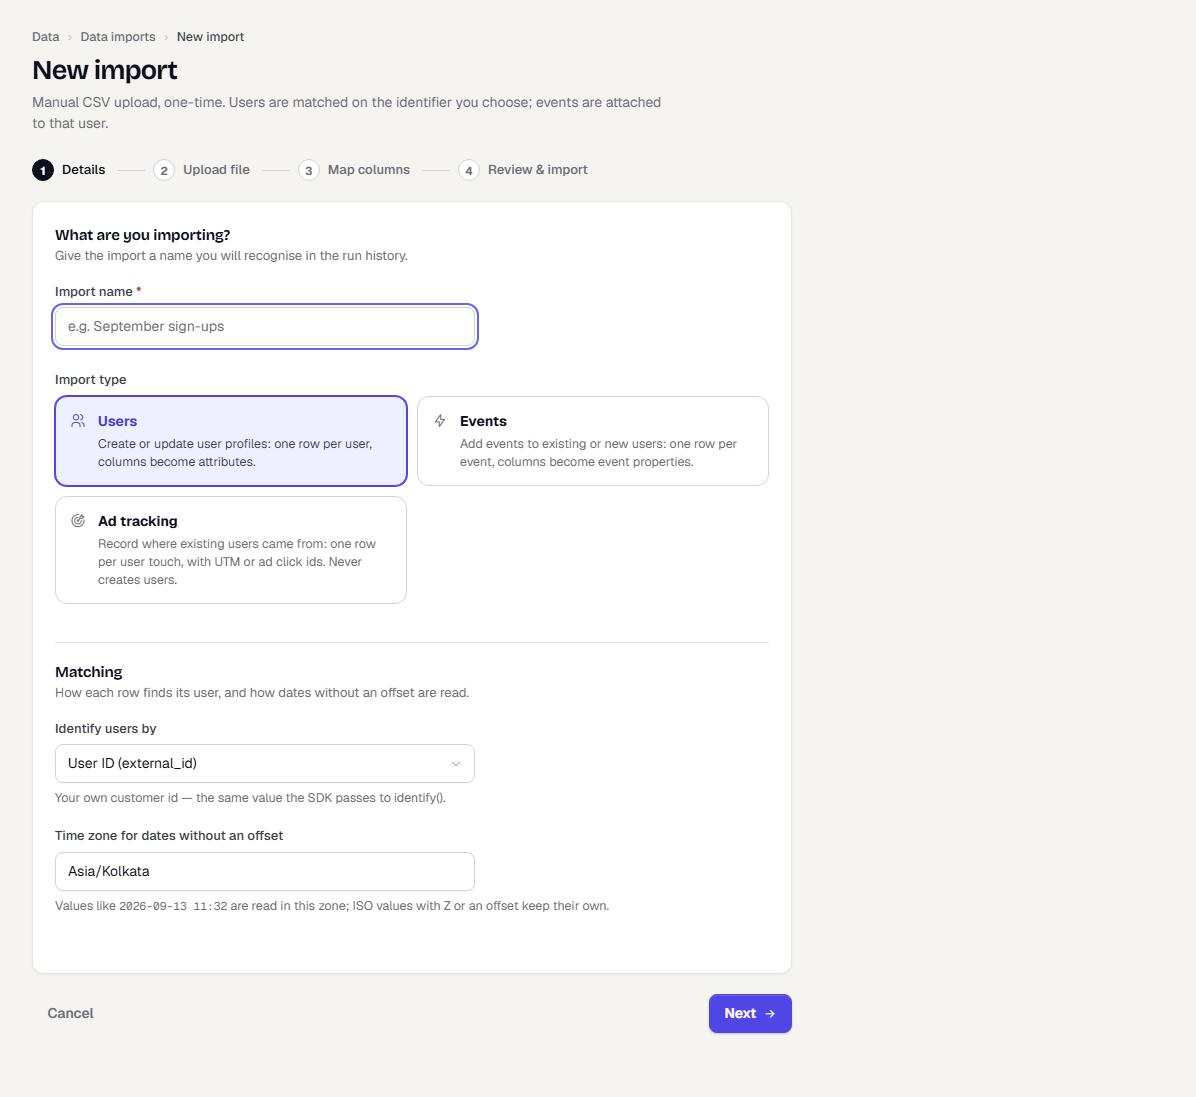
- Select Next.
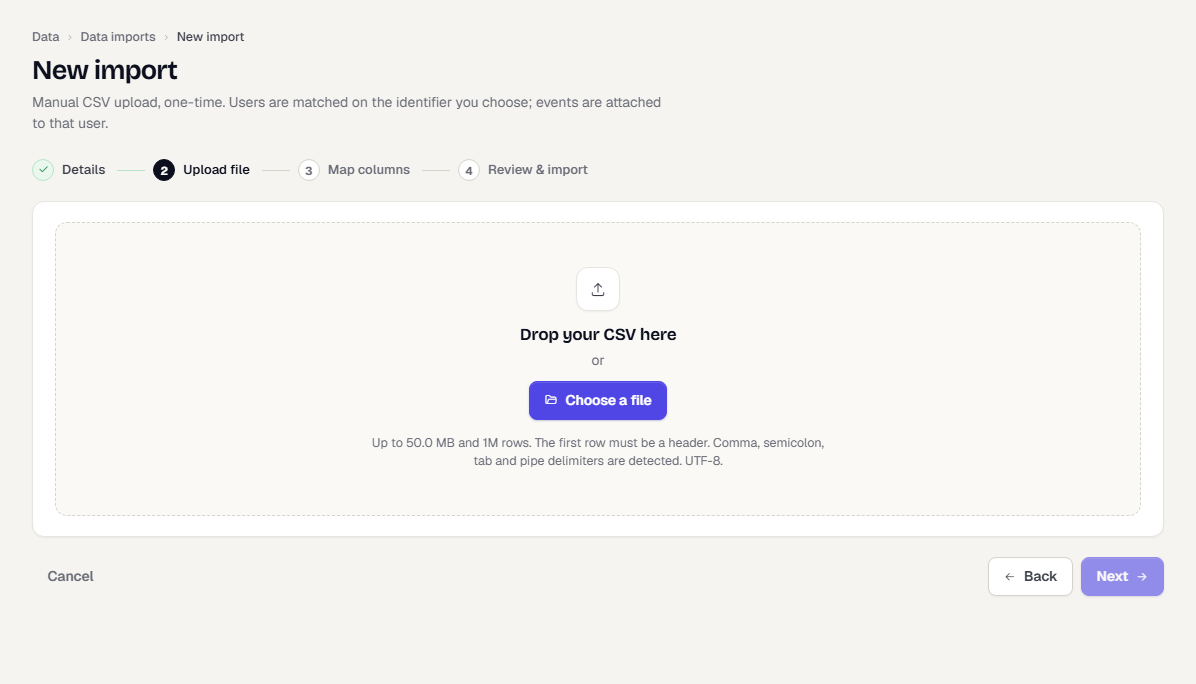
Step 2. Upload file
- Drop your CSV on the page, or select Choose a file.
The page shows the file's size, rows, columns and detected delimiter, plus a Preview of the first rows. Select Replace file to pick a different one.
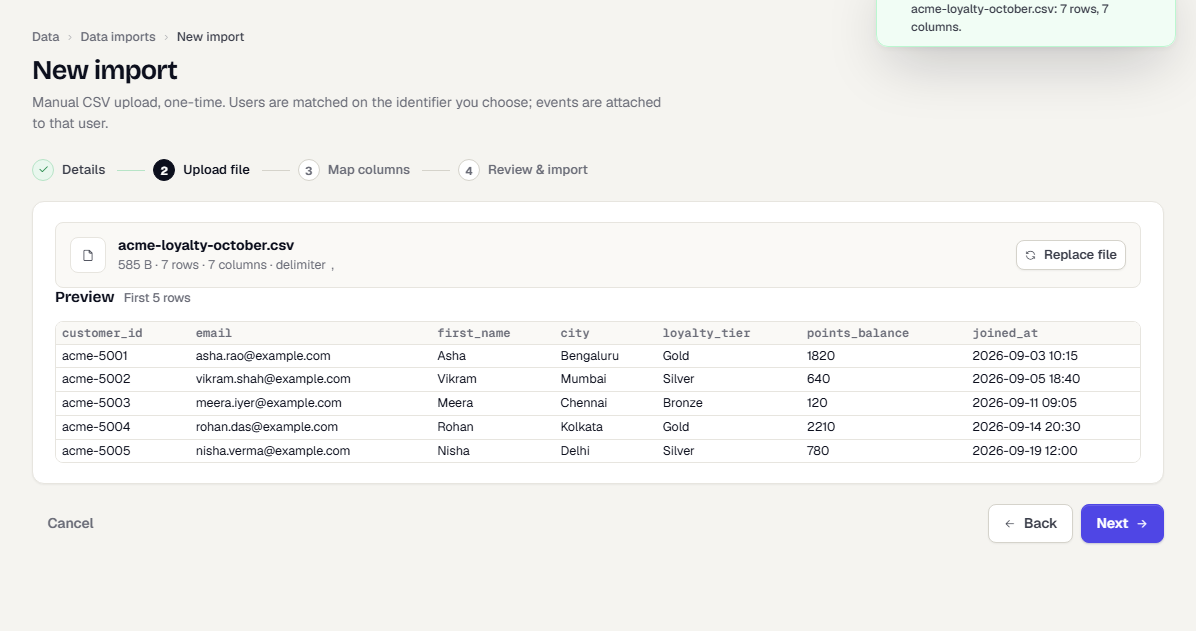
- Select Next.
Step 3. Map columns
- Choose the Primary key column. It holds the identifier of each user.
- For every other column, choose what it maps to in Map to. For a users import: User attribute, Alias · second external id or Skip column. For an events import: Event property, Event name, Event time or Skip column.
- Pick or type the Attribute (or Property) key. A key that does not exist yet is created, and the row says so. A typo here becomes a new attribute.
- Set the Data type and, for dates, the Date format.
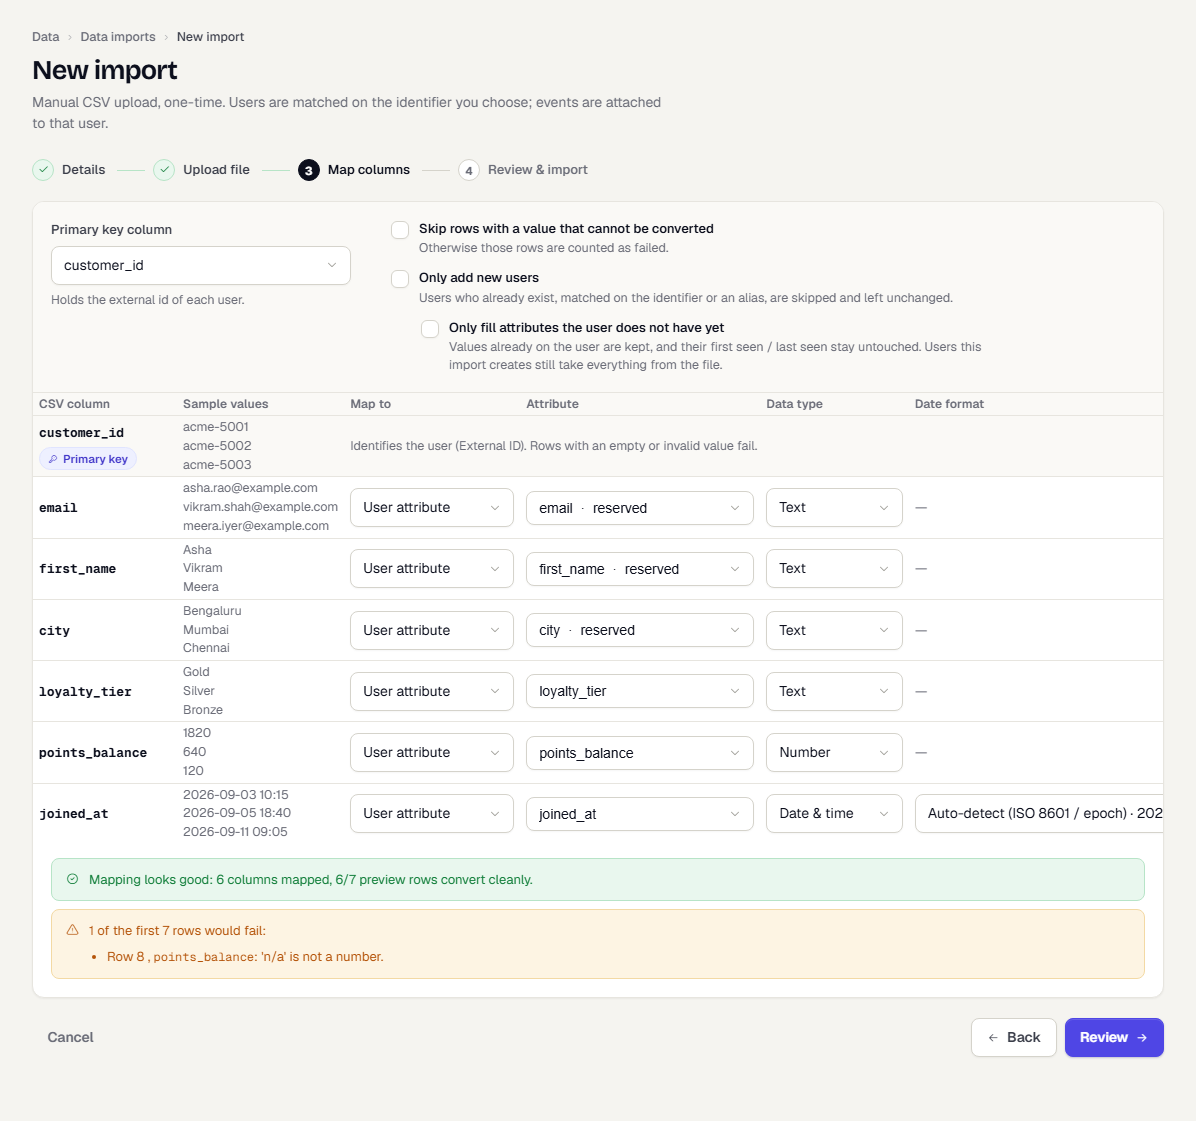
Options
| Option | Effect |
|---|---|
| Skip rows with a value that cannot be converted | Otherwise those rows count as failed. |
| Create users that do not exist yet (events) | On by default. Off fails rows whose identifier matches no user. |
| Skip events already recorded (events) | Drops a row when the same user already has that event at that time, within a tolerance you set. Use it for backfills that overlap live events. |
| Only add new users (users) | Existing users are skipped and left unchanged. |
| Only fill attributes the user does not have yet (users) | Keeps values already on the user. |
For a backfill, map a column to Event time. If you do not, every event gets the time the import runs, and events cannot be re-timed afterwards.
Live validation
As you map, TrueEngage checks the mapping against a sample of rows and shows the result under the table.
- A green message means the mapping looks good and shows how many preview rows pass.
- Red messages name the columns to fix. Review stays disabled until they are fixed.
- A warning lists new attributes or properties that will be created, and sample rows that would fail or be skipped.
- A column can also carry a note with a triangle icon, for example when a column is saved as an ad tracking touch instead of an attribute. These notes do not block Review.
Select Review when the mapping is valid.
Step 4. Review and import
- Check the summary: name, type, file, identifier, time zone, how invalid values and existing users are handled, and the mapped columns.
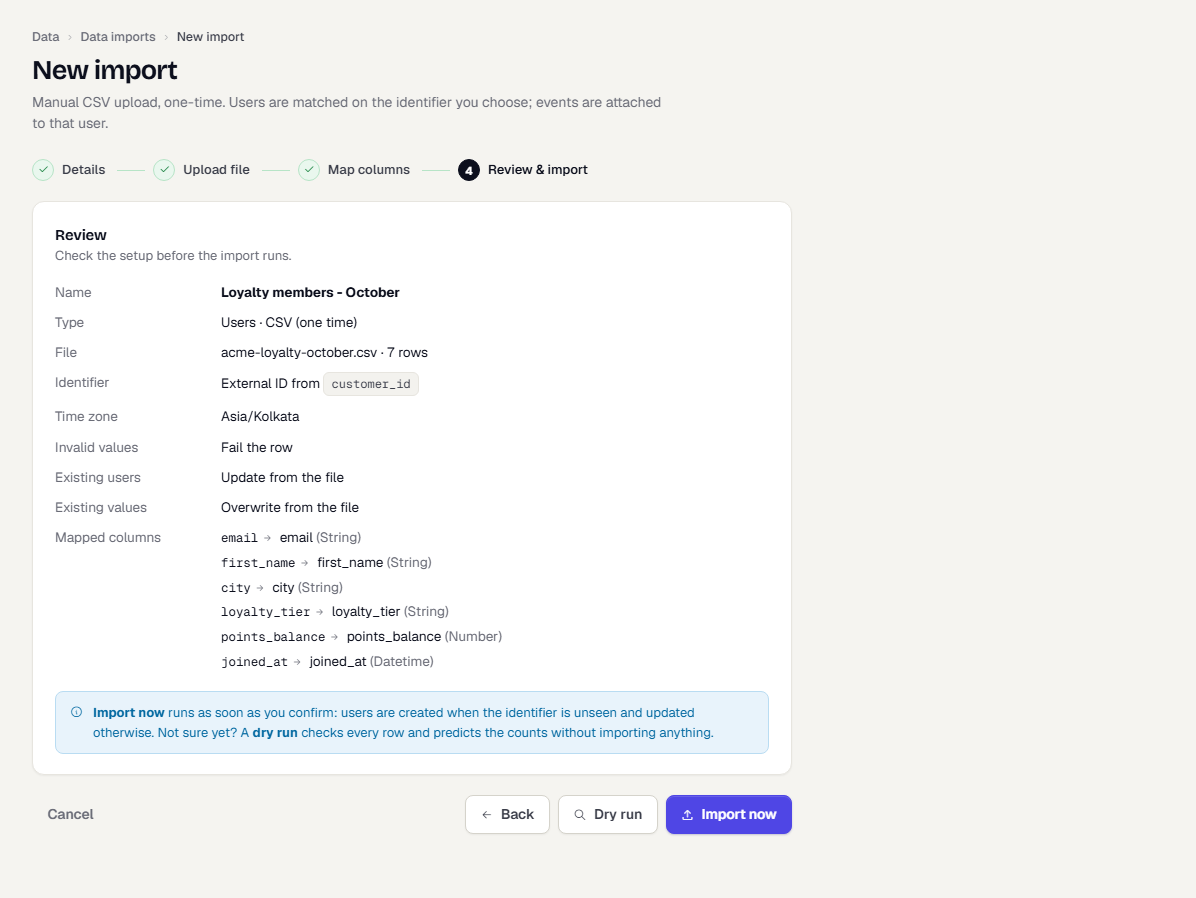
- Select Dry run to check every row and predict the counts. Nothing is imported.
- Select Import now to run it. Users are created when the identifier is unseen and updated otherwise.
The import opens on its detail page. See Read import results.
What happens next
- Read import results and fix failed rows.
- Review new attributes in Manage user attributes.
Was this page helpful?