Account and profile
Edit your profile and photo, change your password, manage signed-in devices, choose light or dark theme, pick your alert emails, edit the organisation and review your permissions.
The Account page holds everything about you and your organisation. It has these tabs: General, Security, Appearance, Notifications, Organisation, Workspace and My permissions. The tab is kept in the address, for example ?section=security, so a link opens the right one. Notifications shows only when your role can view alerts.
Before you start: any signed-in member can open Account. Only an organisation Owner can save changes on the Organisation tab, and changing the workspace avatar needs the Team management permission.
To open it, select Settings, then Account in the sidebar. You can also use the account menu, described below.
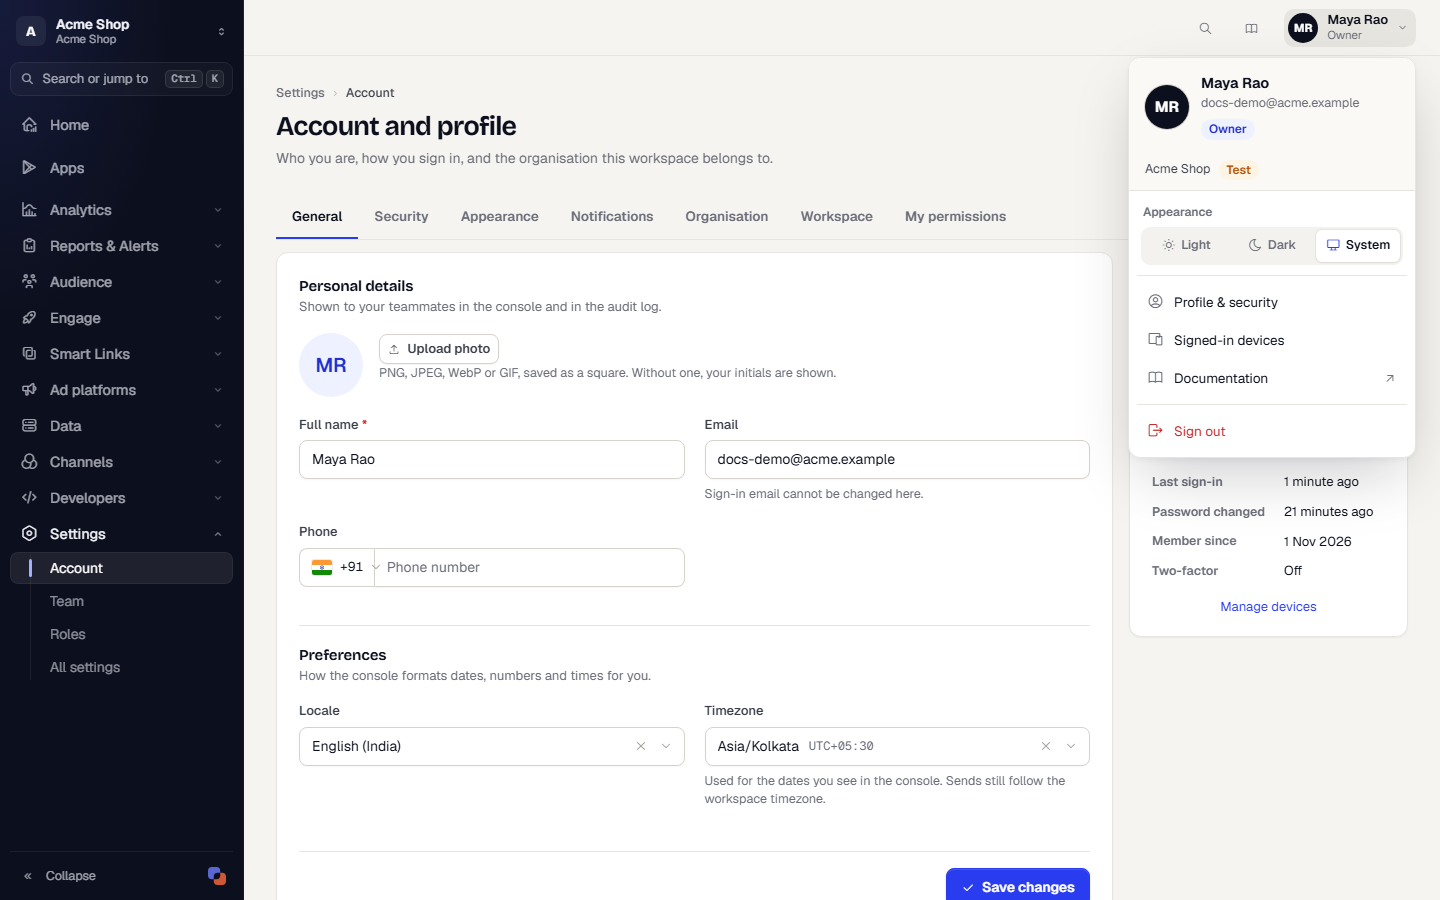
Open the account menu
Select your name at the top right of any page. The menu shows your name, email and role, the workspace and environment you are in, and:
- Appearance, a switch between Light, Dark and System. See Choose a light or dark theme.
- Profile & security, which opens this page.
- Signed-in devices, which opens the device list on the Security tab.
- Documentation, which opens these docs in a new tab.
- Sign out.
Edit your profile
- Open the General tab.
- Under Personal details, select Upload photo (or Change photo) to crop and save a square picture. PNG, JPEG, WebP or GIF work. Select Remove to go back to your initials. Your photo shows in the account menu and to teammates.
- Change your Full name or Phone.
- Under Preferences, choose your Locale and Timezone. These control how the console shows dates and numbers to you. Sends still follow the workspace timezone.
- Select Save changes.
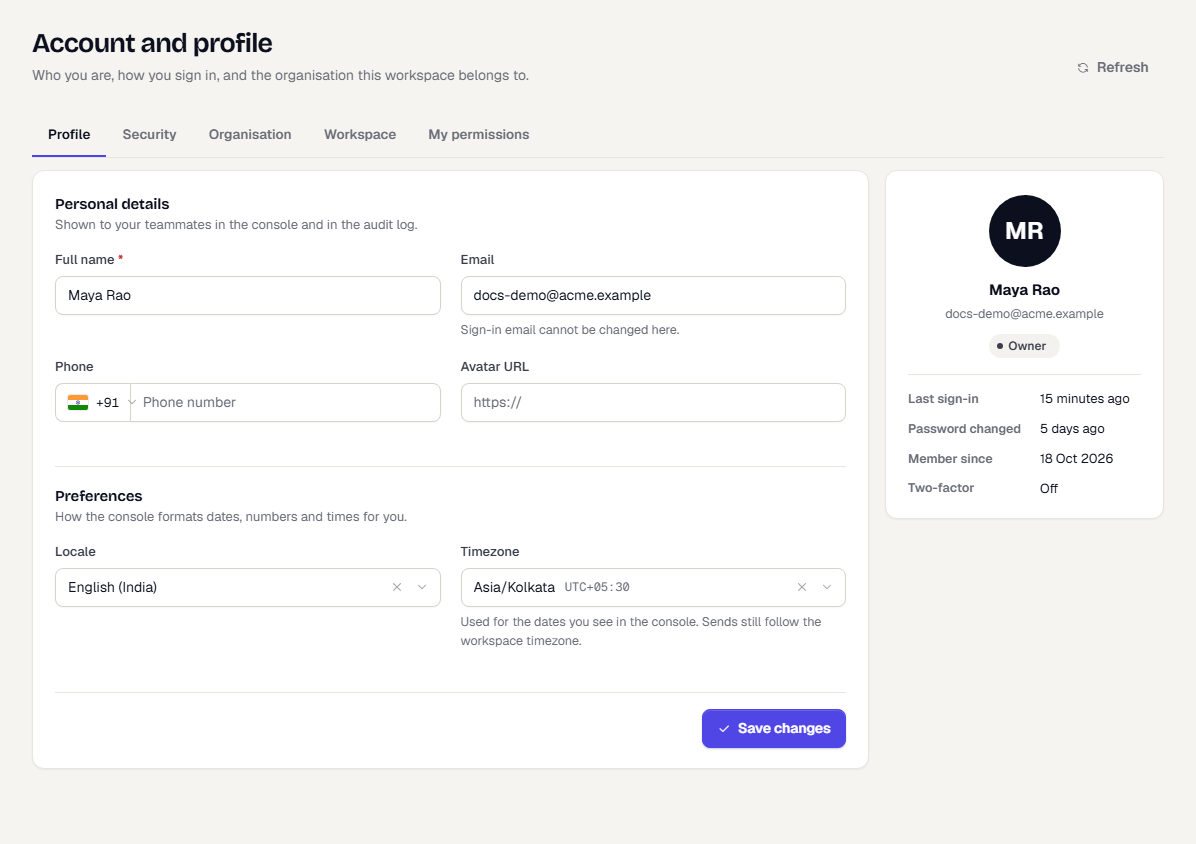
Your Email is your sign-in and cannot be changed here. The card on the right shows your role, last sign-in, when your password changed, when you became a member and whether two-factor is on.
Change your password
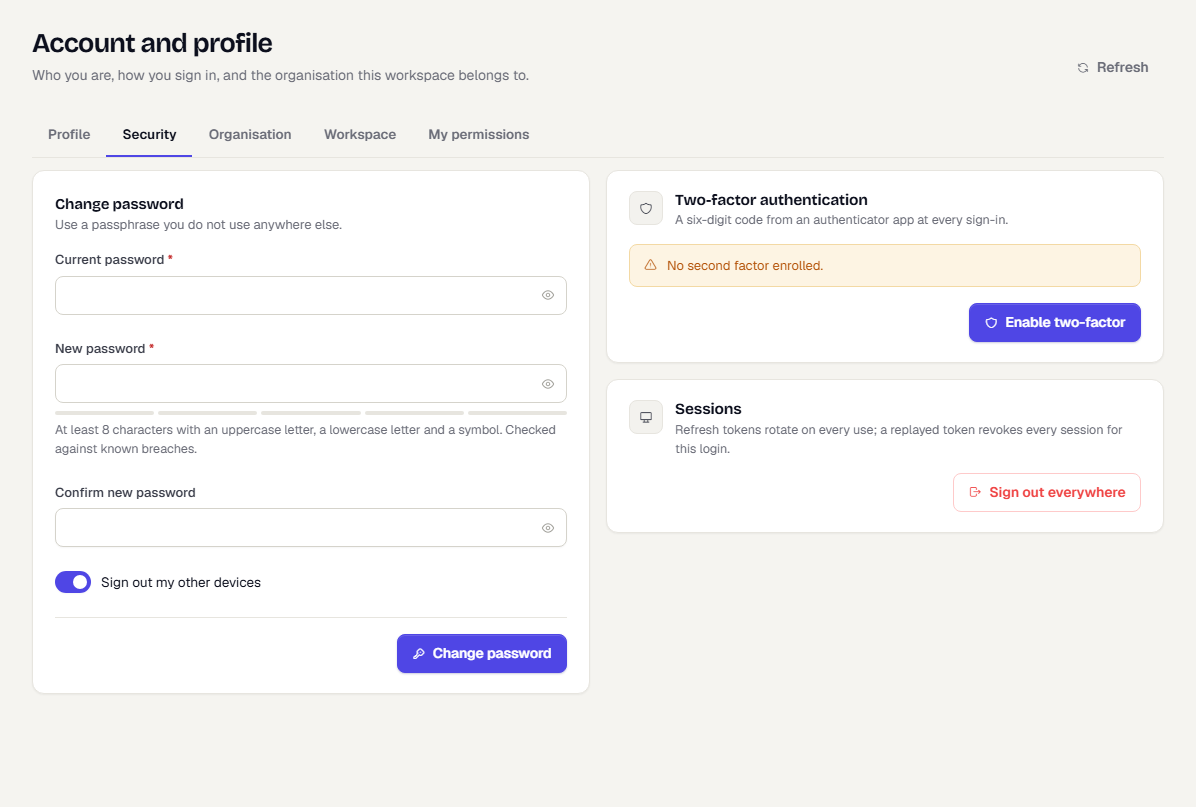
- Open the Security tab.
- Enter your Current password.
- Enter a New password and repeat it under Confirm new password. TrueEngage checks it against known breaches.
- Leave Sign out my other devices on to end your other sessions.
- Select Change password.
Turn on two-factor sign-in
On the Security tab, under Two-factor authentication, select Enable two-factor. If it is already on, the button reads Enrol another device. For the full walkthrough, see Two-factor authentication.
Review and end your signed-in devices
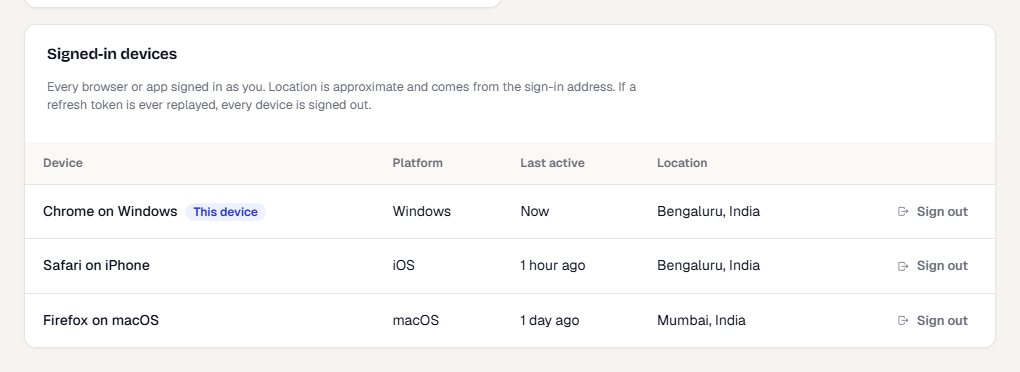
The Signed-in devices card at the bottom of the Security tab lists every browser or app signed in as you. Each row shows the Device, its Platform, Last active, and an approximate Location that comes from the sign-in address. Your current device is marked This device.
Select Sign out on a row to end that one session. Sign-in tokens rotate on every use. If a token is ever replayed, every session for your login ends.
To end every session at once, including this one, use All sessions and select Sign out everywhere.
Choose a theme
The Appearance tab switches the console between Light, Dark and Match system. See Choose a light or dark theme.
Choose which alerts email you
The Notifications tab lists the alerts in the workspace and environment you are in. Under You get email for, select Unsubscribe to stop an alert's emails. Under Other alerts here, select Email me to start. These emails go to your sign-in address. Destinations such as Slack or a webhook belong to the alert itself and are set on the Alerts page. If your role can see alerts but not subscribe, the tab says so.
Edit the organisation
- Open the Organisation tab.
- Edit the Legal name, Display name, Industry, Company size and Website. The URL slug cannot change once issued.
- Under Locale and data, set the Country, Base currency and Default timezone. The Data region shows where runtime data is stored.
- Under Primary contact, set the Name, Designation, Email and Phone we use for billing and incidents.
- Under Policies, turn on what you need:
- Approval flow: campaigns and flows need a second person before they go live.
- Enforce 2FA: every member must set up an authenticator at their next sign-in.
- Teams: group members and scope templates and segments to a team.
- PII masking: mask email and phone in the console for roles that cannot unmask.
- Select Save changes.
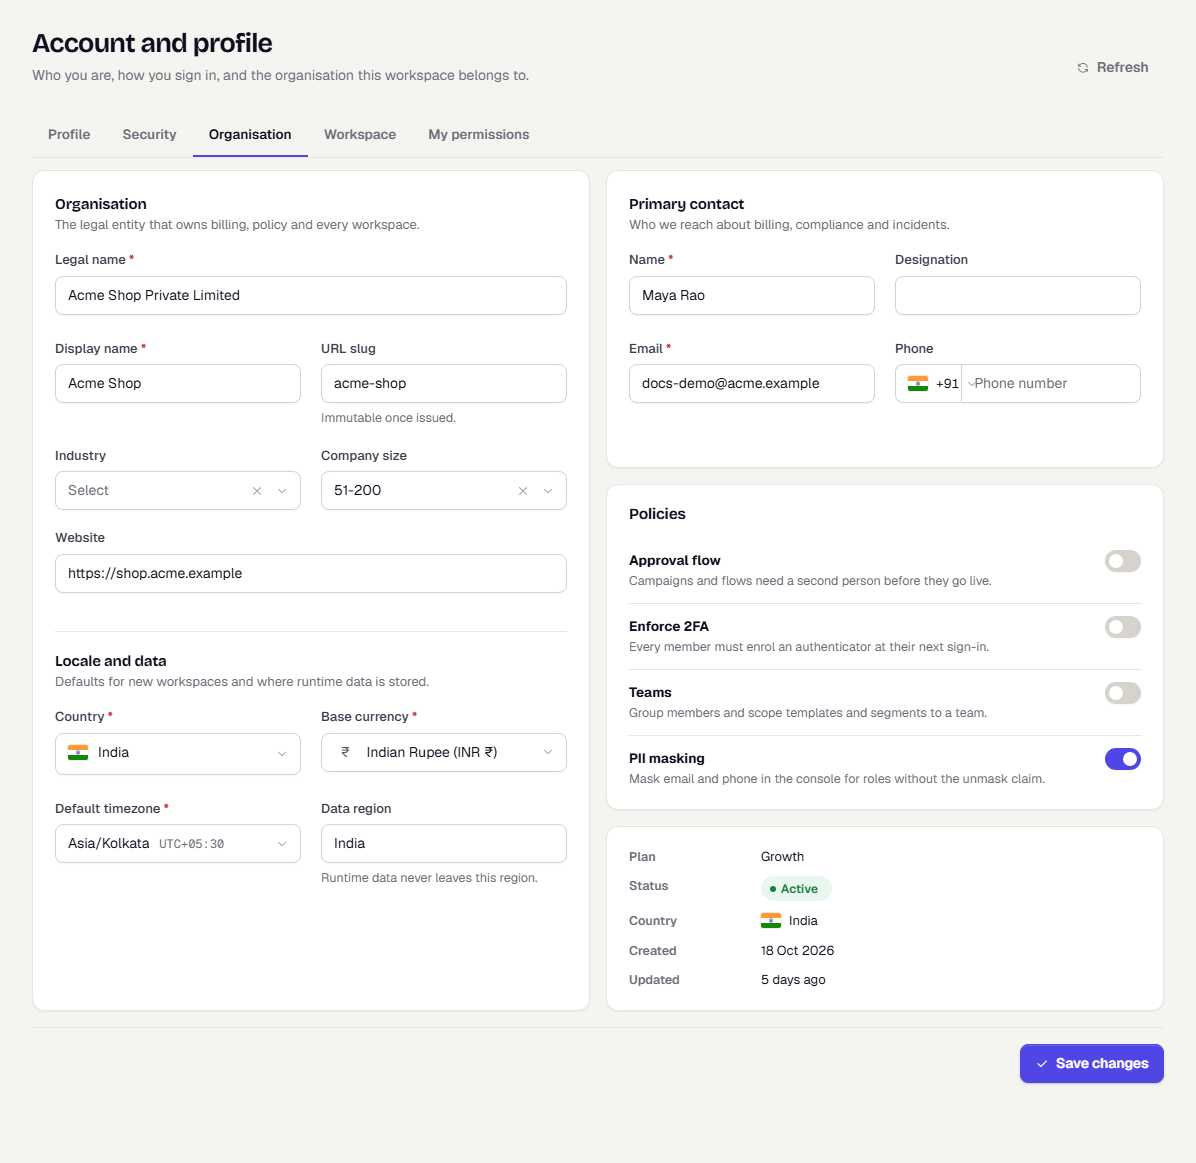
A card at the bottom of the tab shows the organisation's Plan, Status, Country, when it was Created and when it was last Updated. If you are not an Owner, the tab is read-only and says so at the top.
Workspace avatar and details
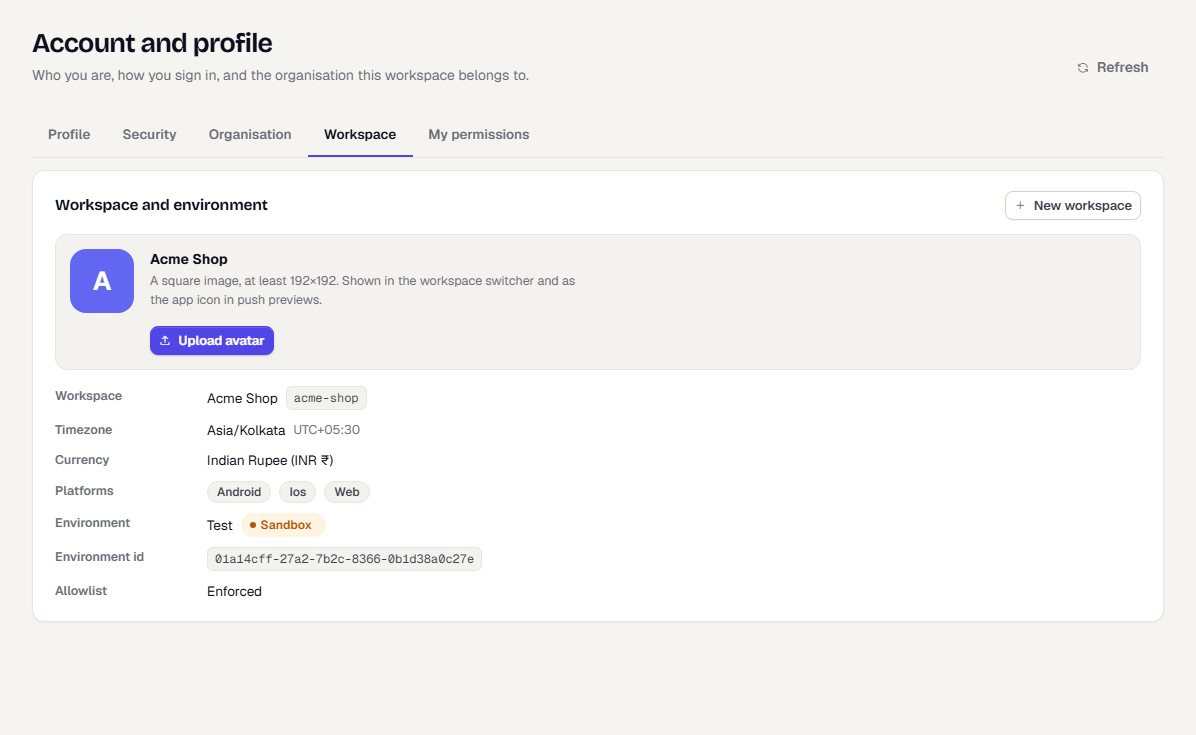
The Workspace tab shows the current workspace and environment. Select Upload avatar (or Change avatar) to set a square image, at least 192 by 192 pixels. It appears in the workspace switcher and as the app icon in push previews. Use Remove to clear the image. Until you upload one, the switcher shows the first letter of the workspace name. Below the avatar, a details list shows the workspace Timezone, Currency and Platforms, and the environment you are in with its delivery mode, its id and whether the Allowlist is Enforced. Select New workspace to create another one. Only Owners and Admins see this button. See Set up your organisation and workspace.
See your permissions
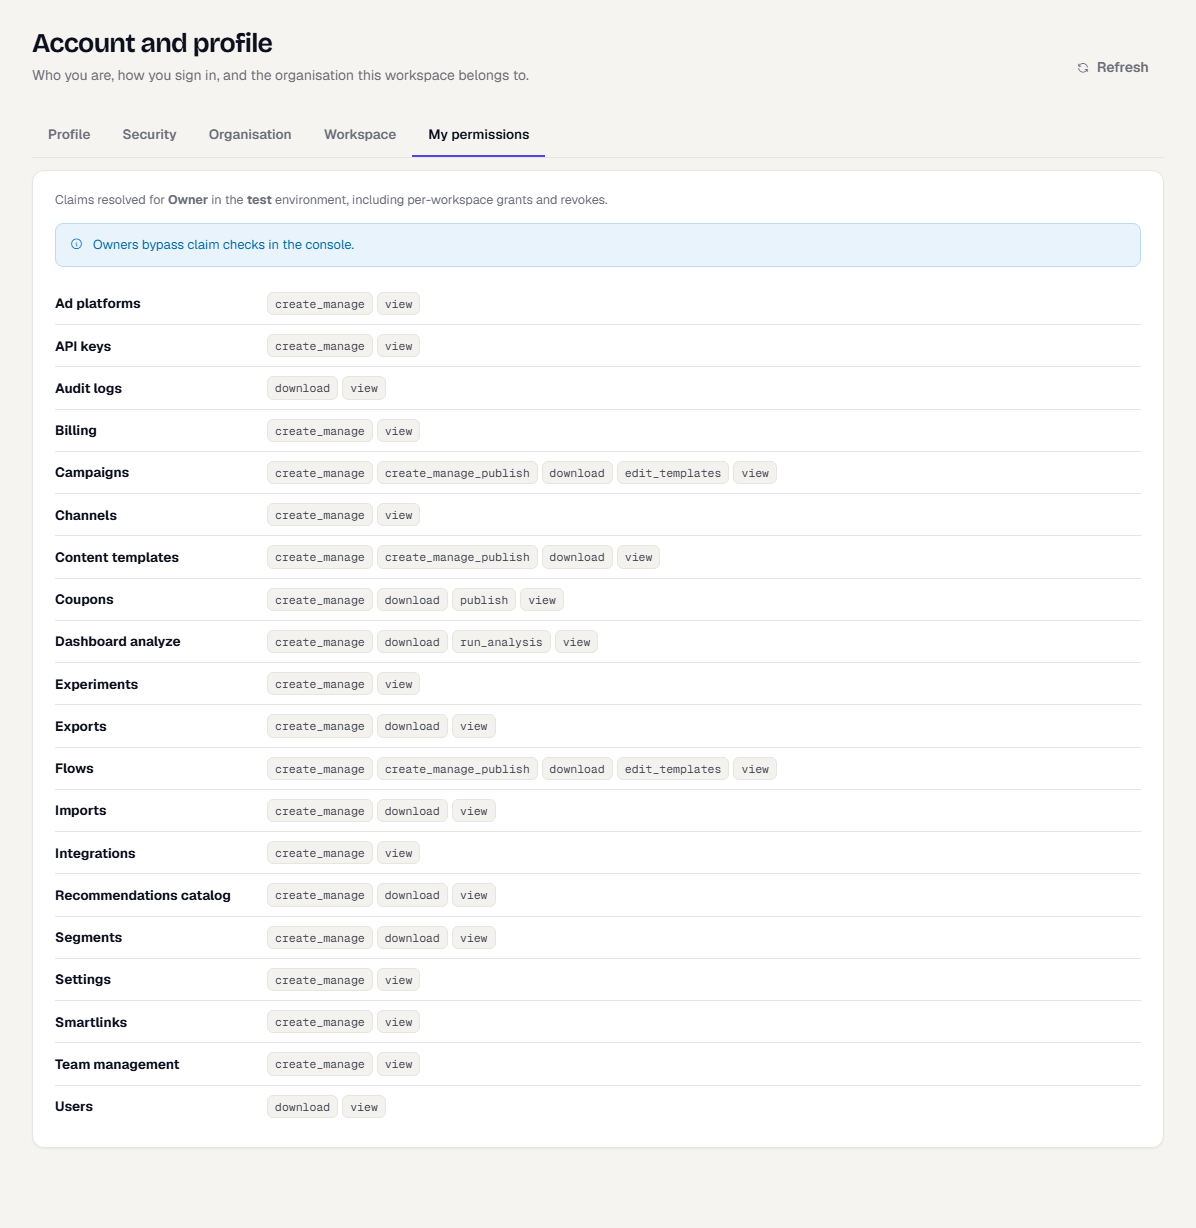
The My permissions tab lists every action your role allows in the current environment, grouped by area, such as campaigns or segments. Use it to find out why a page is missing or a button is disabled. Every member can open it, whatever their role. Owners see a note that they bypass permission checks.
Related
Was this page helpful?