Manage test groups
Create named groups of test recipients, add members for each channel, and copy a group to Live.
A test group is a named list of recipients for test sends. Add yourself, your team, and a device on each platform so every template can be checked on real devices.
Before you start
You need permission to manage templates. Groups belong to one environment. A group in Test does not exist in Live until you copy it.
Open the page
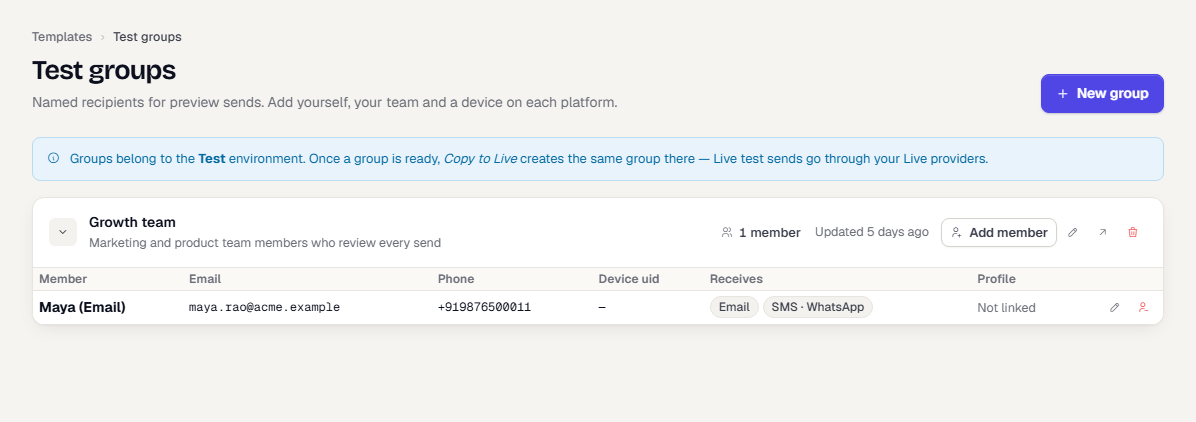
Open Engage → Templates and select Test groups. With no groups, the page shows No test groups and a Create group button. Otherwise each group is a row with its member count.
Create a group
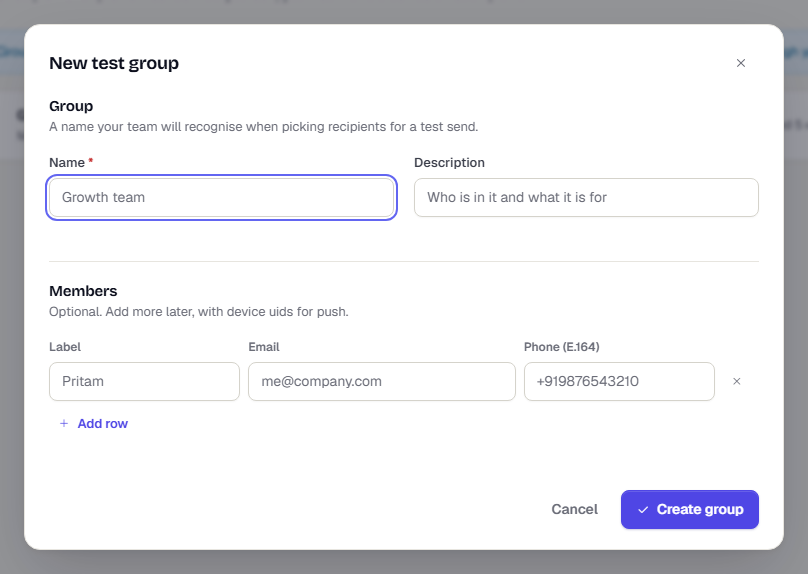
- Select New group.
- Enter a Name such as
Growth team, and an optional Description. - Optional: under Members, select Add row and enter a Label, Email and Phone (E.164) for each person. You can add more members later.
- Select Create group.
Add a member
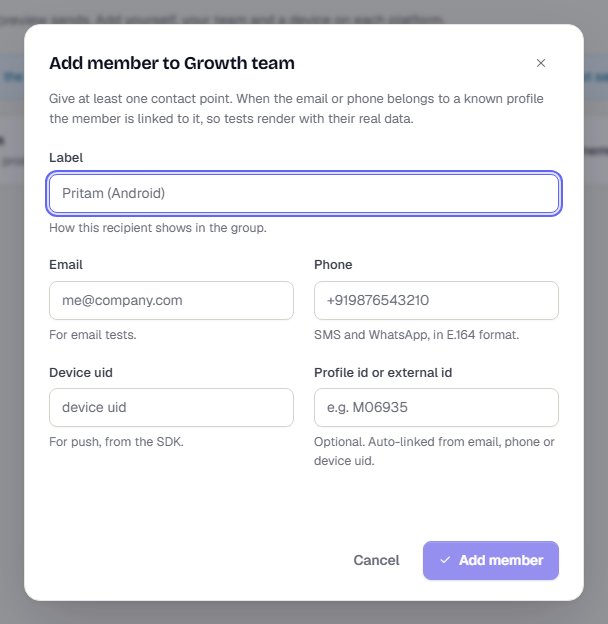
- Select the arrow beside a group to expand it, then select Add member.
- Enter a Label such as
Pritam (Android). - Give at least one contact point: Email for email tests, Phone in E.164 format for SMS and WhatsApp, or Device uid for push (from the SDK).
- Optional: enter a Profile id or external id. If you leave it empty, the member is linked automatically when the email, phone or device uid matches a profile.
- Select Add member.
The member table shows each person's address, which channels they receive (Receives), and whether they are Linked to a profile. A linked member renders tests with that profile's real data. A member who is Not linked uses the profile you pick when you send.
Edit, remove or delete
- Use the pencil beside a group to rename it or change its description.
- Use the pencil or the remove icon on a member row to edit or remove that member.
- Use the trash icon to delete a group.
Copy a group to Live
In Test, the arrow icon Copy group to Live creates the same group and members in Live. Live test sends go through your Live providers to real inboxes and numbers.
Related
Was this page helpful?