Set delivery controls
Limit how often people are messaged, hold sends in quiet hours, pace sending, space messages, expire stale sends and choose who receives real messages from Test.
Delivery controls protect your audience from too many messages, keep large sends from hitting your vendor all at once and keep Test sends from reaching real customers. They are steps in the send gate, which every message passes before it goes to a provider.
Before you start
- You need permission to manage channels. If the New cap, New window, Save or Add buttons are missing, ask an Owner or Admin.
- Controls are per environment. Set them in Test and Live separately.
- Transactional messages bypass frequency caps and quiet hours. See Core concepts.
In the sidebar, open Channels and select Delivery Controls. The tabs at the top are Frequency capping, Do not disturb, Throttling, Minimum delay, Expiry and Test allowlist. A number on a tab counts what is switched on. The address keeps the tab, for example ?section=dnd.
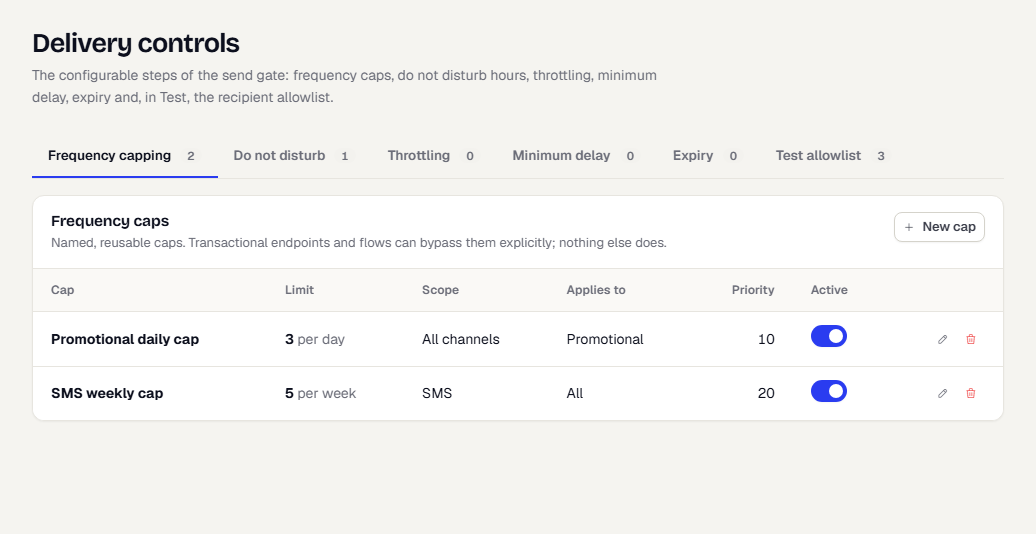
Add a frequency cap
A frequency cap limits how many messages one person receives in a period. When several caps match a message, the strictest one wins.
- On the Frequency capping tab, select New cap.
- Under Cap, enter a Name, such as "Promotional daily cap".
- Set Max messages (1 to 1000) and Per: Per hour, Per day, Per week or Per month. The count is rolling, not calendar-based.
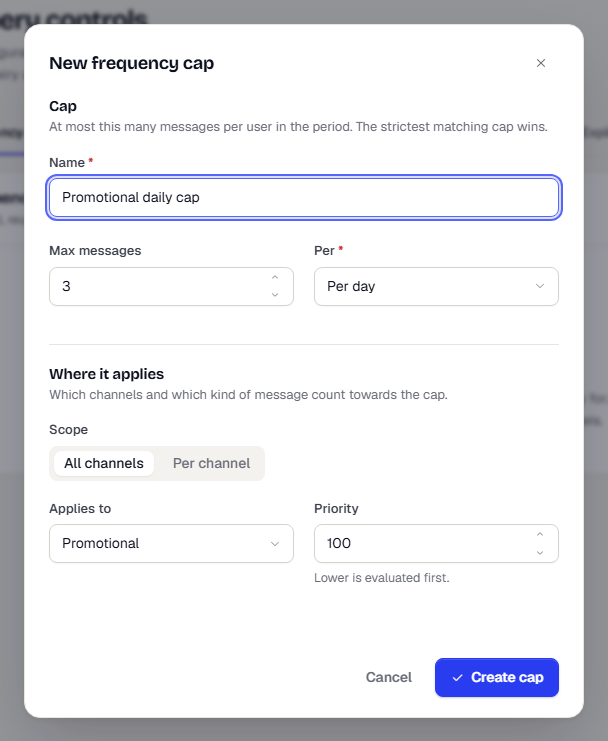
- Under Where it applies, choose Scope: All channels counts messages across every channel, Per channel counts one channel only. For Per channel, pick the Channel. The scope cannot be changed after you create the cap.
- In Applies to, choose All messages, Promotional or Transactional.
- Set Priority. Lower numbers are evaluated first.
- Select Create cap.
A good start is three promotional messages per day across all channels. Use the Active toggle in the table to switch a cap off without deleting it. Select the pencil icon (Edit cap) to change a cap, or the bin icon to delete it.
Add quiet hours
Quiet hours (also called do not disturb) are windows when people are not messaged, such as overnight. A new workspace starts with a default window of 22:00 to 08:00 in the customer's local time, with sends deferred. Edit or add to it.
- On the Do not disturb tab, select New window.
- Enter a Name, such as "Night DND".
- Optionally pick a Channel. Leave it as All channels to cover everything.
- Set Start and End in 24-hour time. A window may cross midnight, for example 22:00 to 08:00.
- Under Days, select the days it applies to.
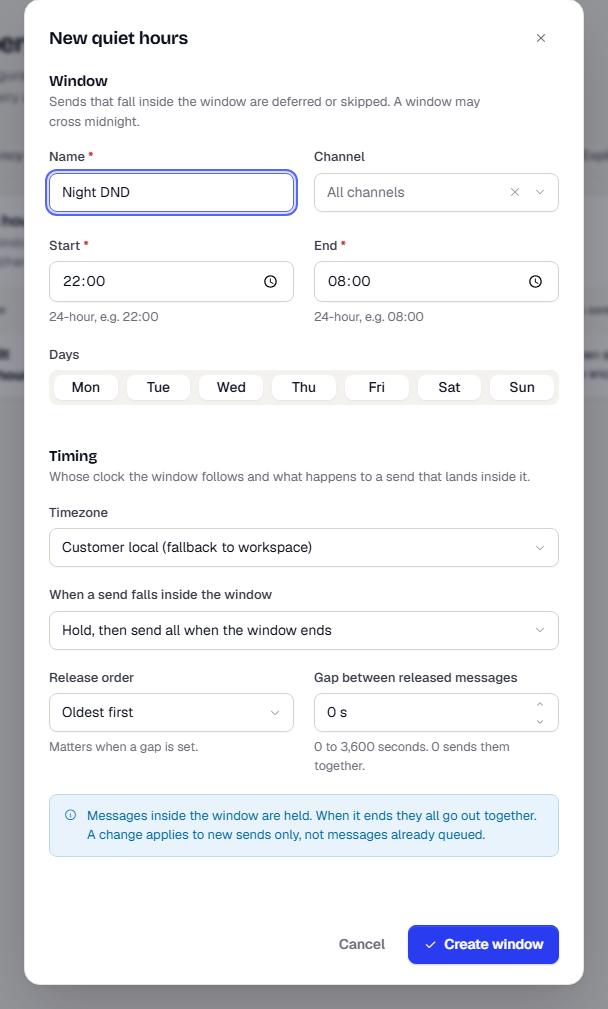
- Under Timing, choose whose clock the window follows in Timezone:
- Customer local (fallback to workspace) uses the person's own timezone, or the workspace timezone when none is known.
- Workspace default uses the workspace timezone for everyone.
- Fixed timezone uses one IANA timezone, such as
Asia/Kolkata, that you enter.
- Under When a send falls inside the window, choose what happens:
- Hold, then send all when the window ends holds every message and sends them when the window closes.
- Hold, then send only the newest per person sends one message per person when the window closes, the most recent one. Older held messages are skipped.
- Do not send drops the message for that person.
- For the two hold choices, set Release order (Oldest first or Newest first) and Gap between released messages (0 to 3,600 seconds). A gap spaces the held messages apart when the window ends, so they do not all go at once.
- Select Create window. Use the Active toggle, the pencil icon (Edit quiet hours) and the bin icon in the table to switch a window off, change it or delete it.
Spread out a large send (Throttling)
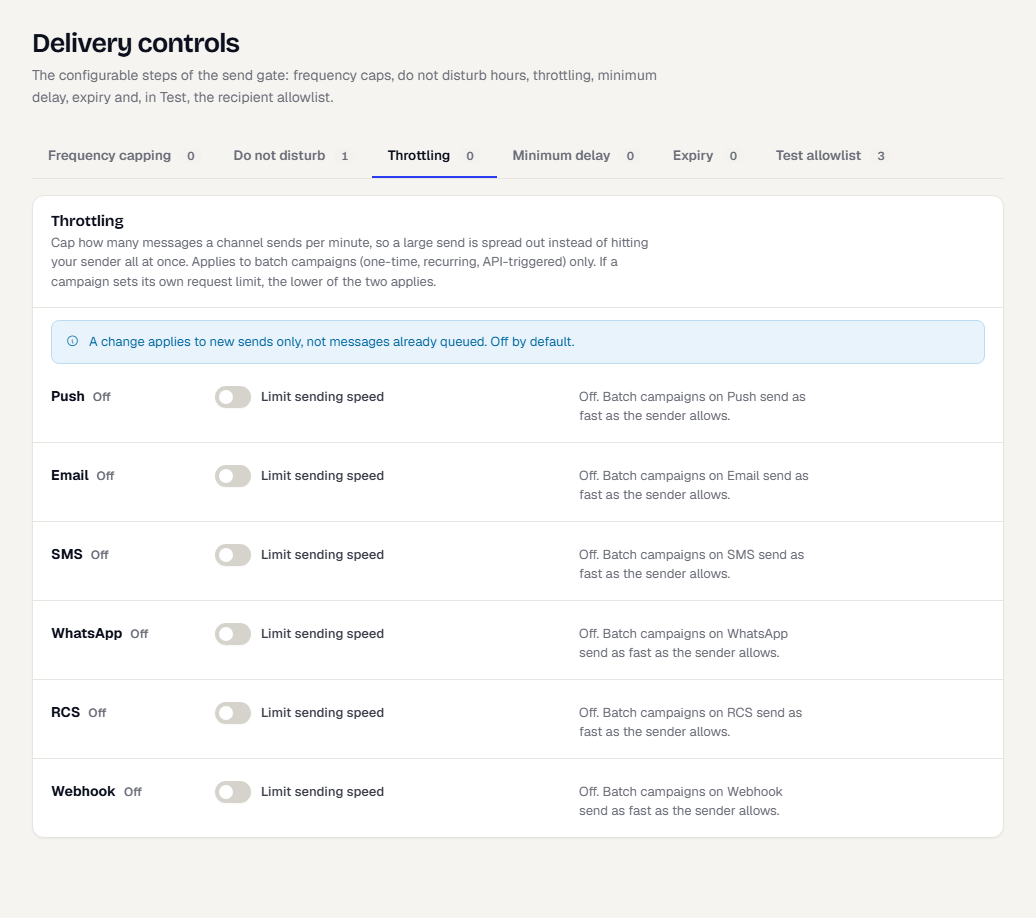
Throttling caps how many messages a channel sends per minute, so a large send is spread out instead of reaching your vendor all at once. It applies to batch campaigns only: one-time, recurring and API-triggered. Event-triggered campaigns, flows and transactional messages are not slowed. If a campaign sets its own Throttle (messages per minute) on its Limits step, the lower of the two applies.
- Open the Throttling tab. Each channel has a row, all switched off by default.
- Switch Limit sending speed on for a channel.
- Enter Messages per minute. A sentence on the row says what the setting does.
- Select Save. Discard returns the row to what was saved.
Space messages to one person (Minimum delay)
Minimum delay sets the shortest time between two messages to the same person on a channel. A message that would arrive sooner is skipped.
- Open the Minimum delay tab and switch Space messages to one person on for a channel.
- Enter Seconds between messages.
- Under Applies to, choose Promotional only or All messages, including transactional and OTP. Transactional messages are exempt unless you choose the second option.
- Select Save.
A campaign can ignore this for its own sends. On its Limits step it has Ignore the channel's minimum delay, which is off by default.
Drop messages that wait too long (Expiry)
Expiry stops a message from going out long after it was meant to. It sets how long after its scheduled time a message may still be sent. A later message is dropped, and the reason is recorded. A flash-sale push that was held back overnight is a good example.
- Open the Expiry tab and switch Expire unsent messages on for a channel.
- Set Drop a message not sent within, from 1 minute up to 28 days.
- Select Save.
A campaign can set its own expiry on its Limits step, and that wins over the channel setting. For push, the remaining time is also passed to the push service as the message's time to live.
Throttling, minimum delay and expiry are off by default, and a change applies to new sends only, not to messages already queued.
Add to the Test allowlist
Test is a sandbox. Only recipients on the allowlist get real messages from Test. Every other send is captured in the sandbox log and goes nowhere. The allowlist does not apply in Live.
- On the Test allowlist tab, choose a Kind: Email, Phone, Device UID, External ID or Domain.
- Enter the Value, for example
me@example.com, a phone number, or a whole domain. - Optionally add a Label, such as "Priya's test phone".
- Select Add.
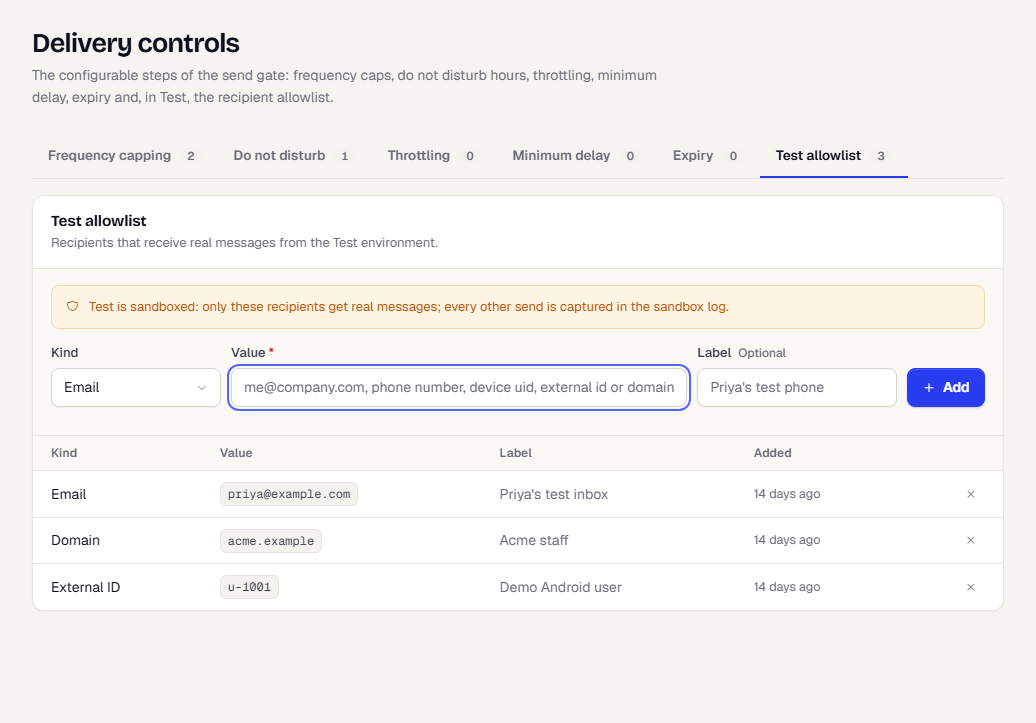
The full-page view above lists the existing entries. To remove one, select the cross icon (Remove from allowlist) on its row.
Add yourself and your test devices before you try a campaign in Test. Use real addresses you own, never your customers'.
What happens next
When a campaign or flow sends, each message passes expiry, the allowlist (in Test), consent, suppression, frequency caps, minimum delay and quiet hours. Throttling then paces the send. Messages that fail a step are skipped or deferred, and the run shows the reason.
Related
Was this page helpful?