The campaign wizard
Every step of the New campaign wizard - basics, audience, content, display, delivery, limits, goals, and review.
The wizard walks you through up to eight steps. Which ones you see depends on the channel and campaign type, as the table below shows. This page covers every field. For a start-to-finish walkthrough of one type, see one time, recurring, event triggered or API triggered.
Which steps you see
| Step | Shown for |
|---|---|
| Basics | Every campaign |
| Audience | Every type except API triggered |
| Content | Every campaign |
| Display | In-App, On-Site and Cards campaigns only |
| Delivery | Push, email and SMS campaigns. For In-App, On-Site and Cards it appears only on a one-time or recurring campaign, where it holds the send time |
| Limits | Every campaign |
| Goals | Every campaign |
| Review | Every campaign |
A push, email or SMS campaign has seven steps (six for API triggered, which has no audience). An event-triggered In-App campaign also has seven: Display takes the place of Delivery. A one-time In-App campaign has all eight.
In this guide, In-App, On-Site and Cards campaigns are the ones that use the In-App Message, On-Site Message and App Inbox / Cards channels.
Before you start
- You need permission to manage campaigns. Publishing needs a separate publish permission; without it you can only save drafts.
- Create and publish a template for the channel first. The template picker lists published templates only, so a draft won't appear until you publish it.
- Create a segment if you want a saved audience.
Click New campaign on the campaigns list. The steps run along the top, and you can click any of them to jump there. Back and Next: at the bottom move one step at a time. Save draft is always at the top right; Save & publish appears there once you reach the last step, Review.
The number on each step turns into a green tick once you have opened it and it has nothing left to fix. A step with a problem shows an amber warning mark instead, so skipping a step never looks finished. If you leave with unsaved changes, TrueEngage asks before throwing them away.
Opening a saved campaign to edit it takes you to the first step that still needs something, or to Review when everything is in place. A link can also open a particular step, for example ?step=delivery.
Step 1: Basics
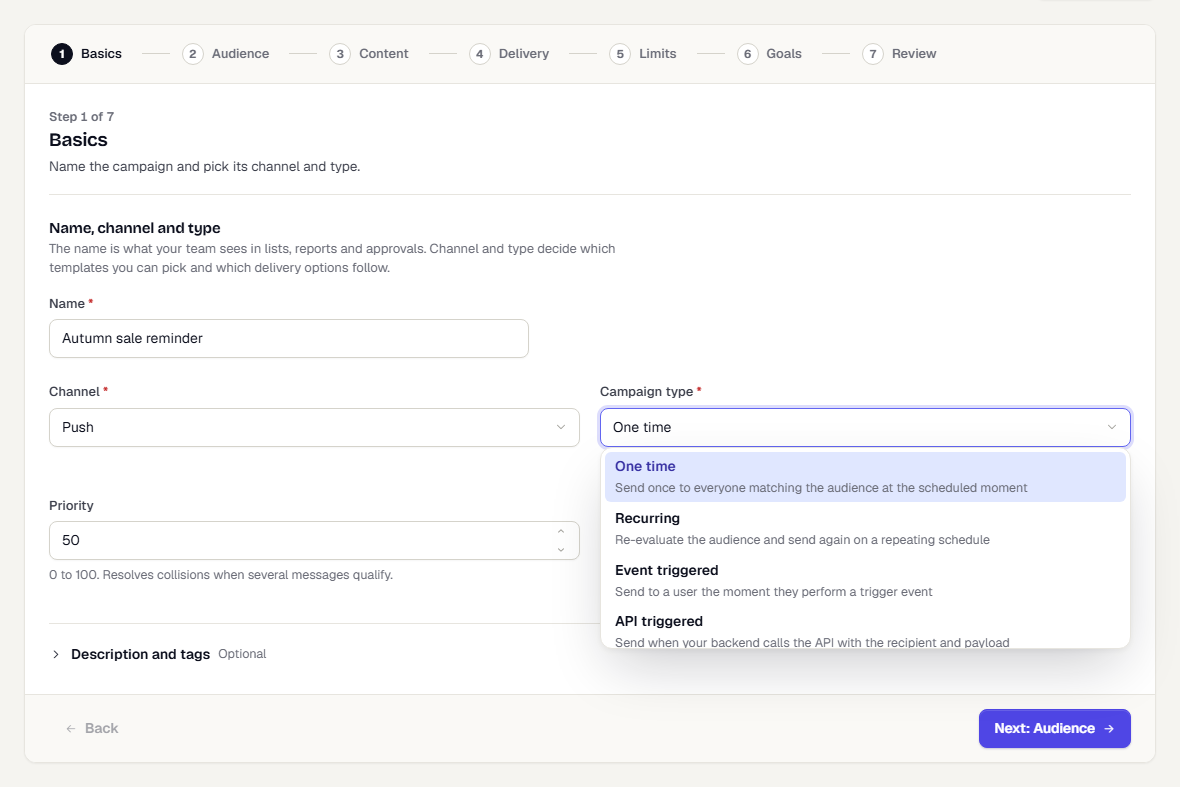
- Enter a Name. Your team sees it in lists, reports and approvals.
- Pick the Channel. This decides which templates you can choose. It is locked once the campaign leaves draft.
- Pick the Campaign type.
- Optionally open Description and tags to add a Description and Tags.
- Set Priority, from 0 to 100. It only matters when several messages qualify for the same user at once. In-App, On-Site and Cards campaigns don't show it here, because they set priority on the Display step.
Step 2: Audience
API-triggered campaigns skip this step, because you name the recipients in each API call.
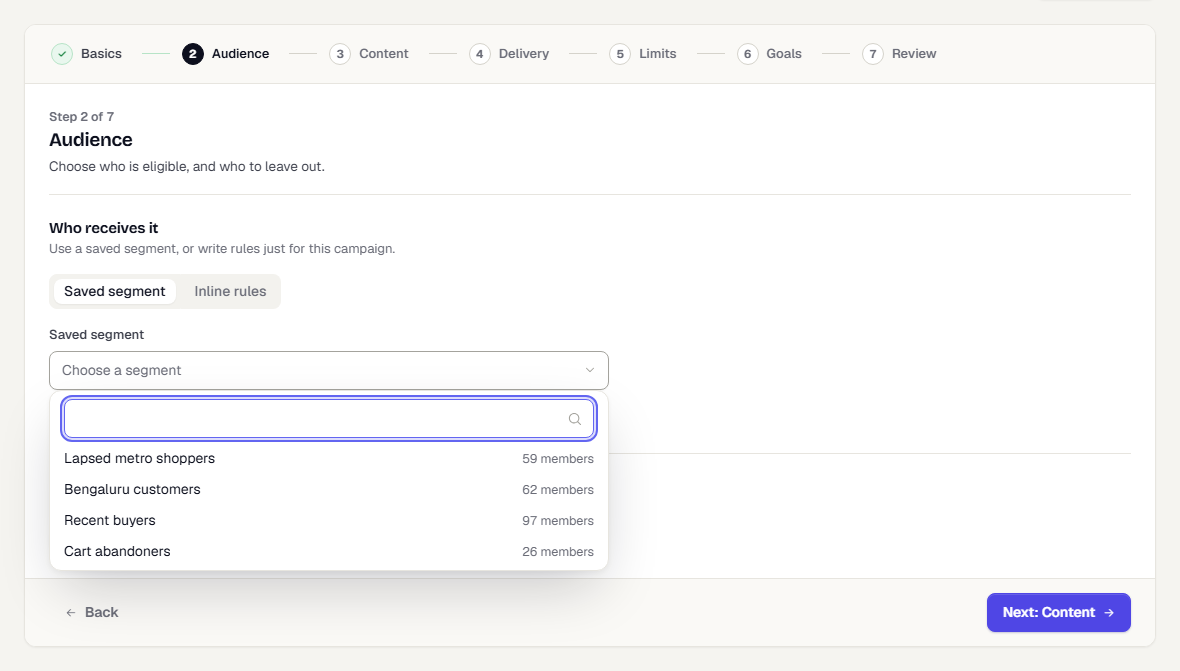
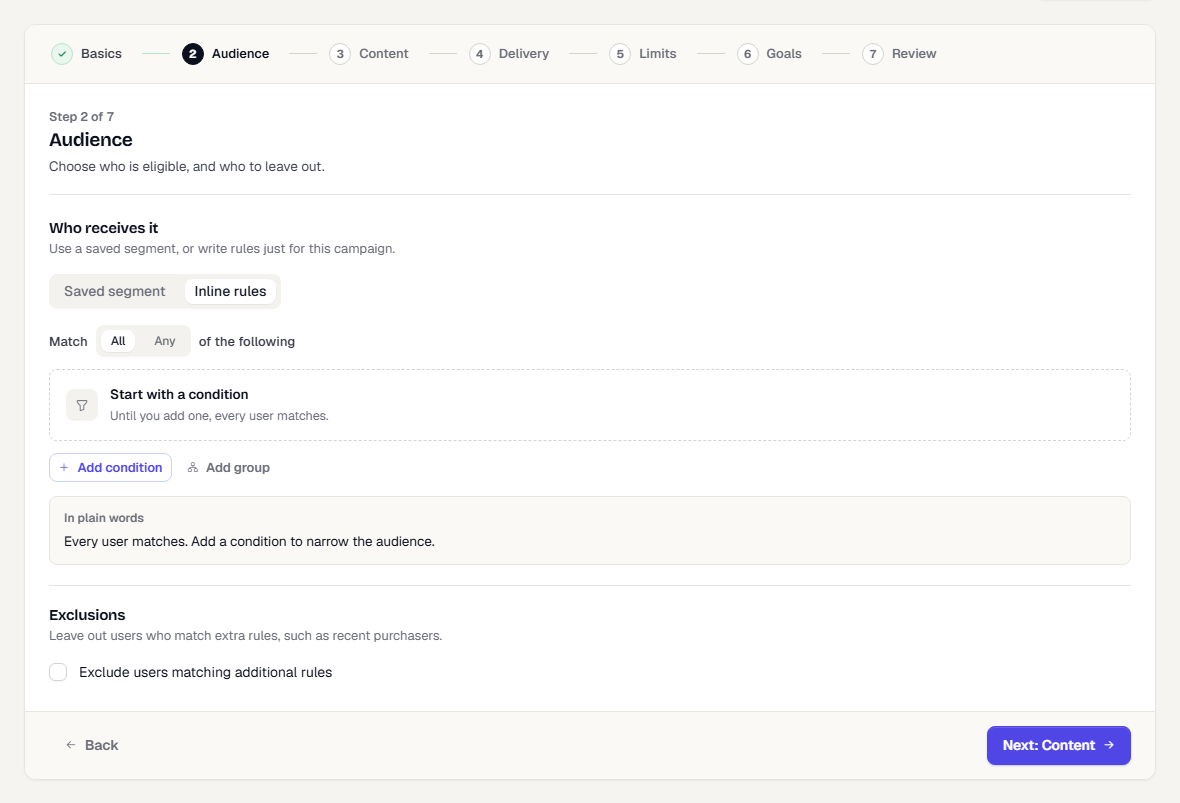
- Choose Saved segment or Inline rules. On an event-triggered campaign you can leave the audience empty to send to whoever does the event.
- For a saved segment, pick it from Saved segment. Each segment in the list shows how many members it has, and under the picker you see the size and when it was last counted. Segments that aren't real time refresh every few hours, so the audience can lag a little.
- For inline rules, choose whether users must match All or Any of the conditions, then click Add condition or Add group. They apply to this campaign only.
- To leave people out, tick Exclude users matching additional rules and build the exclusion rules.
Step 3: Content
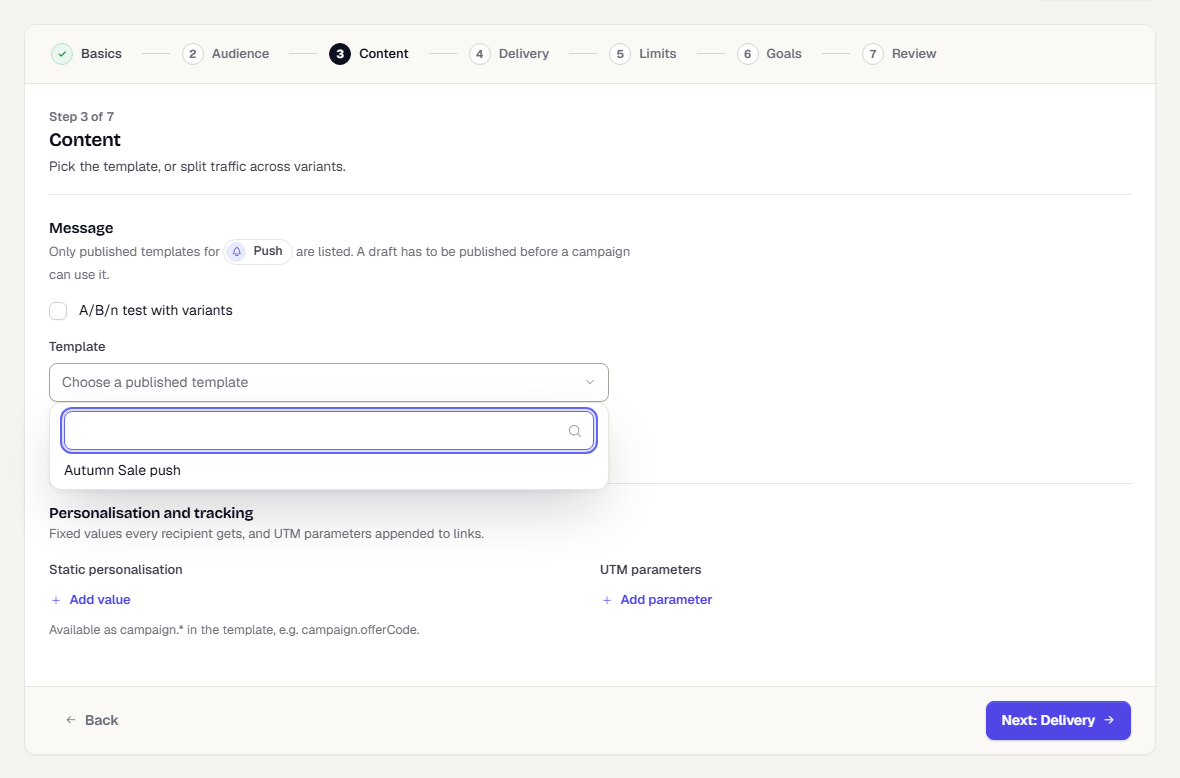
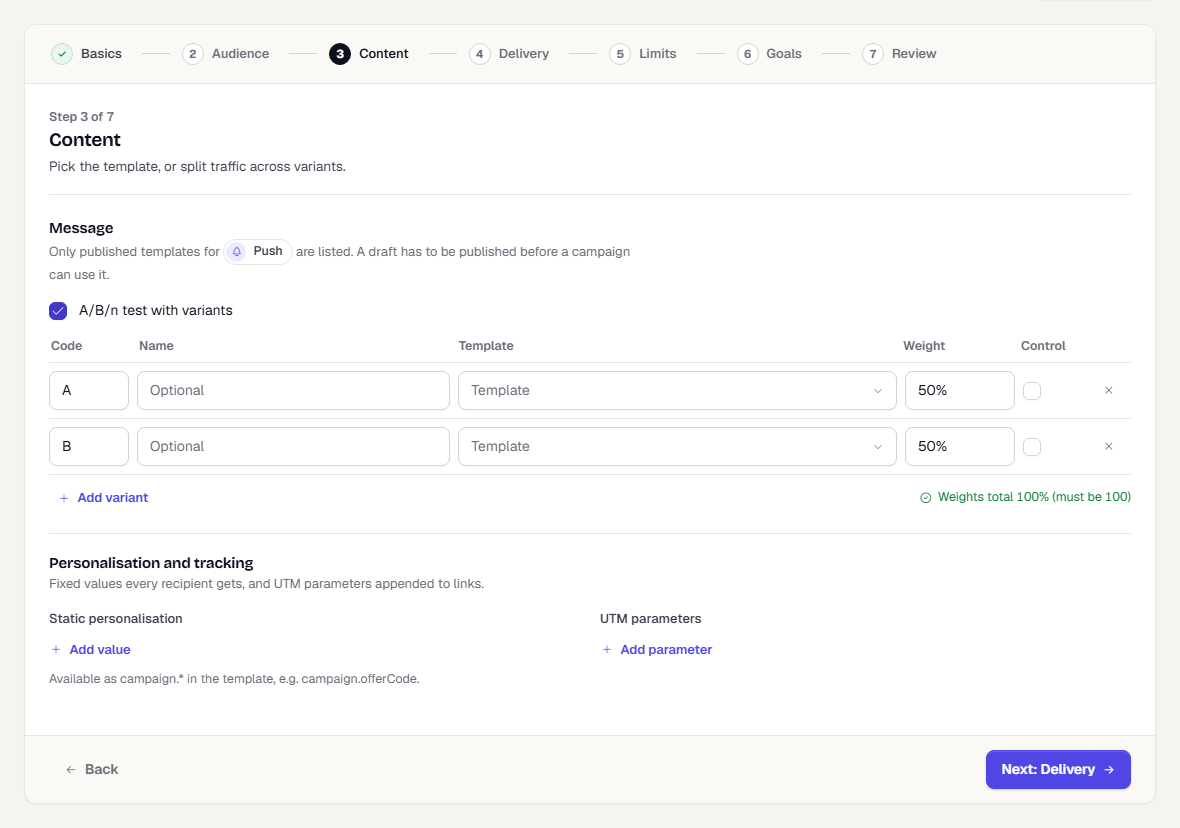
- Pick a Template. Only published templates for the channel appear. Create a template opens in a new tab, so your campaign stays as it is while you make and publish it.
- Or tick A/B/n test with variants to split traffic. Each row has a Code, an optional Name, a Template and a Weight. Tick Control on a row to send nothing to that share. Weights must total 100%. You can add up to 10 variants.
- Under Static personalisation, add fixed values. Templates read them as
campaign.<key>, for examplecampaign.offerCode. - Under UTM parameters, add parameters that are appended to links, such as
utm_source. They override the workspace values set in UTM defaults.
Step 4: Display (In-App, On-Site and Cards only)
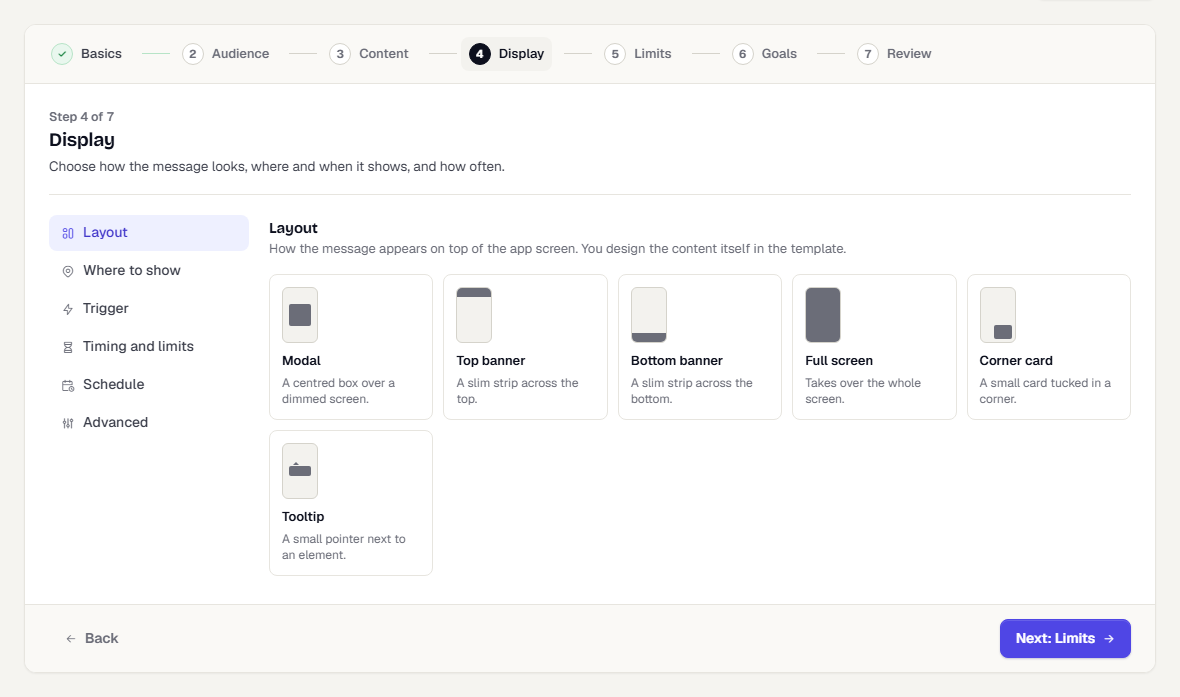
This step appears between Content and Delivery, and only when the channel is In-App, On-Site or Cards. It decides how the message looks on screen, where and when it shows, and how often one person sees it. A side list switches between its sections, one at a time:
| Section | What you set |
|---|---|
| Layout | The layout and, for a pop-up or corner card, its position |
| Where to show | The screens or page paths where the message can appear |
| Trigger | The Trigger event and Event property filters |
| Timing and limits | Delay after the trigger, Max per session, Minimum gap between shows, Max per person, ever and Priority |
| Schedule | Show from and Show until |
| Advanced | My app draws this message, Show when the device is offline, Orientation and Minimum SDK version |
Cards have no layout, screens, delay or advanced section. They show Limits and priority, Schedule, and a Trigger only when the campaign type needs one. A section with a problem is marked in the side list.
For every field and how the SDK uses it, see In-app messages and cards.
Step 5: Delivery
In-App, On-Site and Cards campaigns skip this step unless the type is One time or Recurring, because their trigger and timing live on Display. For the other channels, what you see depends on the type:
- One time and Recurring show a schedule. See Schedule and timezone.
- Event triggered shows the trigger. See Send an event-triggered campaign.
- API triggered has no schedule. See Send an API-triggered campaign.
Schedule and timezone
- On a recurring campaign, switch the toggle from Send once to Recurring. One-time campaigns have no toggle.
- For a single send, set Send at. Leave it empty and the campaign waits for Run now. Times use the timezone below it.
- For a recurrence, set Frequency (Daily, Weekly or Monthly), Time of day, the Days or Day of month, and optional Starts and Ends.
- Pick the Timezone. The time you enter is the clock time in that zone. The workspace timezone is the default.
- Optionally tick Send in each user's local timezone so everyone gets it at the same local clock time, or Best-time optimisation (per-user send time).
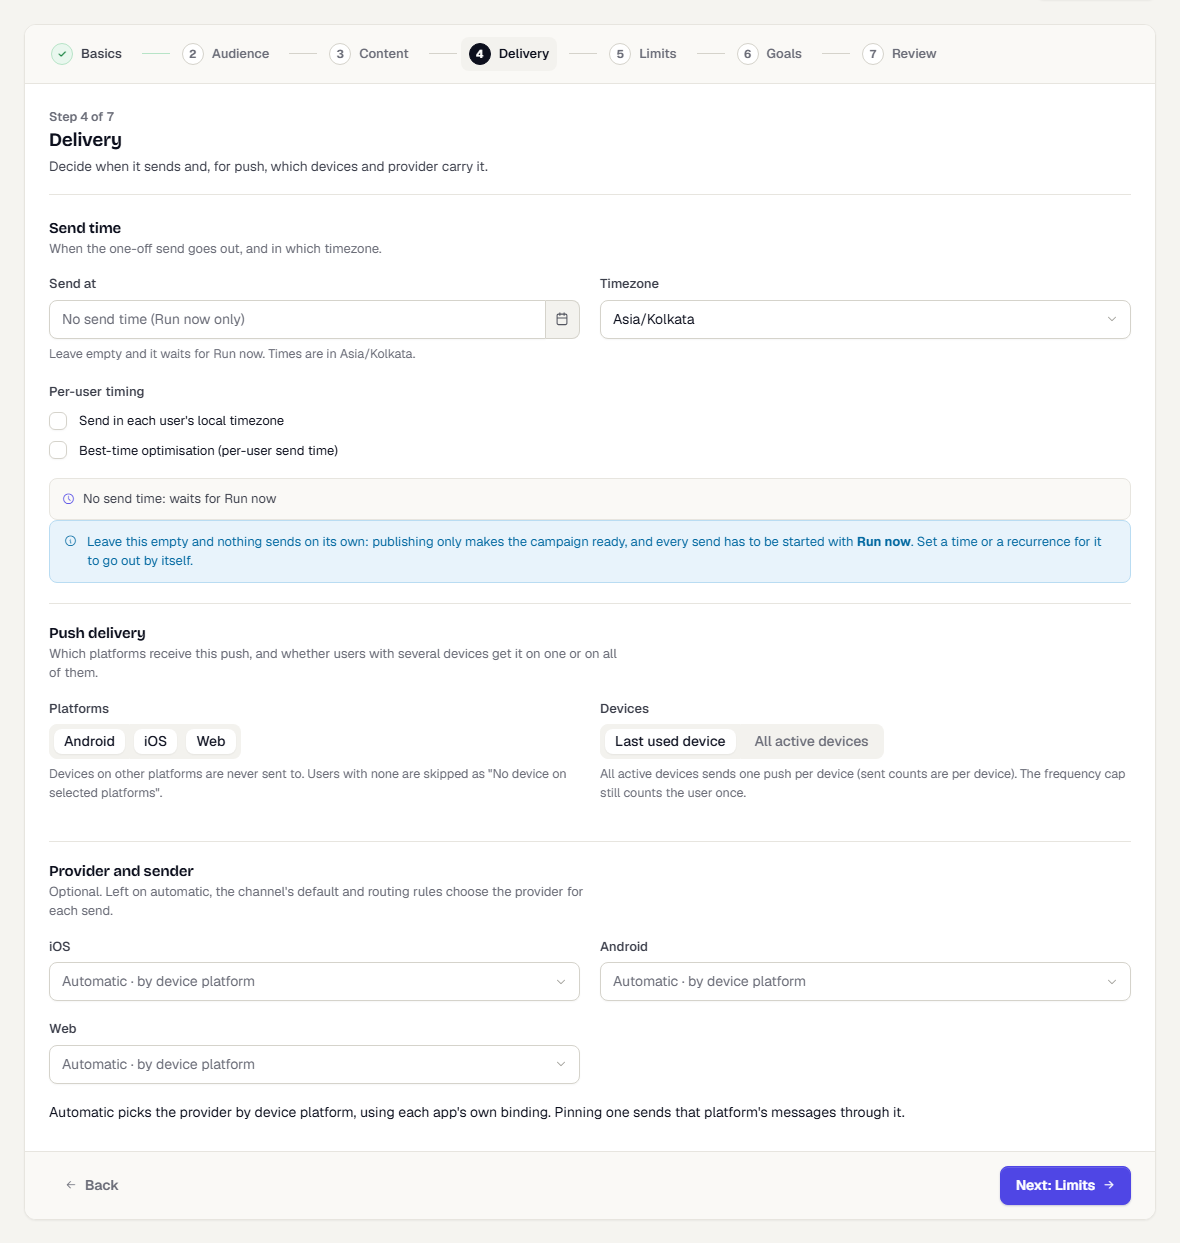
If you leave the schedule empty, nothing sends on its own. Publishing only makes the campaign ready, and you start each send with Run now.
Push platforms and devices
For push campaigns only:
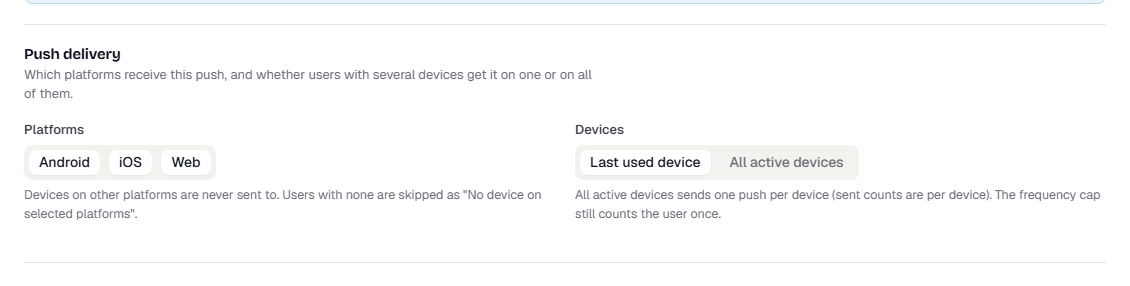
- Under Platforms, choose Android, iOS and Web. Devices on other platforms are never sent to, and users with none are skipped as "No device on selected platforms".
- Under Devices, choose Last used device or All active devices. With all devices, a user with two phones gets two pushes. The frequency cap still counts the user once.
Channel and provider
Under Provider and sender, leave the provider on automatic and TrueEngage picks one using your routing rules, then the channel default. To pin a specific provider, choose it from Provider. For email, Send from overrides the template's From address; a sending domain that isn't verified blocks live sends. For push, you can pin a provider for each platform.
For push, the section shows one picker each for iOS, Android and Web, all set to automatic. The Acme Shop demo has no providers, so each list is empty apart from automatic. Add providers under Channels, then Providers. See Providers.
Step 6: Limits
Keep volume and frequency in check. Empty means unlimited.
- Max audience caps how many users the campaign targets.
- Throttle (messages per minute) slows delivery.
- Respect frequency caps and Respect quiet hours (DND) keep the usual guardrails on. Untick them only for urgent messages.
- Ignore the channel's minimum delay is off by default. Turn it on to let this campaign reach someone sooner than the channel's minimum gap between messages. See Set delivery controls.
- Subscription category skips people who opted out of the chosen category in the preference centre. See Subscription categories.
- Expiry drops a message that has waited too long to send, from 1 minute to 28 days after its scheduled time. It wins over the channel default. The throttle here and the channel's throttle both apply, and the lower one wins.
Step 7: Goals
Control group
Control group is the hold-out. It keeps 0 to 50% of reachable users out of the send, so the campaign page can compare their conversion rate with the users who were sent to. It starts at 0%, which means no hold-out and no lift figure; set 10% to measure lift. See Conversions and lift.
Conversion goals
A goal is an event that counts as success when it happens within a window after a send that reached the user.
- Click Add goal.
- Pick the Event, such as Order Placed.
- Set the Window, how long after the send the event still counts.
- Optionally set a Value property, such as
value. The window can be anything from 5 minutes to 30 days, in minutes, hours or days. - Tick Primary on one goal. It drives the Converted count.
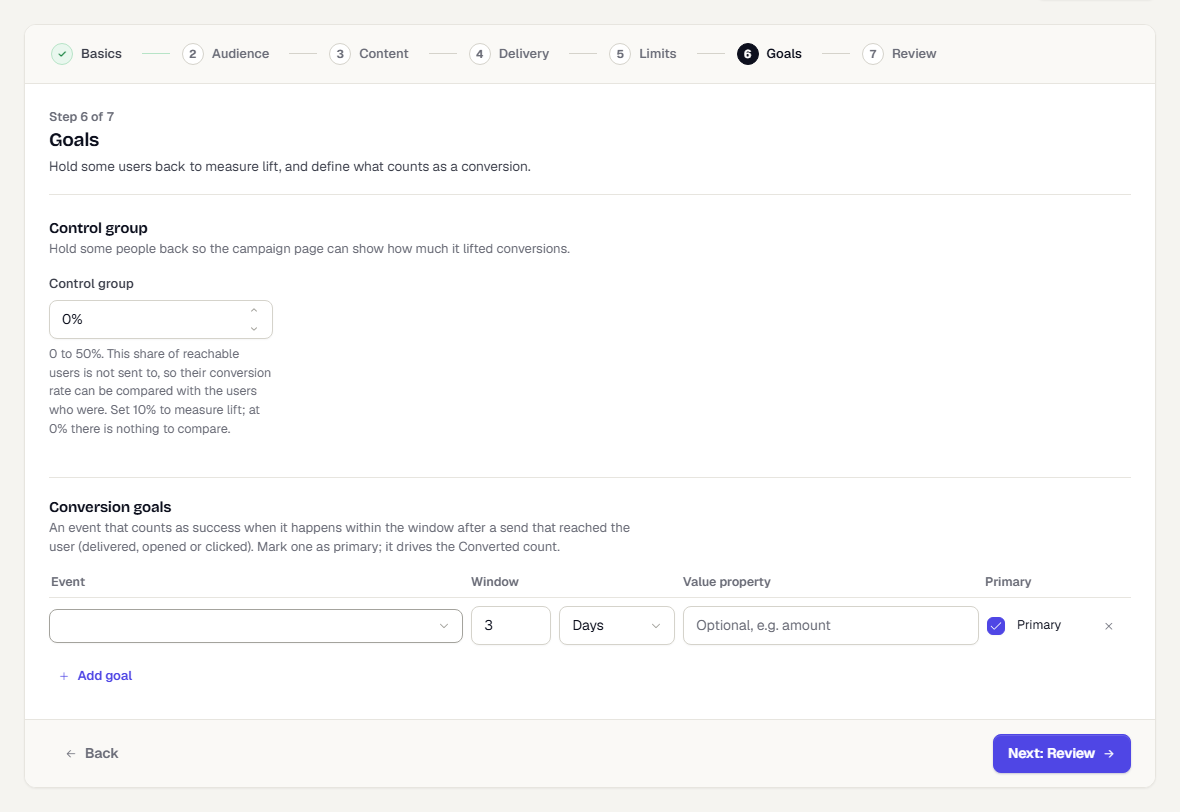
A goal counts when the event follows a send that was delivered, opened or clicked. When you change the goals of an existing campaign, Apply goal changes to past events appears. Choose a range (Last 7 days, Last 30 days, Last 90 days or All time) to credit past events too. See Conversion history. Without a goal, reporting stops at clicks. Account-level conversion events set under Data, then Data Management, on the Events tab, are counted too.
Step 8: Review
If you open a campaign that has already finished, a note says saving reopens it as a draft; past runs stay on record and nothing sends until you publish again.
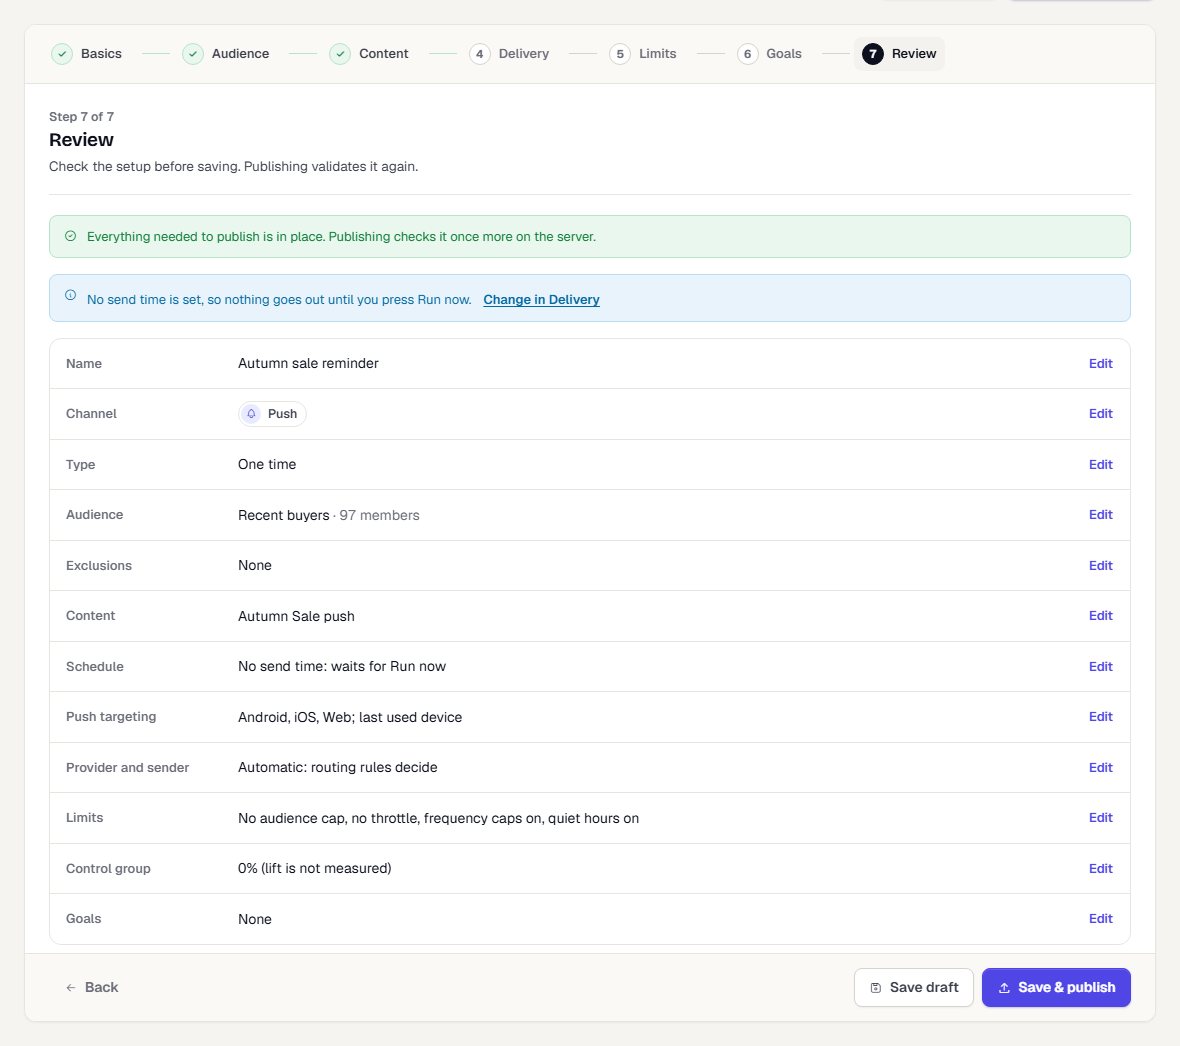
At the top, a checklist lists anything that would stop a publish, such as no audience, no published template, a missing trigger event or variant weights that don't total 100. For an In-App, On-Site or Cards campaign it also lists problems on the Display step, such as no trigger event or screens listed without an app. Each item has a Fix in link, for example Fix in Delivery or Fix in Display, that jumps to that step. When the list is empty it says everything needed is in place. A second note flags things that don't block publishing but are worth knowing, such as a one-time campaign with no send time, which waits for Run now.
The rows below show the whole setup: audience with its member count, exclusions, content, schedule or trigger (for In-App, rows for Display, Schedule and Trigger), push platforms and devices, provider and sender, limits, control group and goals. Click Edit next to any row to change it. Then click Save draft, or Save & publish. Publishing validates again on the server, which stays the final check.
When you edit a campaign that is already scheduled, paused or running, the buttons read Save changes instead, and there is no separate publish.
If a publish of a brand new campaign is refused, the campaign is still saved as a draft. You land on its Review step with the reasons shown at the top.
What happens next
A published campaign shows on the campaigns list. Open it to follow its runs: Read a campaign's results.
Was this page helpful?