Install a dashboard template
Start from a ready-made set of funnels, RFM models and tiles for your industry by mapping each step to your own events.
A dashboard template is a ready-made analytics setup. Installing one creates the funnels, RFM models and dashboard it contains, all wired to your own events. You choose which of your events matches each step before anything is created, and you can edit everything afterwards.
Before you start
- You need permission to manage analytics to install a template. Without it you can look at a template but not install it.
- Your app or an import should already be sending the events the template needs. Steps without an event are left out.
- Templates are installed per environment. Installing in Test doesn't touch Live.
Open the gallery
- In the sidebar, open Analytics, then Dashboards, then Browse templates. You can also open the title menu on any dashboard and click Browse templates.
- Each card shows the industry, a summary and what it creates, for example 2 funnels, 1 RFM model, 8 tiles. If there is more than one industry, filter with the chips at the top.
- Click Use template on the one you want.
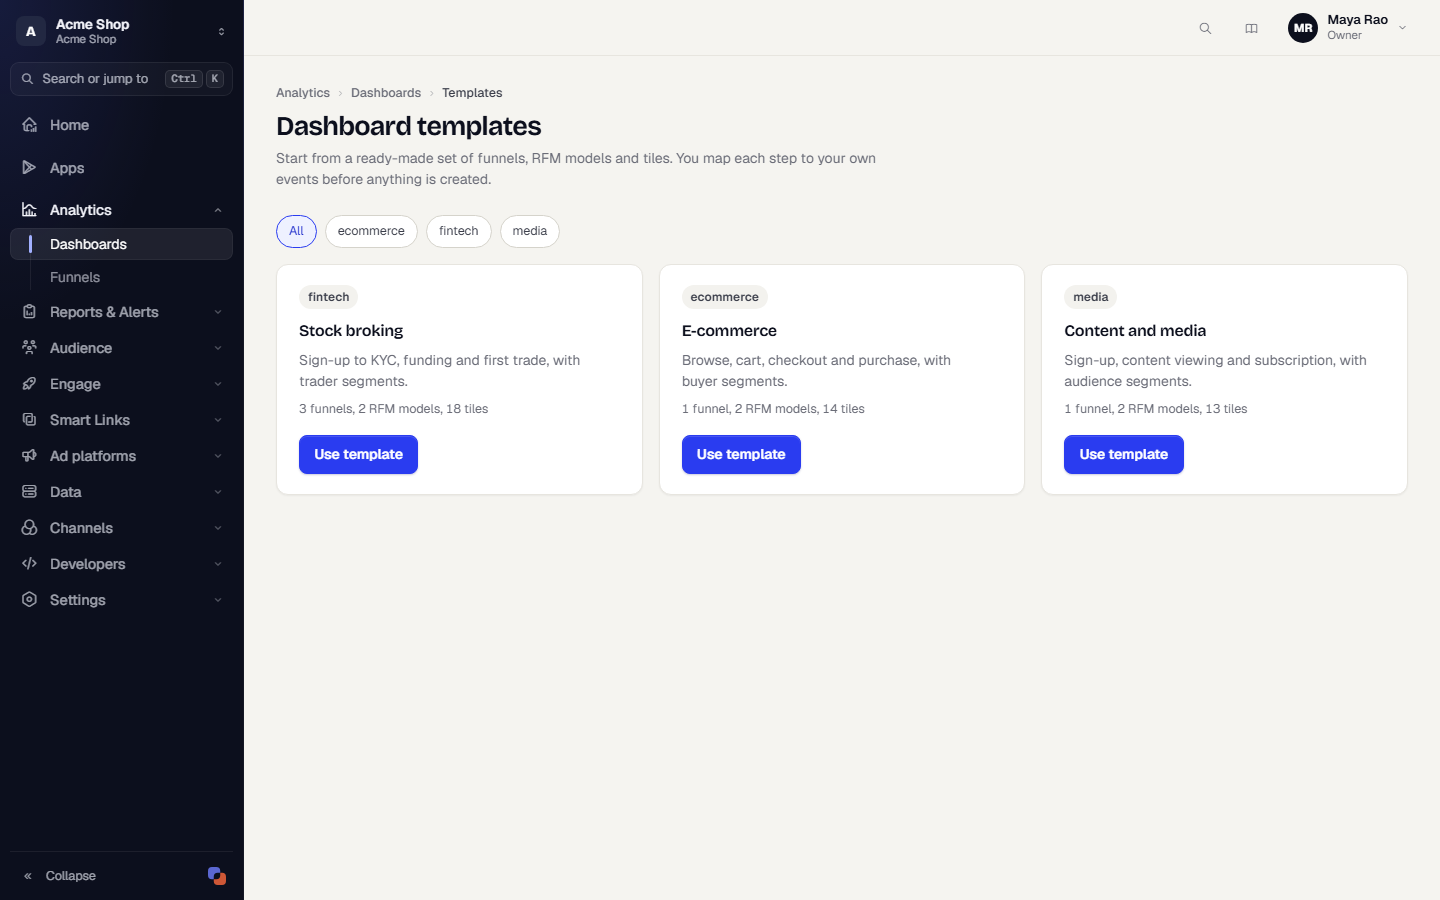
A card tagged Installed has a button to Open dashboard. If a newer version exists, it is tagged Update available. Installing the new version creates a new copy and leaves your current dashboard as it is.
Step 1: Map events
The wizard shows three steps: Map events, Preview and Name and install.
- For each line, pick the event from your app that means that step. Lines marked Required need an event. Lines marked Optional can stay empty.
- A chip beside each picker tells you how sure TrueEngage is: Matched, Likely match, Your pick, Not found or Not mapped. Click a suggested event under the picker to use it.
- If a note says No recent events in the last 90 days, the event exists but hasn't been seen lately. Tiles that use it may look empty at first.
- When every required line has an event, click Preview.
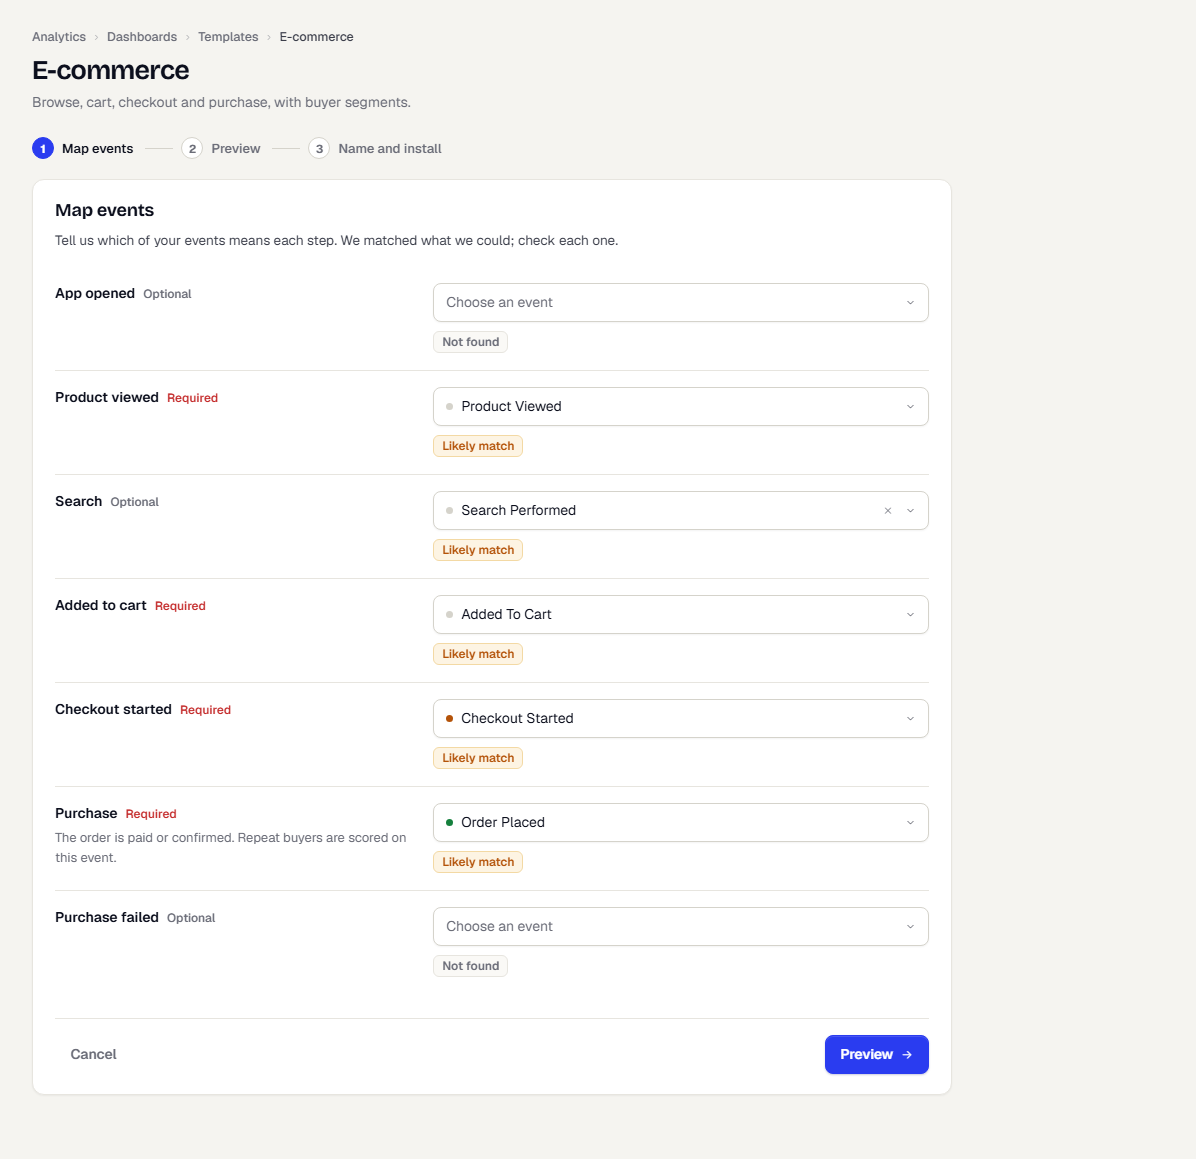
If you click Preview with required lines empty, a red message lists the steps that still need an event.
Step 2: Preview
The preview shows what installing will create, based on your choices: the funnels with their steps, the RFM models and the tiles on the dashboard.
- Anything that needs an event you didn't map is listed under Left out, with the reason, and is not created.
- A note lists events with no activity in the last 90 days.
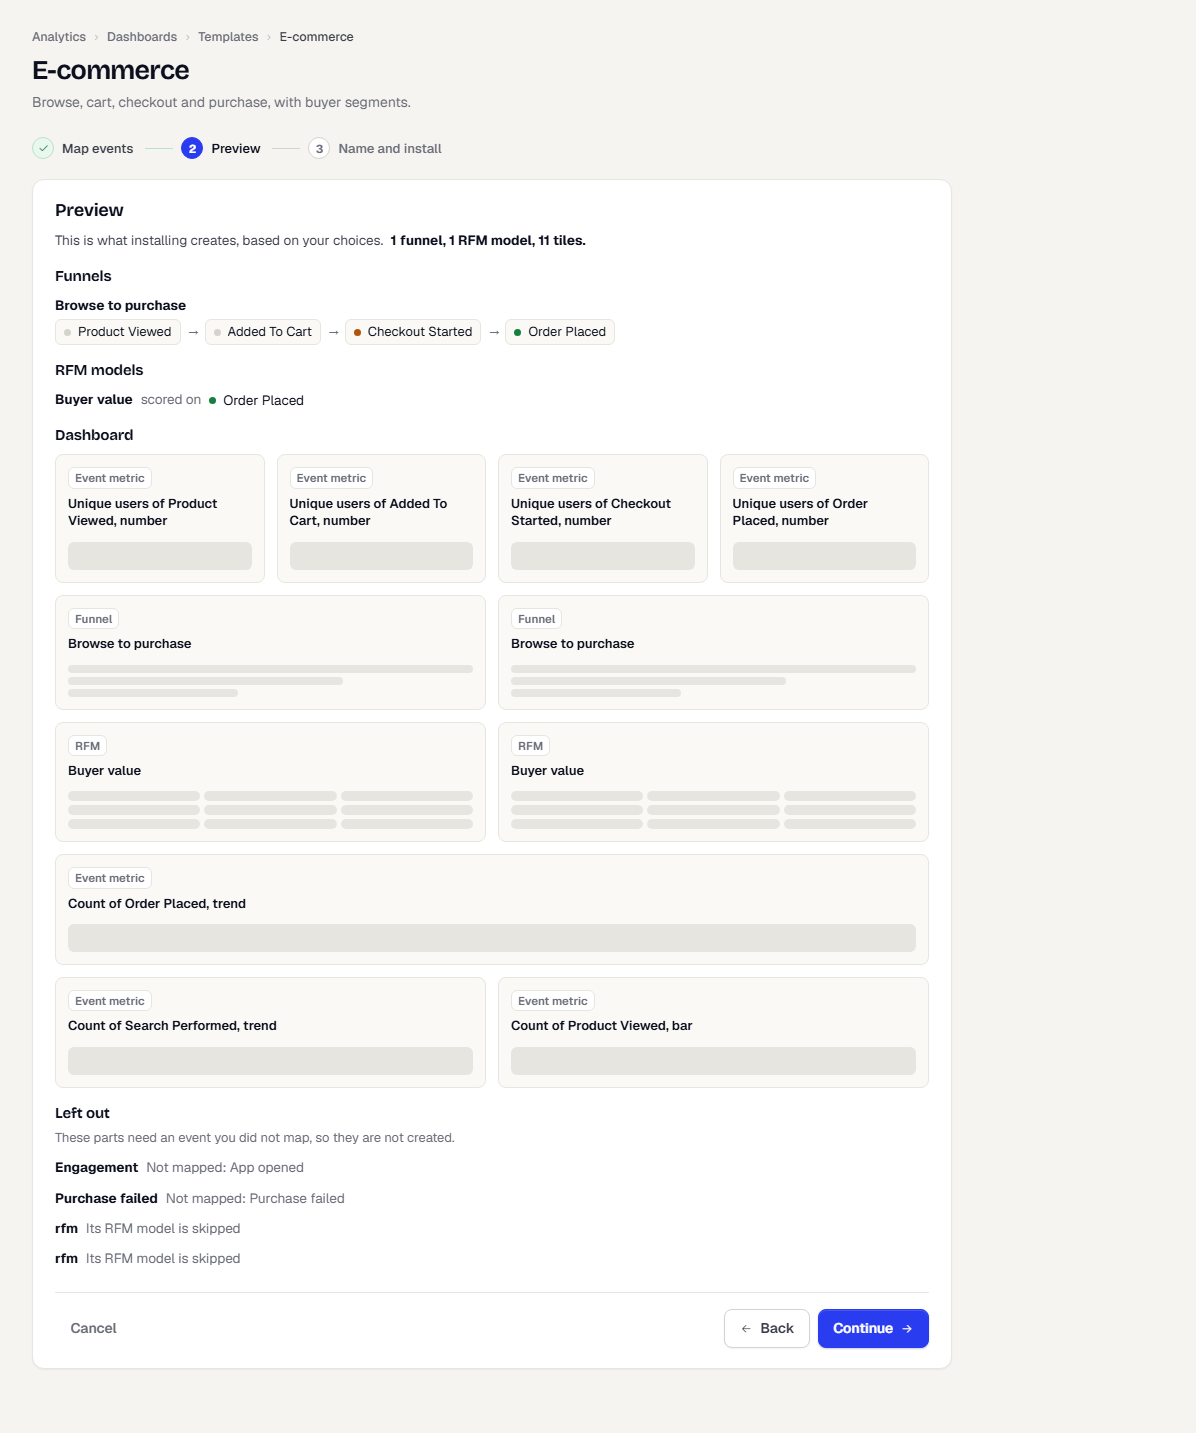
Click Continue. Click Back to change a mapping.
Step 3: Name and install
- Type a Dashboard name.
- Decide on Share with the workspace. It is off by default, so the dashboard is Private until you've reviewed it.
- Click Install template.
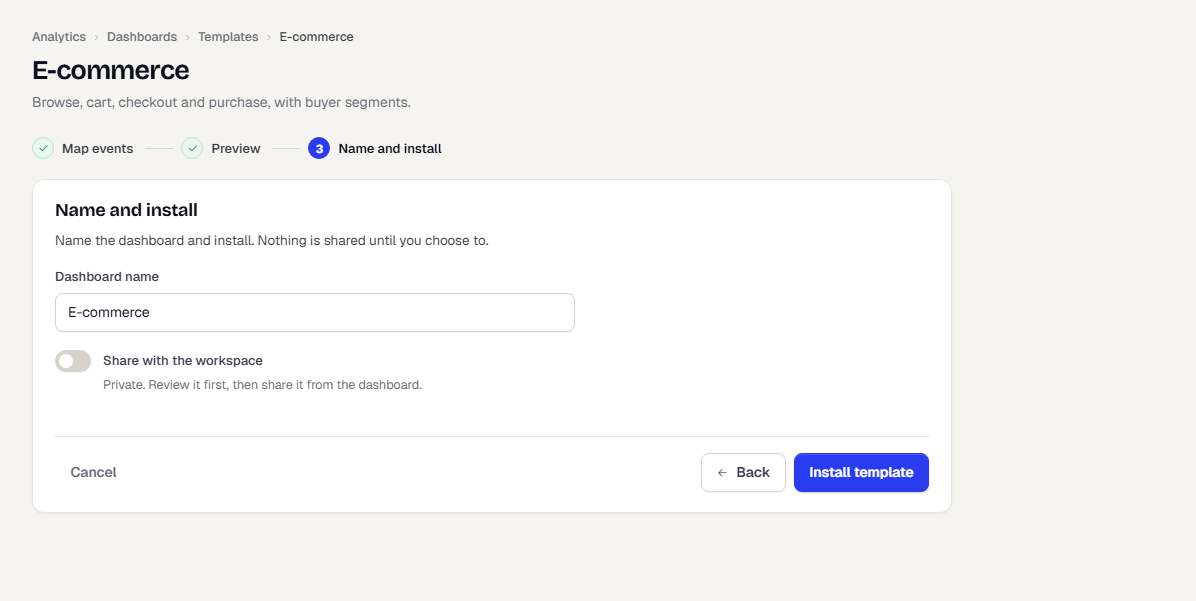
What happens next
TrueEngage creates the funnels, the RFM models and the dashboard in one go, then opens the dashboard. They are your own copies: rename, rearrange or delete any of them. The funnels appear under Funnels and the models under RFM. RFM scores fill in after the model's first run.
If the environment already has a dashboard from this template, the wizard says Already installed. Open it or Install another copy from there.
Related
Was this page helpful?