Manage the suppression list
Block addresses and numbers from receiving messages, see bounces and unsubscribes that add themselves, and add or remove many at once from a CSV.
The suppression list holds the email addresses and phone numbers that must not receive your messages. Every send checks it before anything goes to a vendor, whatever the campaign or flow.
Entries add themselves when an address hard-bounces, a person files a complaint or someone unsubscribes. You can also add addresses yourself, or load and remove many at once from a CSV file.
Each channel has its own list. The Suppression tab is on Email, SMS & RCS and WhatsApp. Push has none.
Before you start
- You need permission to manage channels to add, remove or import. With only view permission you can read the list and open Past imports.
- Addresses are shown masked, for example
a••••@acme.example. There is no export of the list, and there never is a way to see the full address in the console.
Read the list
- In the sidebar, open Channels and choose Email, SMS & RCS or WhatsApp.
- Select the Suppression tab.
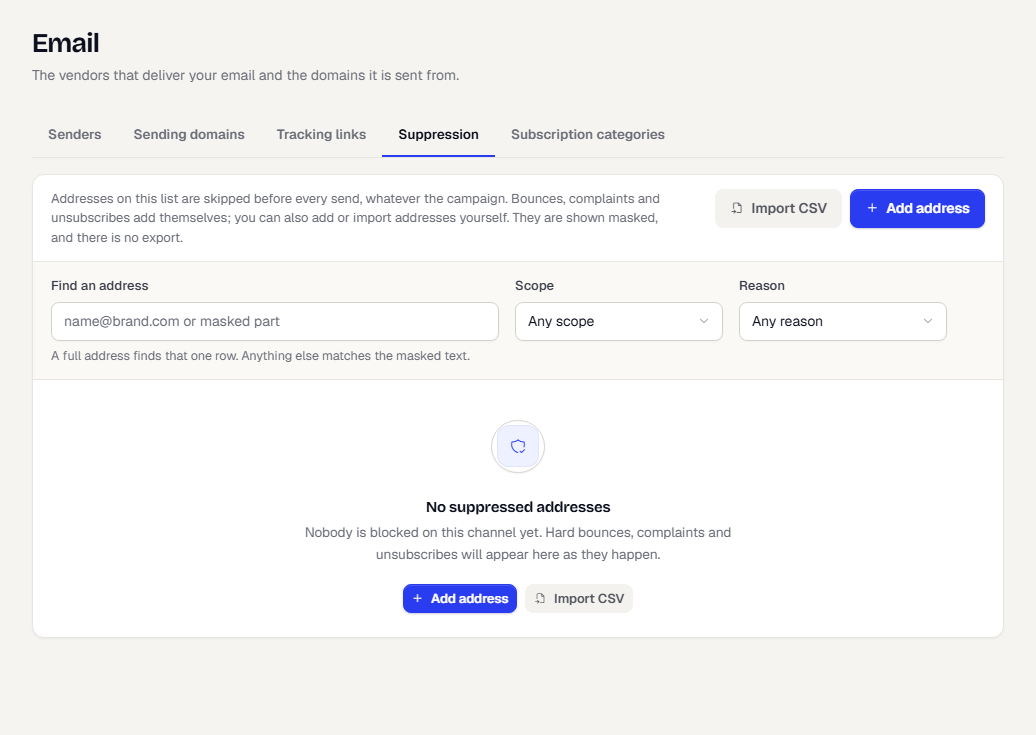
Each row shows:
| Column | What it shows |
|---|---|
| Address or Number | The masked identifier. |
| Reason | Hard bounce, Complaint, Unsubscribed, Invalid address, Added manually, Regulatory or Repeated soft bounces. |
| Scope | All messages, or one sending category, such as Promotional only. |
| Source | Where the entry came from. |
| Added | When it was added. |
| Lifts on | The date the entry stops applying, or Never. A lapsed entry reads Lapsed. |
On SMS & RCS a switch at the top changes between SMS and RCS. Use Find an address (or Find a number) to look one up. A full address finds that one row. Anything else matches the masked text. Narrow the list with Scope and Reason. Select Load more for older rows.
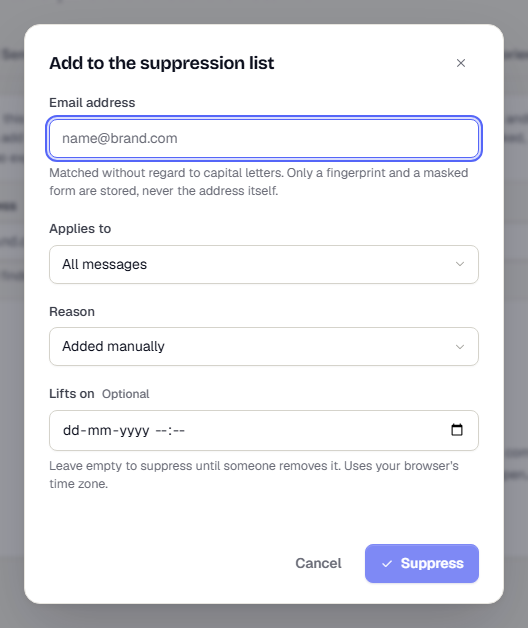
Add one address
- Select Add address.
- Enter the Email address or Phone number. Phone numbers need the country code first, for example
+919876543210. TrueEngage keeps only a fingerprint and a masked form of the value. - Under Applies to, choose All messages, or one category such as Promotional only.
- Choose a Reason: Added manually, Regulatory, Unsubscribed, Hard bounce or Complaint.
- Optionally set Lifts on. Leave it empty to suppress until someone removes the entry.
- Select Suppress.
Remove an entry
Select the bin icon (Remove) on a row. A dialog states the reason on record and warns that the removal is written to the audit log. Select Remove suppression to confirm, or Keep it suppressed to cancel. Removing a hard bounce or a complaint carries an extra warning, because sending to those addresses harms your sender reputation.
Add or remove many from a CSV
- Select Import CSV.
- Under What should this file do?, choose Suppress addresses or Remove suppressions.
- On SMS & RCS, choose the Channel.
- Choose Applies to. Choose All messages unless the file is about one sending category. When you remove, only entries at exactly this scope are removed.
- When you suppress, choose a Reason and optionally Lifts on.
- Select Choose a CSV file, or Download a sample to see the format.
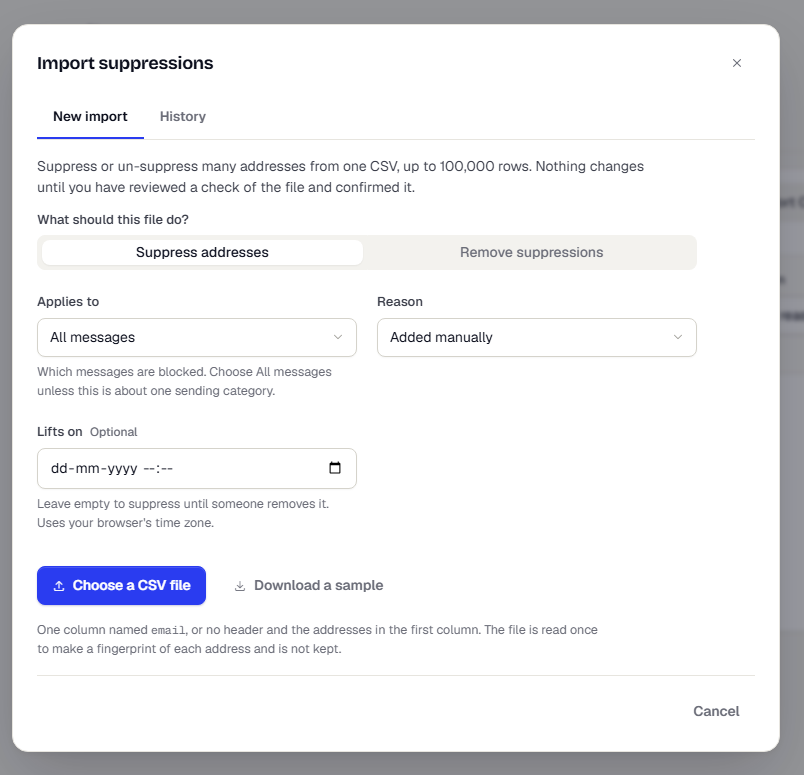
The file needs one column named email (or phone), or no header and the addresses in the first column. It can hold up to 100,000 rows. Phone numbers must start with + and the country code. A number without one is reported as an error, never guessed.
TrueEngage reads the file once and checks it first. Nothing changes until you review the check and confirm. The check shows how many rows are usable, repeated or invalid, how many would change, a masked sample, and the row numbers of any errors. When you remove entries it also shows how many are hard bounces or complaints, and asks you to tick a box before it lets you continue. The confirm button names the count, for example Suppress 1,200 addresses.
The import keeps running if you close the dialog. The History tab lists past imports and what each did. If an import fails part way, upload the same file again. Rows already applied are skipped.
What happens next
- A suppressed address is skipped at the send gate, and the run shows the reason.
- A category-scoped entry blocks only messages of that category. For choices that people make themselves in the preference centre, see Subscription categories.
- Unsubscribe links that you control are covered in Set up a sending domain.
Related
Was this page helpful?