Alerts
Get told by email, Slack, Teams or a webhook when a campaign fails, a sender loses access, delivery statuses go quiet or events drop or stop.
An alert watches something you rely on and tells your team when it breaks. Each alert runs a check every few minutes. When a check fails, an incident opens and TrueEngage messages every destination on the alert. The incident stays open until a clean check closes it.
The alerts you can set:
| Alert | It triggers when |
|---|---|
| Campaign failure rate | At least a set share of one campaign's sends fail within the look-back period, and the campaign sent enough messages to matter. |
| Sender authentication errors | A sender's vendor rejected your credentials at least a set number of times in the look-back period. |
| Delivery tracking stale | A sender with delivery tracking on has sent messages but received no delivery status for a set number of hours. |
| Event volume drop | Event volume is at least a set share below the same hours last week. |
| Ingestion stalled | No events have arrived for the look-back period, although events were arriving before. |
| Report metric | The headline number of a saved report goes above or below a limit, or drops or rises by a set percentage compared with the same number of days before. |
| Campaign expiry | A scheduled or running campaign reaches the end of its schedule within a set number of days (default 3), or ended less than a day ago. It reads the end date of a repeating schedule, or the show-until date of an in-app message. |
Alerts on the expiry of push credentials, WhatsApp or Meta access tokens, and on usage or quota are not available yet.
Before you start
- You need permission to manage alerts to create or change them. With only view permission you can read alerts and incidents, and choose to be emailed.
- Alerts, destinations and incidents are separate in Test and Live. An alert in Test watches only Test traffic.
Add a destination
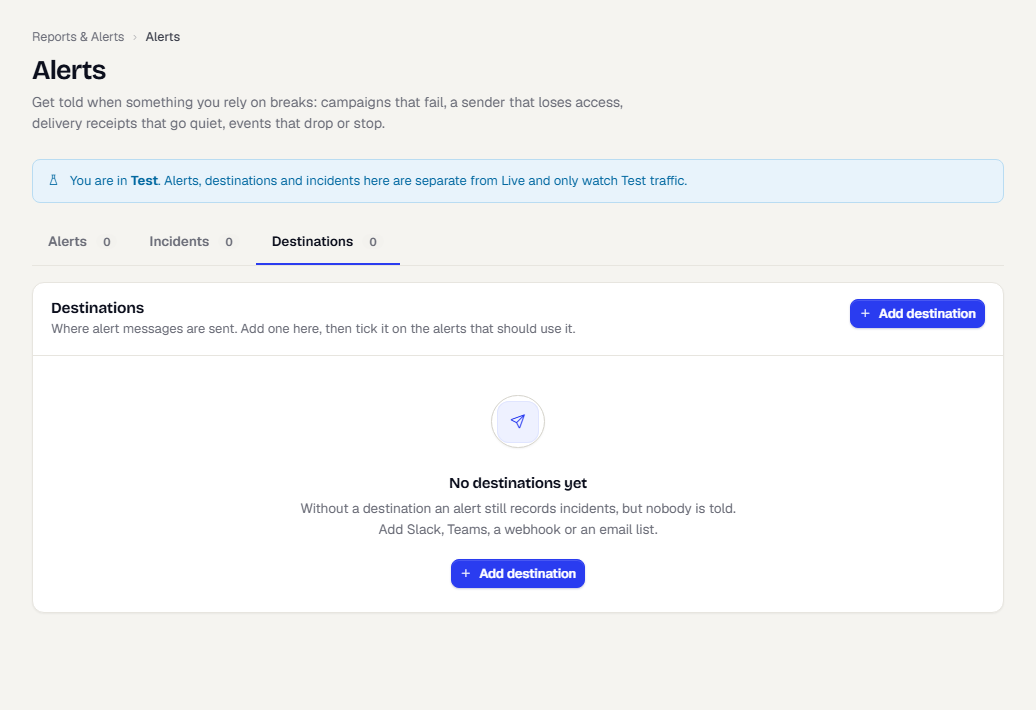
A destination is where an alert's messages go. Add one before you build alerts, or while you build the first one.
- In the sidebar, open Reports & Alerts, then Alerts, and select the Destinations tab.
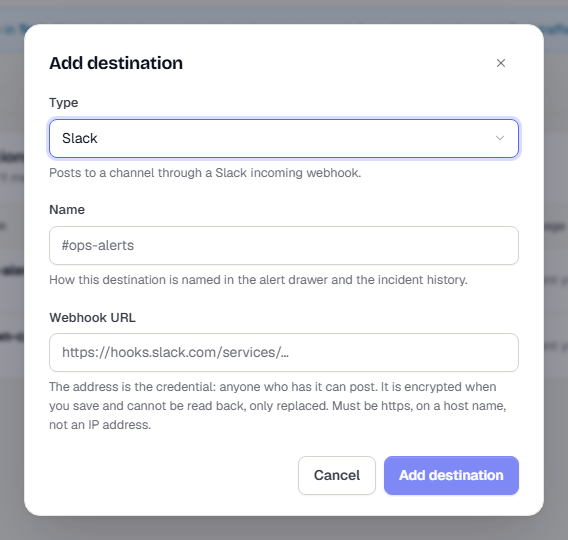
- Select Add destination.
- Choose the Type: Email, Slack, Teams or Webhook.
- Enter a Name, such as "#ops-alerts". It shows in the alert editor and in the incident history.
- For Email, enter the Recipients, up to 10 addresses separated by commas or new lines. Messages go out from the platform sender.
- For Slack, Teams and Webhook, enter the Webhook URL. The address is the credential, so it is encrypted when you save it and can never be read back, only replaced. It must start with
httpsand use a host name, not an IP address. Slack accepts Slack webhook addresses, and Teams accepts Microsoft Teams workflow addresses. - For Webhook, optionally enter a Signing secret of 16 to 256 characters. With a secret, every request carries an
X-TrueEngage-Signatureheader (HMAC-SHA256) that your server can verify. Enter it once, because it is not shown again. - Select Add destination.
Select the send icon (Send a test message) on a row to check that the destination works. Use the switch to turn a destination off, the pencil to edit it, and the bin to delete it. A row shows when the last message was sent, or the error if it failed.
Create an alert
- Open the Alerts tab and select New alert.
- Start from a template, which creates your own copy switched off with nobody to tell yet, so nothing is sent until you turn it on. Or select Custom alert to choose what to watch yourself.
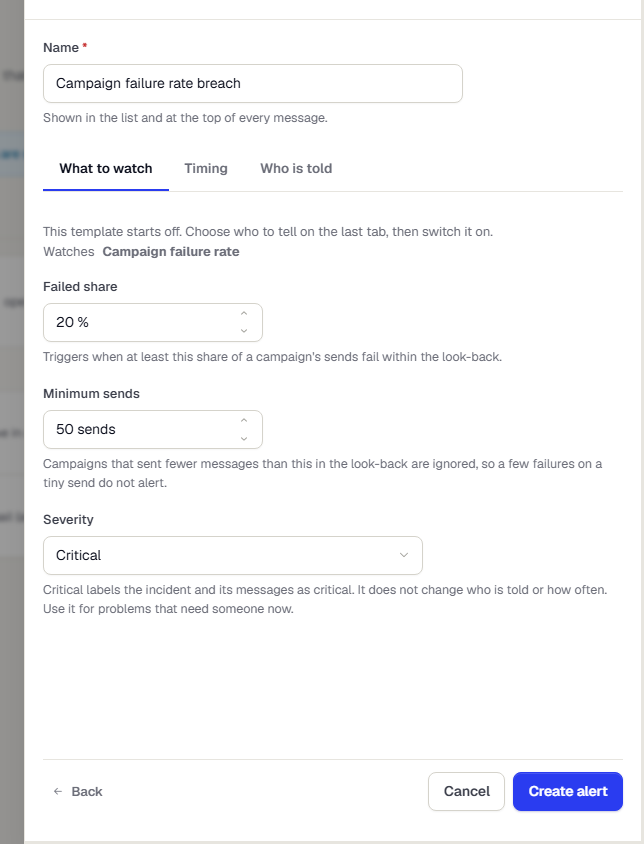
- Give the alert a Name. It shows in the list and at the top of every message.
- On What to watch, set the numbers for the check. The fields depend on the alert, for example Failed share and Minimum sends for campaign failures. Choose a Severity: Info, Warning or Critical.
- On Timing, set the Look-back (5 to 1,440 minutes), how often to Check every (1 to 1,440 minutes) and the Cooldown (0 to 10,080 minutes). A breach inside the cooldown of the last incident reopens it without sending another message. Turn on Tell people when it resolves to send a second message when a clean check closes the incident.
- On Who is told, tick the destinations. Turn Status on when you are ready. Tick Email me when this triggers to also get each message at your login email.
- Select Create alert. To change an alert later, select Save changes. Delete alert removes it.
Alert on a saved report
A report alert watches the headline number of one of your saved reports, for example the total orders of a Trends report. It is a normal alert: it uses the same destinations, incidents, cooldown and acknowledge as the others.
- Open a saved report and select Create alert. The form opens with the report already chosen. You can also select New alert, Custom alert, then Report metric, and pick a report from the list.
- If the report has several series, choose the Series to watch. An alert watches one.
- Under Triggers when it, choose Goes above a number, Falls below a number, Drops by a percentage or Rises by a percentage.
- Set the Limit, or the Change in percent (1 to 100 for a drop, 1 to 1,000 for a rise).
- Set the window. Choose Days (1 to 30, default 7) or Hours (1 to 72). The alert reads the last whole days, or the last whole hours, in India time and never counts today or the hour in progress. A percentage compares that window with the same length just before it.
- On a Breakdown report, under Watch, choose The total, Any row or One row. See below.
- On Timing, set Check every. The default is 6 hours and the shortest is 60 minutes. For an hours window, check every 60 minutes. There is no look-back to set.
What to know:
- Trends reports use the series you pick. Breakdown and session and source reports use their total, unless you watch rows.
- The latest whole hour can still be filling in for a few minutes after it ends, as in the report itself.
- A report with no data for the days never triggers an alert. A percentage change never triggers when the earlier days had no data or a total of zero.
- The report runs as the person who last saved the alert, with that person's access checked at every check, so the alert reads the same numbers they see in the console. That person needs permission to view and run analysis, and the report must be shared or their own. If they lose access, or the report is deleted or made private, the check fails and the alert says why. Nothing is opened or closed while the check fails. Save the alert again to take it over.
Watch the rows of a Breakdown report
On a Breakdown report you can watch each row instead of the total.
- Any row checks every row against the same rule. Each row has its own incident, cooldown and resolve, so one city going over the limit opens one incident for that city and does not hide the others.
- One row watches the row whose value you type, for example
Mumbai. It must match exactly, including capital letters. - An alert watches at most 50 rows. If the report has more, it watches the first 50 in the report's order, and every incident says "Only the first 50 of N rows are watched."
- The Other and (not set) rows are not watched.
- A row that the report does not list for the window has no data and does not trigger. For a percentage change, a row that was not there in the earlier window has nothing to compare with and does not trigger.
Alert on a retention report
A Retention report is read as one percentage: of the people whose first visit fell in the last days you chose, the share that came back in the first return period, counting only people whose first return period has finished. For a day report that is the share who came back on day 1. For a week report, week 1. For a Bracket report, the first bracket (for example days 1 to 3). Unbounded reports use "that period or later". The percentage is for all people; a breakdown of the report is ignored.
- Falls below a number takes a percentage, for example 25.
- Drops by a percentage is a relative change: retention going from 40% to 30% is a 25% drop.
- If no one in the window has finished the first return period yet, there is no number and the alert does not trigger. Use 7 days or more.
- Monthly retention reports cannot be alerted on, because a month of people takes more than a month to finish. Hours windows are not available for retention.
An alert that keeps failing its own check, for example because the data could not be read, stops running and says so in the list. Open it and save it to try again.
Read the list
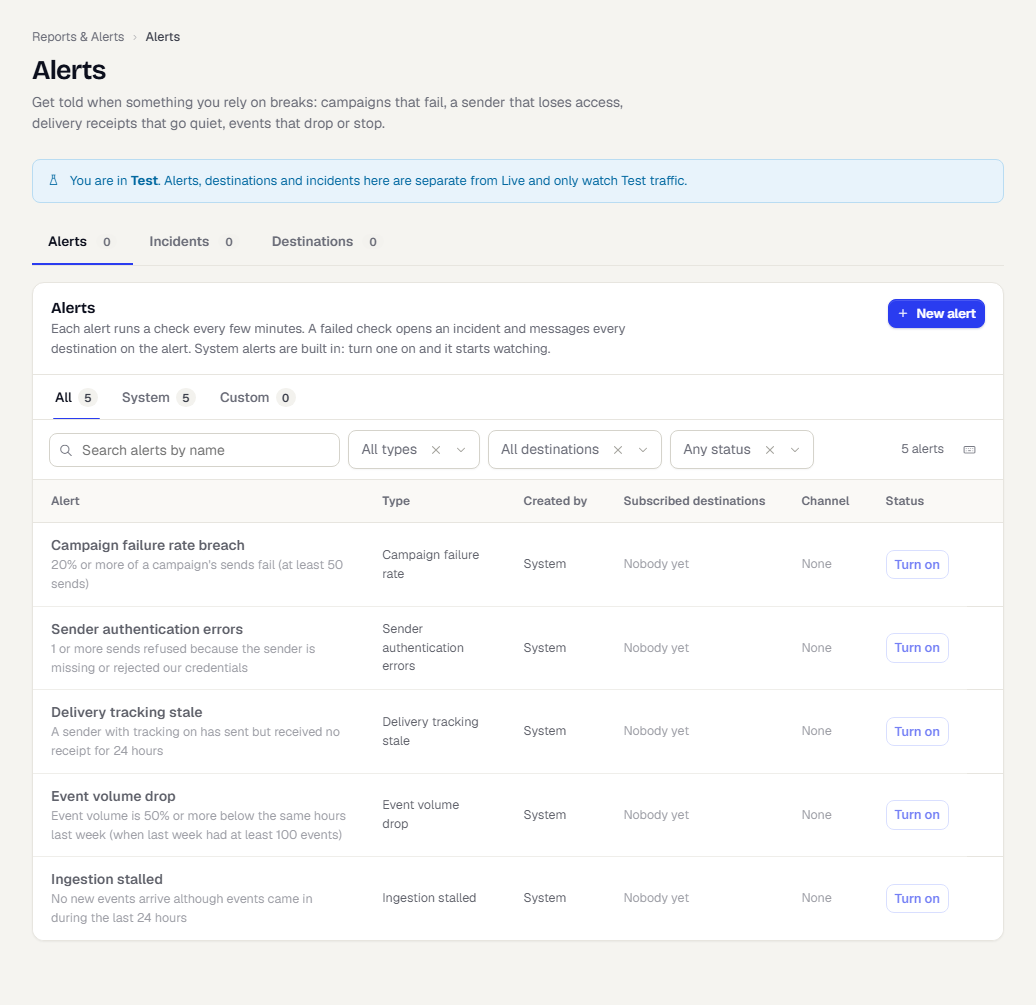
The list is one table with three tabs and a count on each: All, System and Custom.
- System alerts are built in. Each one is listed with a Turn on button. One click creates the alert from its template, switched on. Nothing is turned on for you, and nobody is told until you open the alert and choose destinations. The health alerts of an ad connection are also System alerts, and they are read-only.
- Custom alerts are the ones you made from scratch.
Search by name, and filter by Type, Destination and Status (On, Muted or Not turned on). The tab, search and filters stay in the address, so you can share a filtered view.
Each row shows the alert and what it watches, its Type, Created by, its Subscribed destinations (the first one, then for example "+2 others"; people who chose to be emailed are counted too), the Channel (Email, Slack, Teams or Webhook) and a Status switch. The three-dot menu has Edit (or View without manage permission), Mute or Enable, Email me or Stop emailing me, and Delete. Open incidents show under the alert name and link to the Incidents tab.
Work with incidents
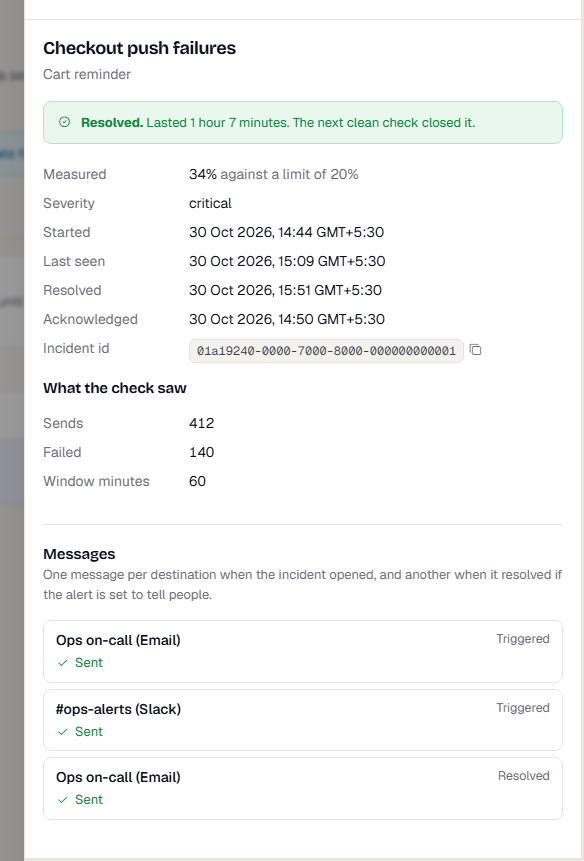
Open the Incidents tab to see every incident, newest first. Filter by All, Open or Resolved and by alert. Each row shows the state, the alert, what was measured against the limit, when it started and how many messages went out.
Select an incident to open it. The panel shows what the check measured, when it was last seen and resolved, what the check saw, and a ledger of every message with its result: sent, failed, skipped or held back. Select Acknowledge to record that you have seen it. This does not stop messages or close the incident.
The link in each alert message opens the incident directly.
Choose which alerts email you
Under Settings, Account, the Notifications tab lists the alerts in the current workspace and environment. Select Email me or Unsubscribe next to each. These emails go to your sign-in address.
Related
Was this page helpful?