Build a flow on the canvas
Create a flow, add steps by search, connect them, use ready-made patterns, group and annotate the canvas, and check problems before you publish.
The canvas is where you draw the journey. Every flow starts with an Entry step connected to an Exit step. You add steps in between, place them anywhere and connect them with lines.
Before you start
- You need the create and manage permission for flows.
- Message steps need a published template.
- Messages are only sent after you publish. A draft never sends. See Save and publish a flow.
- Editing needs a larger screen. On a phone the canvas is read only, with pan and zoom.
- Your workspace may offer a Switch to classic canvas link above the canvas. This page describes the new canvas. The classic canvas has the same steps with a fixed layout.
Create a flow
- In the sidebar, open Engage and select Flows.
- Select New flow.
The editor opens on the Canvas tab. The tab counter shows how many steps the flow has. Notes and frames are not counted.
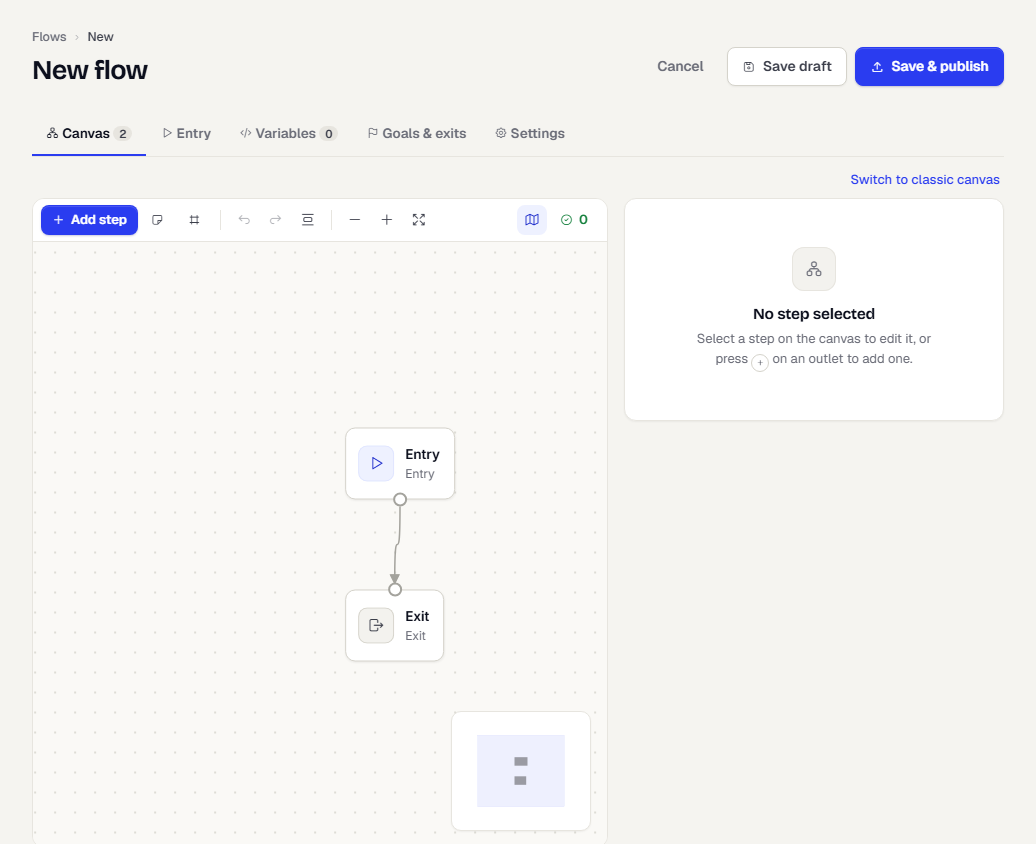
The panel beside the canvas is the inspector. With nothing selected it reads No step selected.
Add a step by search
- Select Add step at the top left of the canvas, or press
/. - Type in Search steps. Try a word like "wait", "email" or "split".
- Move with the arrow keys and press Enter, or select a result.
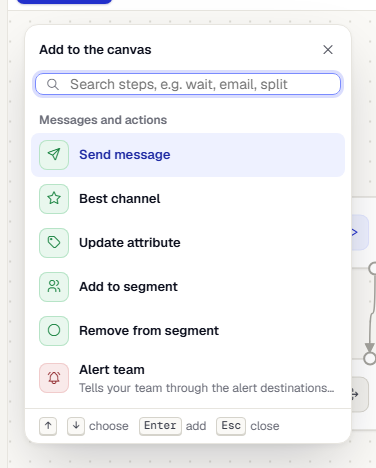
Results are grouped as Messages and actions, Waits and timing, Conditions and splits, End and Triggers. Steps you used recently show first, in Recently used. A step appears only when your workspace can run it.
Where the new step lands depends on what you selected:
- With a step selected, it goes after that step's first free outlet.
- With a connection selected, it is inserted into that connection.
- With nothing selected, it is placed loose near the middle of the view, for you to connect.
You can also select the + under a step to add a step after it, or the + on a connection to add one between two steps.
The step is selected, and the inspector shows its settings. For every step type and its settings, see Steps reference.
Connect steps
Each step has a point on top where lines come in, and one or more outlets at the bottom where lines leave. Drag from an outlet to another step to connect them. A step that branches shows one outlet per branch, labelled such as yes and no. Many lines can lead into one step.
Select a connection and use the cross (Remove connection) to delete just that line.
Use a pattern
A pattern adds several connected steps at once. Open the step search and scroll to Patterns: several steps at once.
| Pattern | What it adds |
|---|---|
| Send with fallback | Send a message, wait a day to see if it worked, and send a second message if it did not. It adds a message, a check (Email opened by default, with the branches Yes and Not in time) and a second message on the no path. Change the check to match your channel. |
| Wait for event, else nudge | Wait up to two days for an event. If it does not happen, send a reminder. It adds a Wait for event step with the branches It happened and Timed out, and a message on the timeout path. |
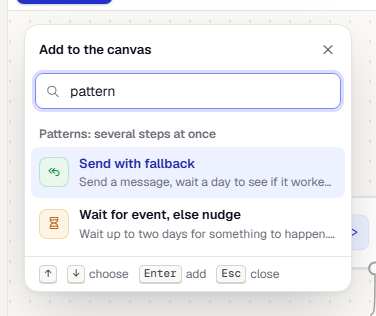
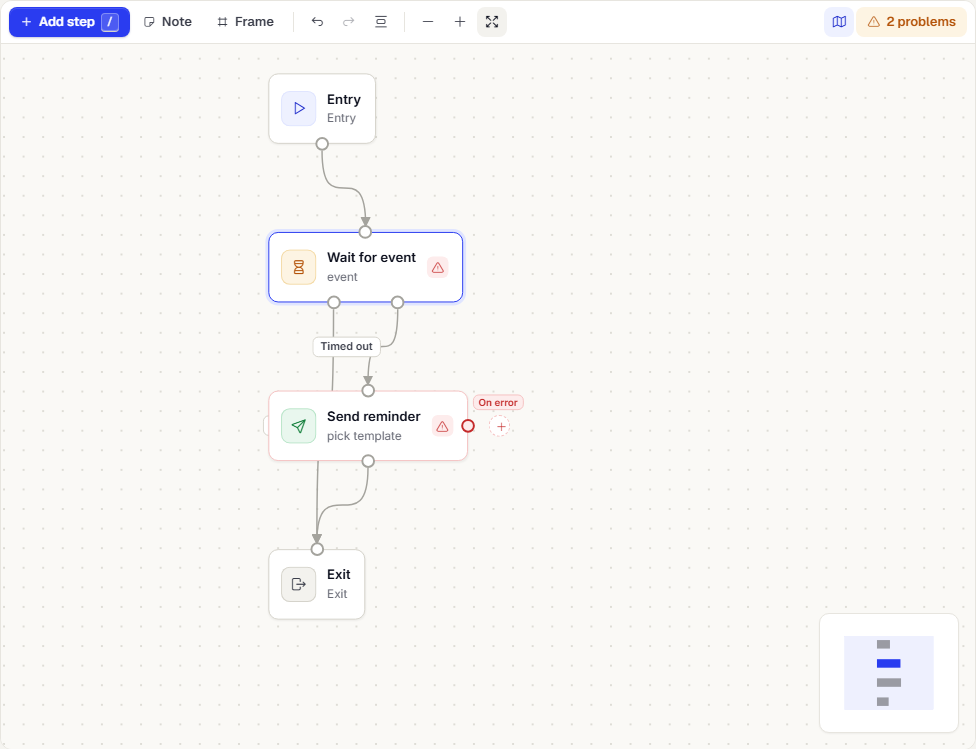
The steps are ordinary steps that you can edit one by one. Choose the template for each message, and for the second pattern choose the event. Undo (Ctrl+Z) removes the whole pattern in one go. The steps that followed the place you inserted it come after the pattern.
Edit a step
- Select a step on the canvas, or press Enter on a selected step.
- In the inspector, change Step name under Details and the step's own settings.
Changes apply to the canvas straight away. They are saved when you save the flow.
Move, zoom and arrange
- Drag a step to place it. Positions are saved with the flow.
- Tidy up (
T) arranges the steps again. Fit to screen (F) shows the whole flow. Use Zoom out and Zoom in to change the scale. - Undo (
Ctrl+Z) and Redo (Ctrl+Y) step through your changes. - Copy, paste and duplicate a selection with
Ctrl+C,Ctrl+VandCtrl+D. - Mini map shows the whole flow in a small overview. It is hidden on narrow canvases.
- Drag a box on empty canvas to select several steps.
Add notes and frames
Select Note to add a sticky note for your team. Select Frame to add a box that groups steps, and give it a name in Name this group. Drag the corner of a frame to resize it. Notes and frames are for people only. They never connect to a step and never affect what the flow does.
Check for problems
The Problems button at the top right of the canvas shows how many things need fixing, or No problems. Select it to open the list. Each item names the step and what is wrong, such as a message step with no template. Select an item to jump to that step. Fix these before publishing. Saving a draft is always allowed.
Steps with a problem also show a warning mark on the canvas.
Remove a step
Select a step and press Delete. If it had one successor, the steps before it are connected to that successor. The Entry and Exit steps cannot be removed. Their settings live on other tabs: Set the entry and Set goals and exits.
What happens next
Fill in the other tabs, then save. See Save and publish a flow. To follow a person through a flow, or to test one without sending, see Test and debug a flow.
Was this page helpful?