Set up your organisation and workspace
The first-run setup for a new account, and how to add another workspace later.
After you sign up, TrueEngage asks for two things: details about your organisation, then your first workspace. You can add more workspaces later.
Before you start: you need a signed-in account. You become the organisation's Owner.
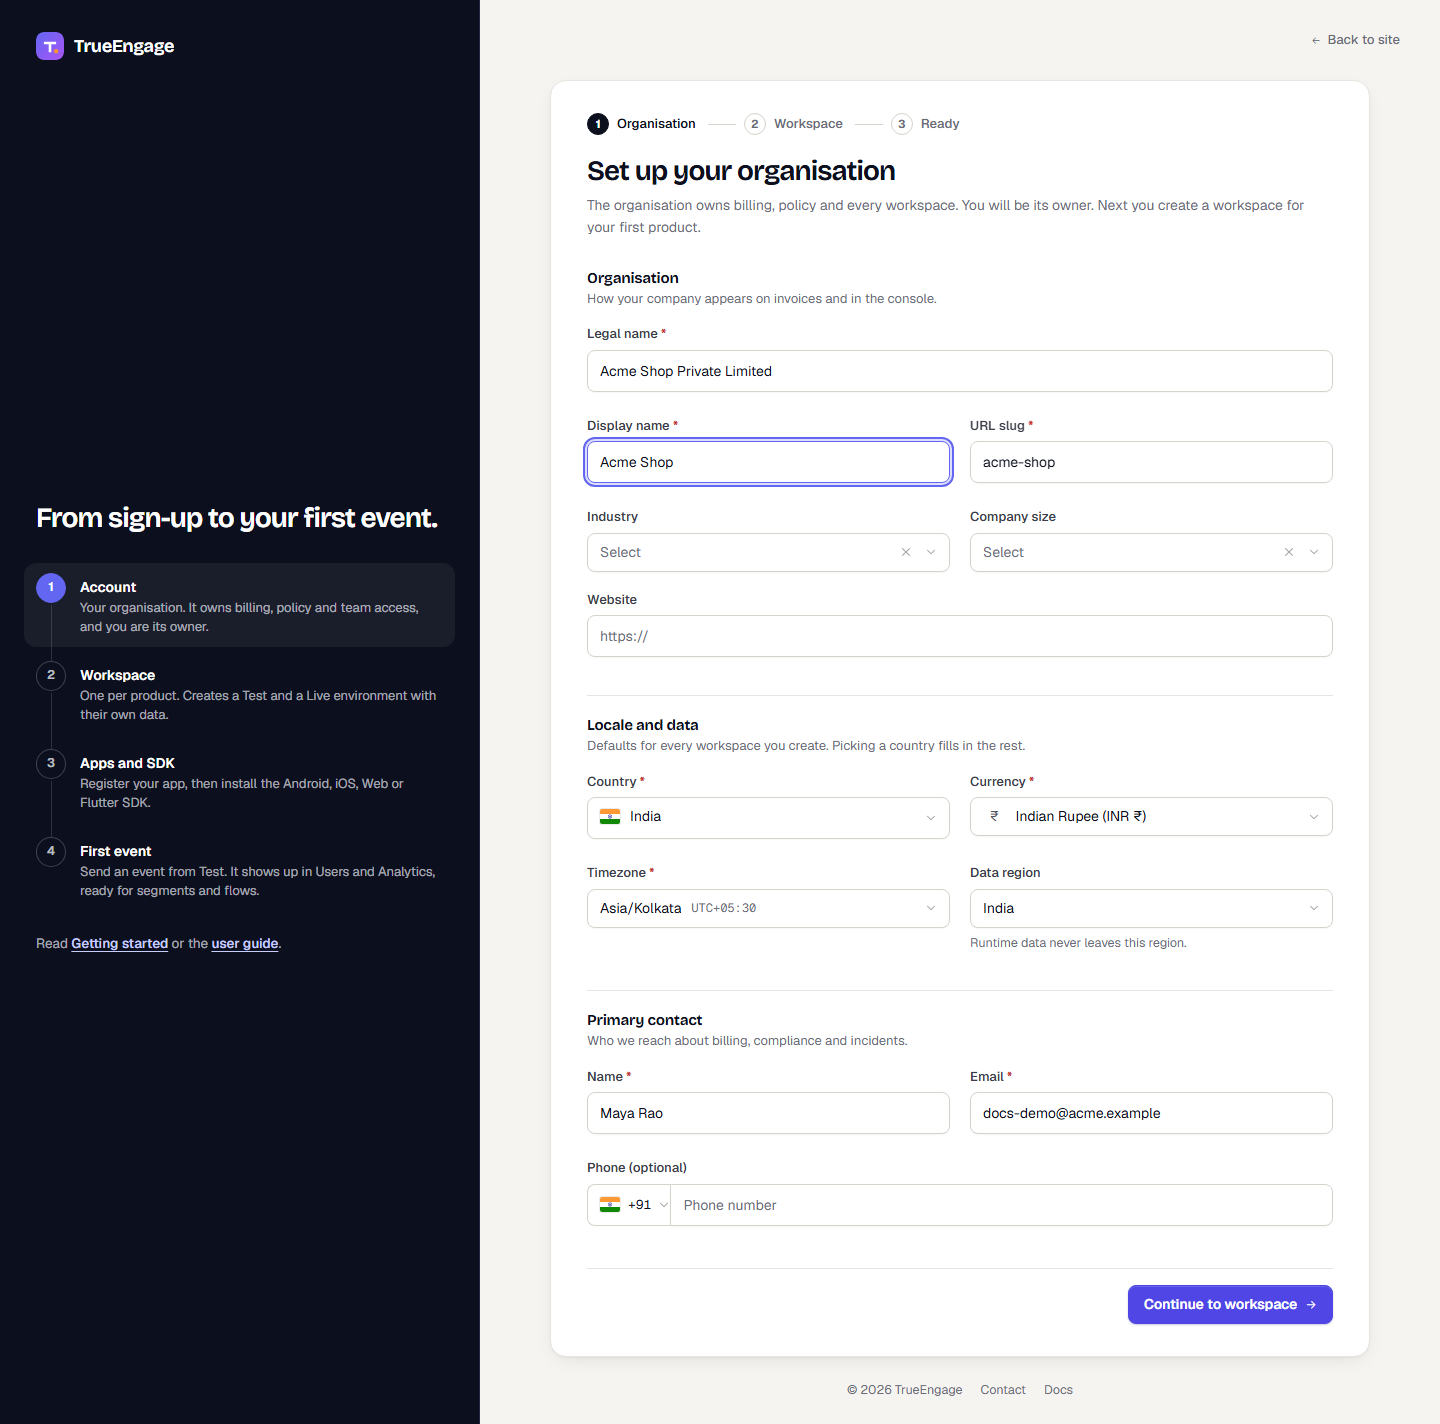
Step 1: Set up your organisation
The organisation owns billing, policy and every workspace.
- Under Organisation, enter the Legal name, Display name and URL slug. Choose an Industry and Company size, and add your Website if you like. The slug fills in from the display name and cannot change later.
- Under Locale and data, pick your Country. The Currency and Timezone fill in for you, and you can change them. Choose the Data region. Runtime data never leaves this region.
- Under Primary contact, enter a Name, Email and optional Phone for billing, compliance and incidents.
- Select Continue to workspace.
Step 2: Create your first workspace
A workspace is one product or app. It owns your data dictionary and gets a Test and a Live environment.
- Enter a Name that your customers recognise. Check the URL slug.
- Under App platforms, pick every platform the SDK will run on.
- Under Defaults, set the Timezone and Currency used for scheduling and reporting, and the Event retention (days). Retention bounds how far back behavioural filters can look and cannot exceed your plan limit. You can enter 1 to 1,095 days.
- Select Create workspace.
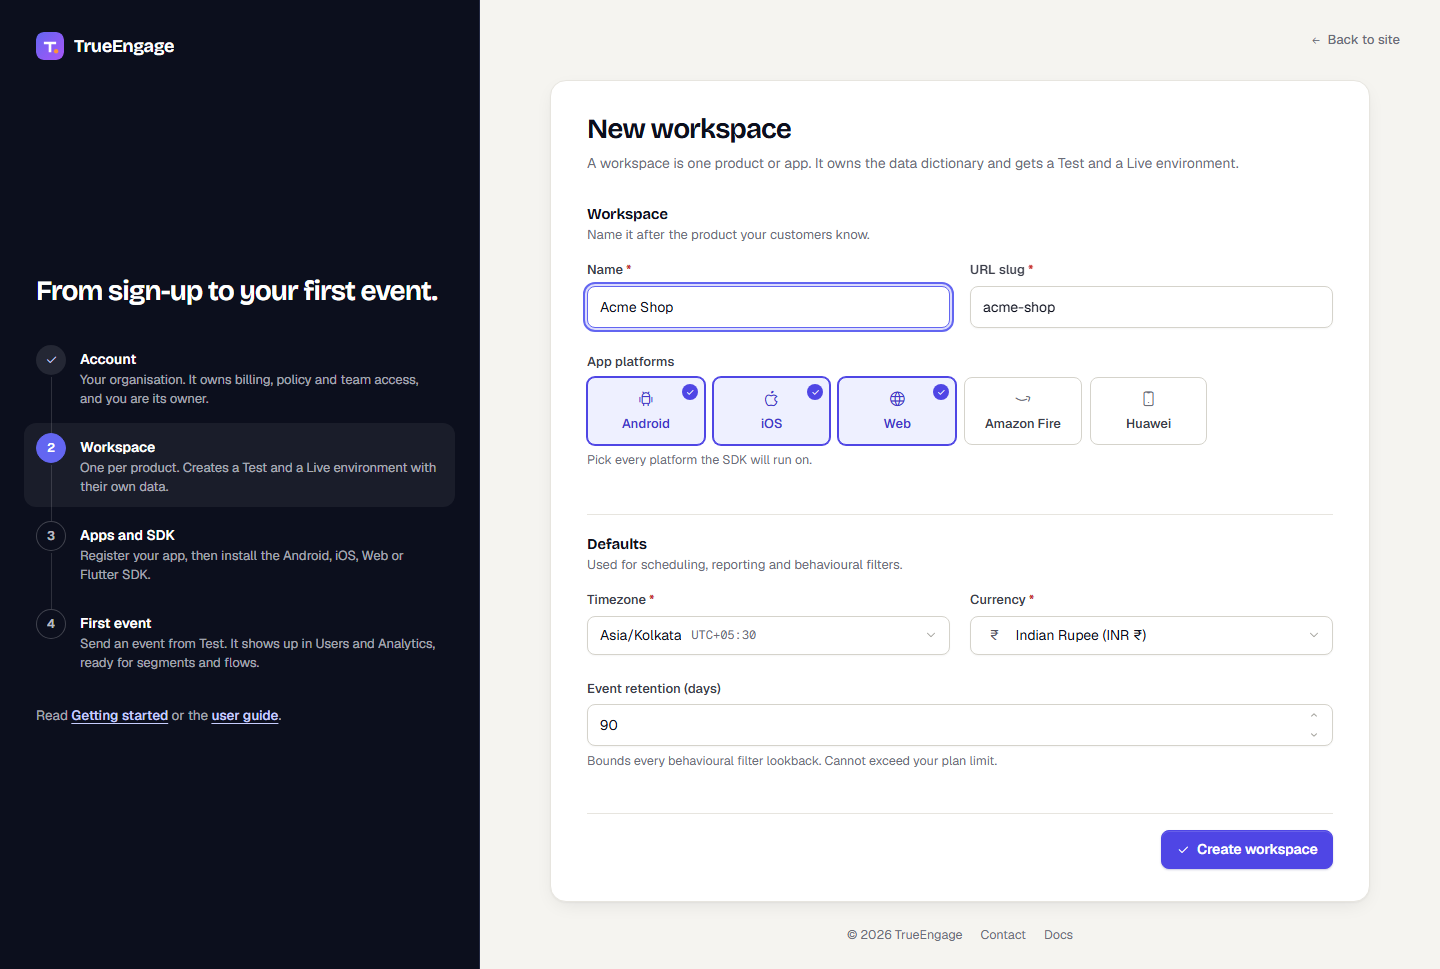
The page is titled Create your first workspace the first time and New workspace after that. The screenshot shows the second case. The first time, a progress strip at the top shows Organisation, Workspace and Ready. When the workspace is created, the Workspace ready page shows the two environments. Test runs in sandbox mode: only people on the allowlist get real messages. Live sends to real customers. A short What to do next list follows: add your app, install an SDK in a development build and open the app so the first event appears under Users. Select Open the console to continue.
Add another workspace later
Open the workspace switcher at the top of the sidebar and select New workspace, or use New workspace on the Workspace tab of Account and profile. The page is titled New workspace and has the same fields as step 2.
Optional: two-factor sign-in
The setup flow can offer to protect your account with an authenticator app. See Two-factor authentication.
Next steps
- Create API keys. See API keys.
- Follow the Quickstart.
Was this page helpful?