Storage and assets
Connect your own storage bucket and manage the images and files your templates and campaigns use.
Files you upload for templates, such as images, live in a storage bucket that you own. Storage & Assets is where you connect that bucket and browse the files in it. It has two tabs: Providers and Assets.
Before you start:
- You need the Settings view permission to open the page, and manage rights to add providers.
- Have a bucket ready on Amazon S3, DigitalOcean Spaces, Cloudflare R2, Google Cloud Storage, Azure Blob or MinIO, plus its access credentials.
Providers belong to a workspace. Because of that, an image in a template still resolves after you promote the template to Live.
Add a storage provider
- In the sidebar, open Settings, then All settings, and select Storage & Assets. The Providers tab is empty until you add one.
- Select Add provider.
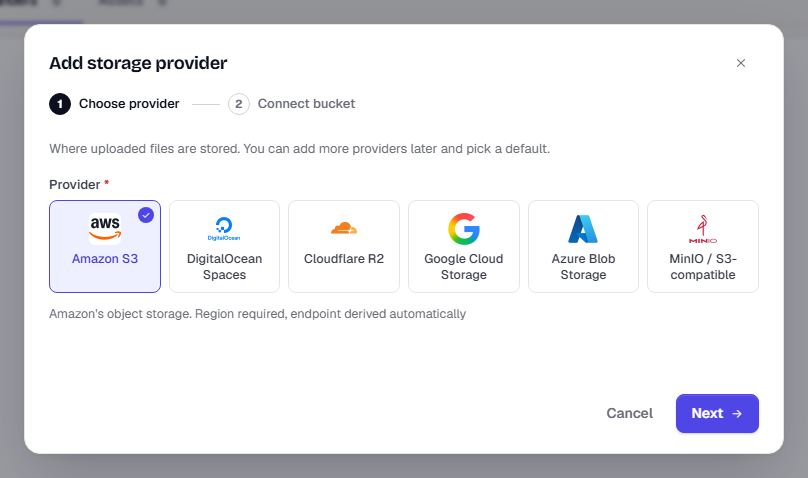
- Under Choose provider, select the service you use, then select Next.
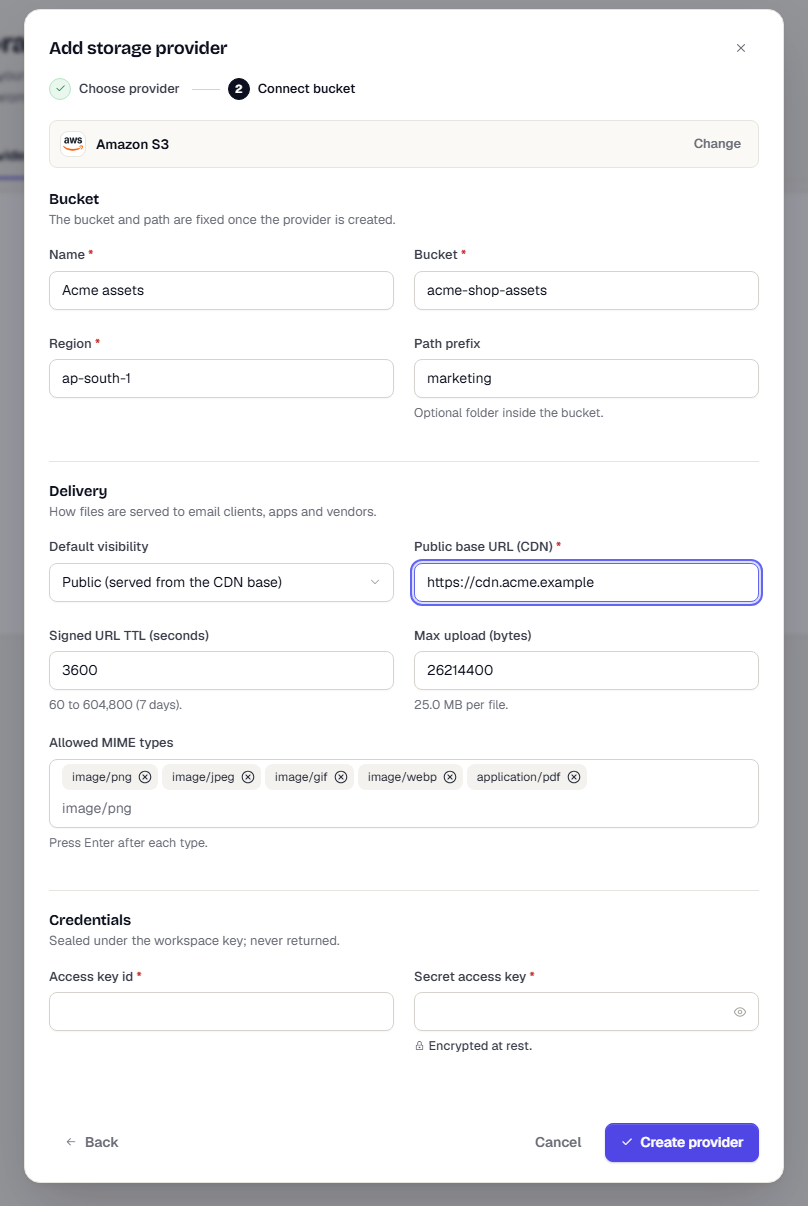
- Under Connect bucket, fill in Name, Bucket, and the Region or Endpoint your service asks for. Add a Path prefix if you want files kept in a folder inside the bucket. The bucket and path are fixed once you create the provider.
- Under Delivery, choose the Default visibility: Public (served from the CDN base) or Signed URLs. Set the Public base URL (CDN), the Signed URL TTL (seconds), the Max upload (bytes) and the Allowed MIME types. Press Enter after each type.
- Under Credentials, enter the access keys. They are sealed with your workspace key and never shown again.
- Select Create provider.
If no provider is listed in the first step, ask your administrator to enable the storage catalogue for your workspace.
Verify a provider
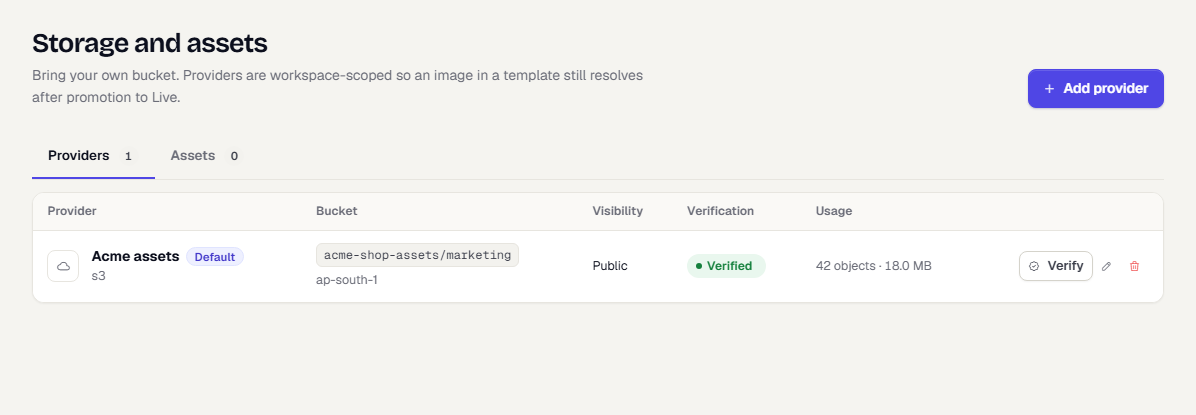
A provider cannot take uploads or become the default until it passes a check. In the Providers tab, select Verify. TrueEngage writes, reads and deletes a small test object. The Verification column then shows the result, and any error appears below it.
Use the star icon to Make default, the pencil to edit, and the bin to delete a provider. The Usage column shows how many objects and how much space it holds.
Browse and upload assets
Open the Assets tab. Folders are on the left, files on the right. Switch between grid and list view, or use Search files. The All providers filter narrows the list to files in one storage provider.
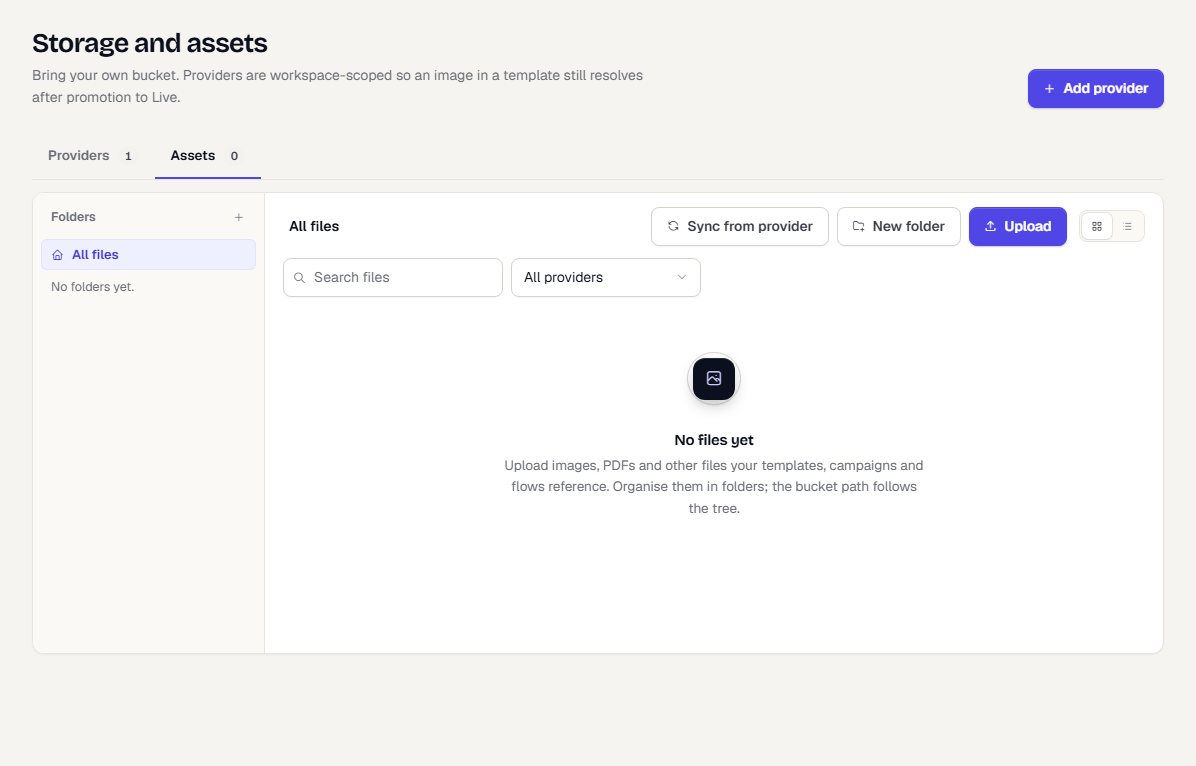
- Select New folder to create a folder. In the folder list, use the pencil, move and bin icons to rename, move or delete a folder.
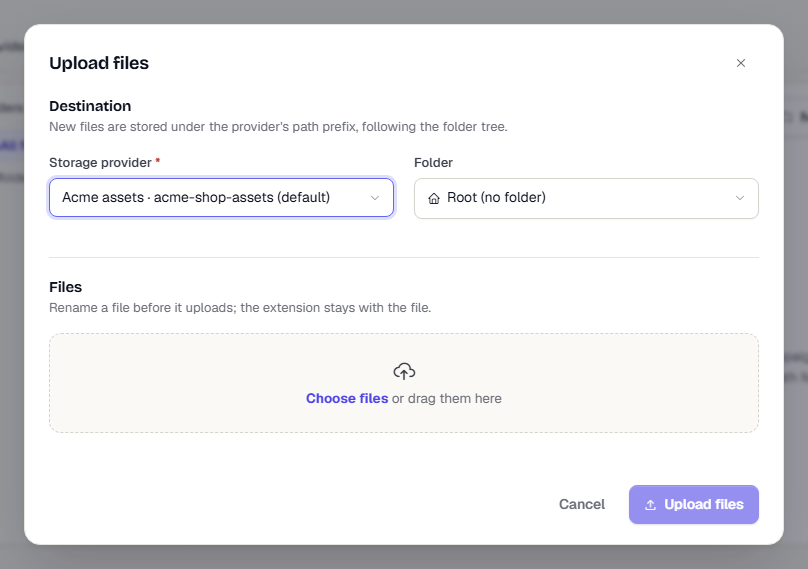
- Select Upload to add files. Choose the Storage provider and Folder, select Choose files or drag files in, rename or title them if you like, then select Upload files.
- Select Sync from provider, choose the Storage provider and select Sync now to import folders and files that are already in the bucket.
- Per file, you can copy the URL, open it, edit its title and alt text, move it to a folder or delete it.
Upload and sync stay disabled until you have a verified provider.
Related
Was this page helpful?