Transactional endpoints
Create endpoints for OTPs and order confirmations, get the slug your server calls, and choose which device receives the message.
A transactional endpoint is a named, one-to-one message your server sends on demand: an OTP, an order confirmation, a password reset. Each endpoint ties a template to a URL slug and declares which guardrails it skips and which device it targets, so the exception is explicit and auditable.
Transactional sends bypass marketing frequency caps and quiet hours when you tick those options. They still go through consent unless you explicitly bypass opt-out.
Before you start
- A published template for the channel.
- Permission to manage campaigns.
- To call the endpoint, a server key. See API keys.
Create an endpoint
- Open Engage, then Transactional.
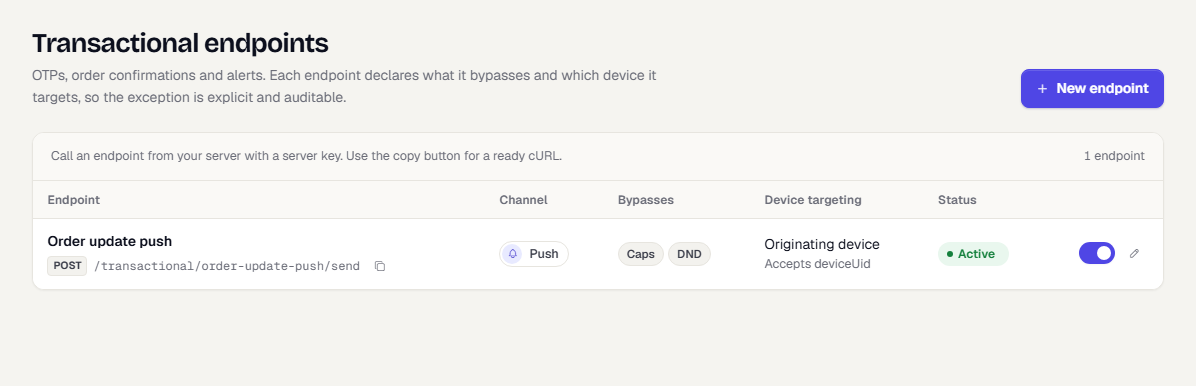
- Click New endpoint.
- Under Endpoint, enter a Name, such as "Order update push". The Slug fills in from the name. Edit it if you want, for example
order-update-push. The hint shows the URL it creates. - Choose the Channel and a published Template.
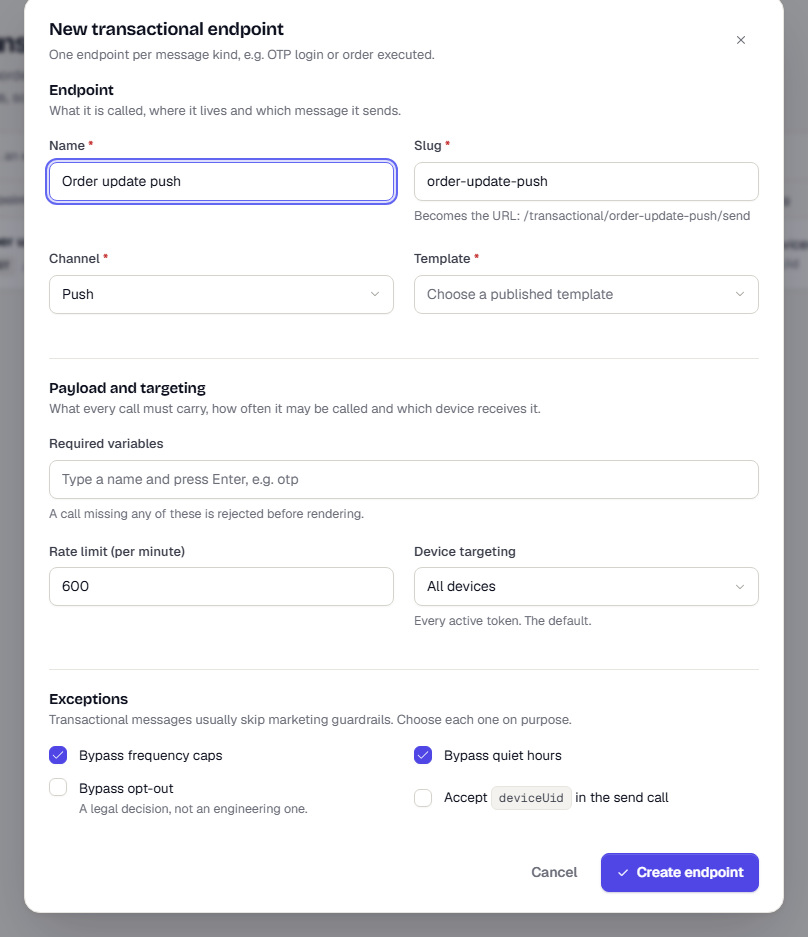
- Under Payload and targeting, add Required variables, such as
orderId. A call missing any of them is rejected before rendering. - Set Rate limit (per minute). It starts at 600.
- Choose Device targeting, described below.
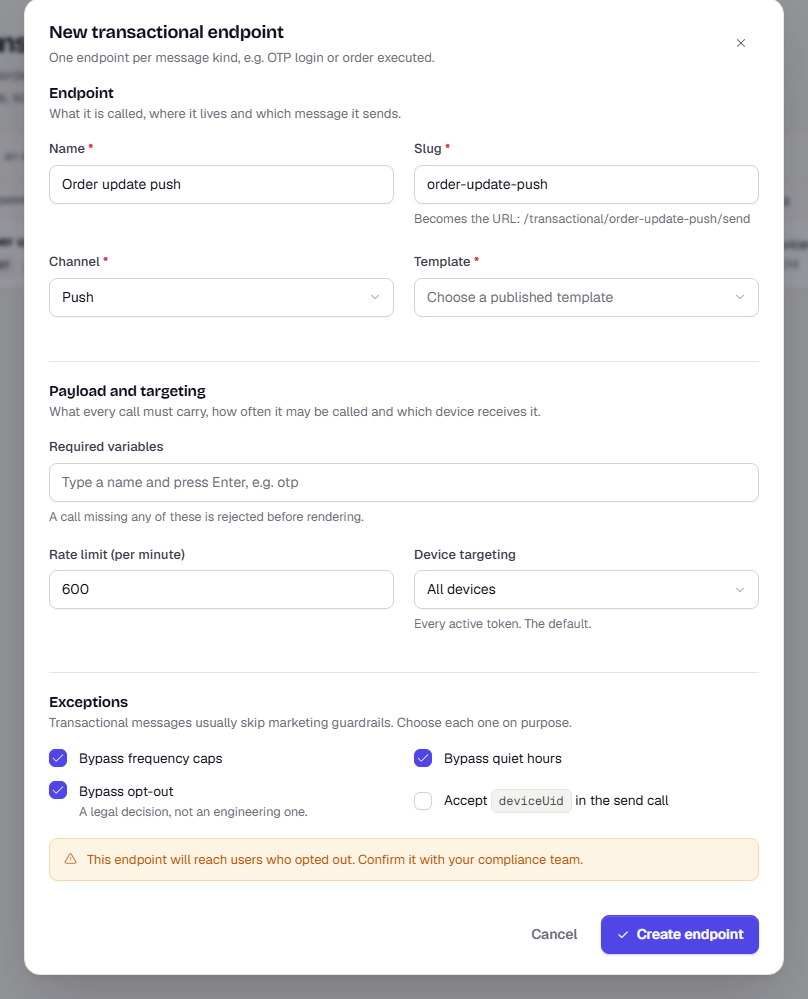
- Under Exceptions, tick only what you need. Bypass frequency caps and Bypass quiet hours start ticked. Bypass opt-out and Accept deviceUid in the send call start unticked. Bypassing opt-out reaches users who unsubscribed, so treat it as a legal decision: the dialog shows a warning and you should confirm it with compliance.
- Click Create endpoint.
Device targeting
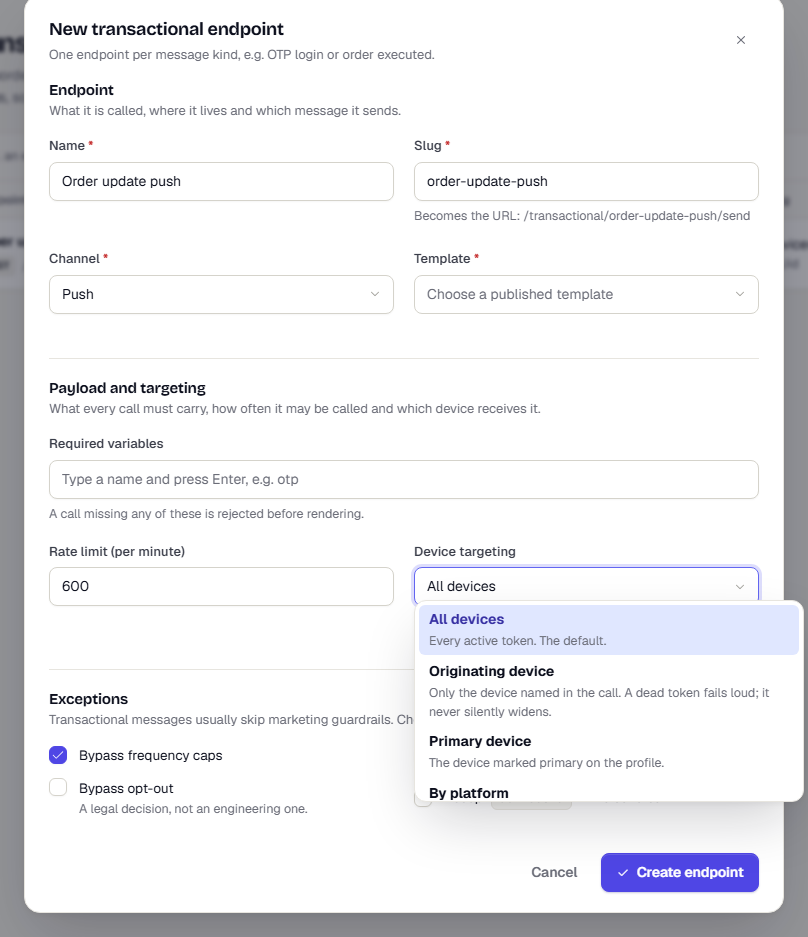
Device targeting applies to push endpoints. It decides which of a user's devices gets the message.
| Option | What it does |
|---|---|
| All devices | Every active token. The default |
| Originating device | Only the device named in the call. A dead token fails loudly; it never widens to other devices |
| Primary device | The device marked primary on the profile |
| By platform | Devices matching the platform in the payload |
To name the originating device, tick Accept deviceUid in the send call and pass deviceUid in the request.
Get the slug and send
The list in the first screenshot above shows each endpoint as POST /transactional/<slug>/send. Click the copy icon (Copy cURL) for a ready-to-edit command. The Bypasses column lists the exceptions, and Device targeting shows the setting.
Your server calls that URL with a server key. Each call needs an idempotencyKey, a recipient, and the required variables. For the full request, response and error codes, see Send a transactional message.
Edit or disable an endpoint
- Click the pencil to open Edit endpoint. The slug and channel are fixed once created, so your server's URL never changes by accident.
- Change the template, variables, rate limit, targeting or exceptions, then click Save changes.
- Use the switch in the row to disable or enable the endpoint without deleting it.
What happens next
Send a test call from your server with a Test key, and check the response. See Send a transactional message.
Was this page helpful?