Read RFM results
See where customers stand in each RFM group, how groups move over time, and turn a group into a segment or a campaign.
The results page for an RFM model shows how your customers are spread across RFM groups, how those groups changed over time, and who moved where. You can turn any group into a segment, or start a campaign for it, straight from here.
Before you start
- Create a model first: Group customers with RFM models.
- You need permission to view analytics to open results. To see the people behind a number, you also need permission to view users.
- To save a group as a segment you need permission to manage segments. To create a campaign you need permission to manage campaigns. Buttons you cannot use are hidden.
Open the results
- In the sidebar, open Audience, then RFM Segments.
- Select a model's name, or use its row menu and choose Open results.
The header shows the model's name, the event it is Scored on, its Look-back, how many people were scored and when. Select the refresh button to reload.
A new model first shows Scoring your customers for the first time. The page updates by itself when scores are ready. A Building history… banner means older days are still being scored. Trends and movement fill in as it runs.
See where everyone stands
The Where everyone stands card shows the whole customer base on one bar and splits it into five families. Under each family, its groups show how many people are in them, their share, and the play that suits them.
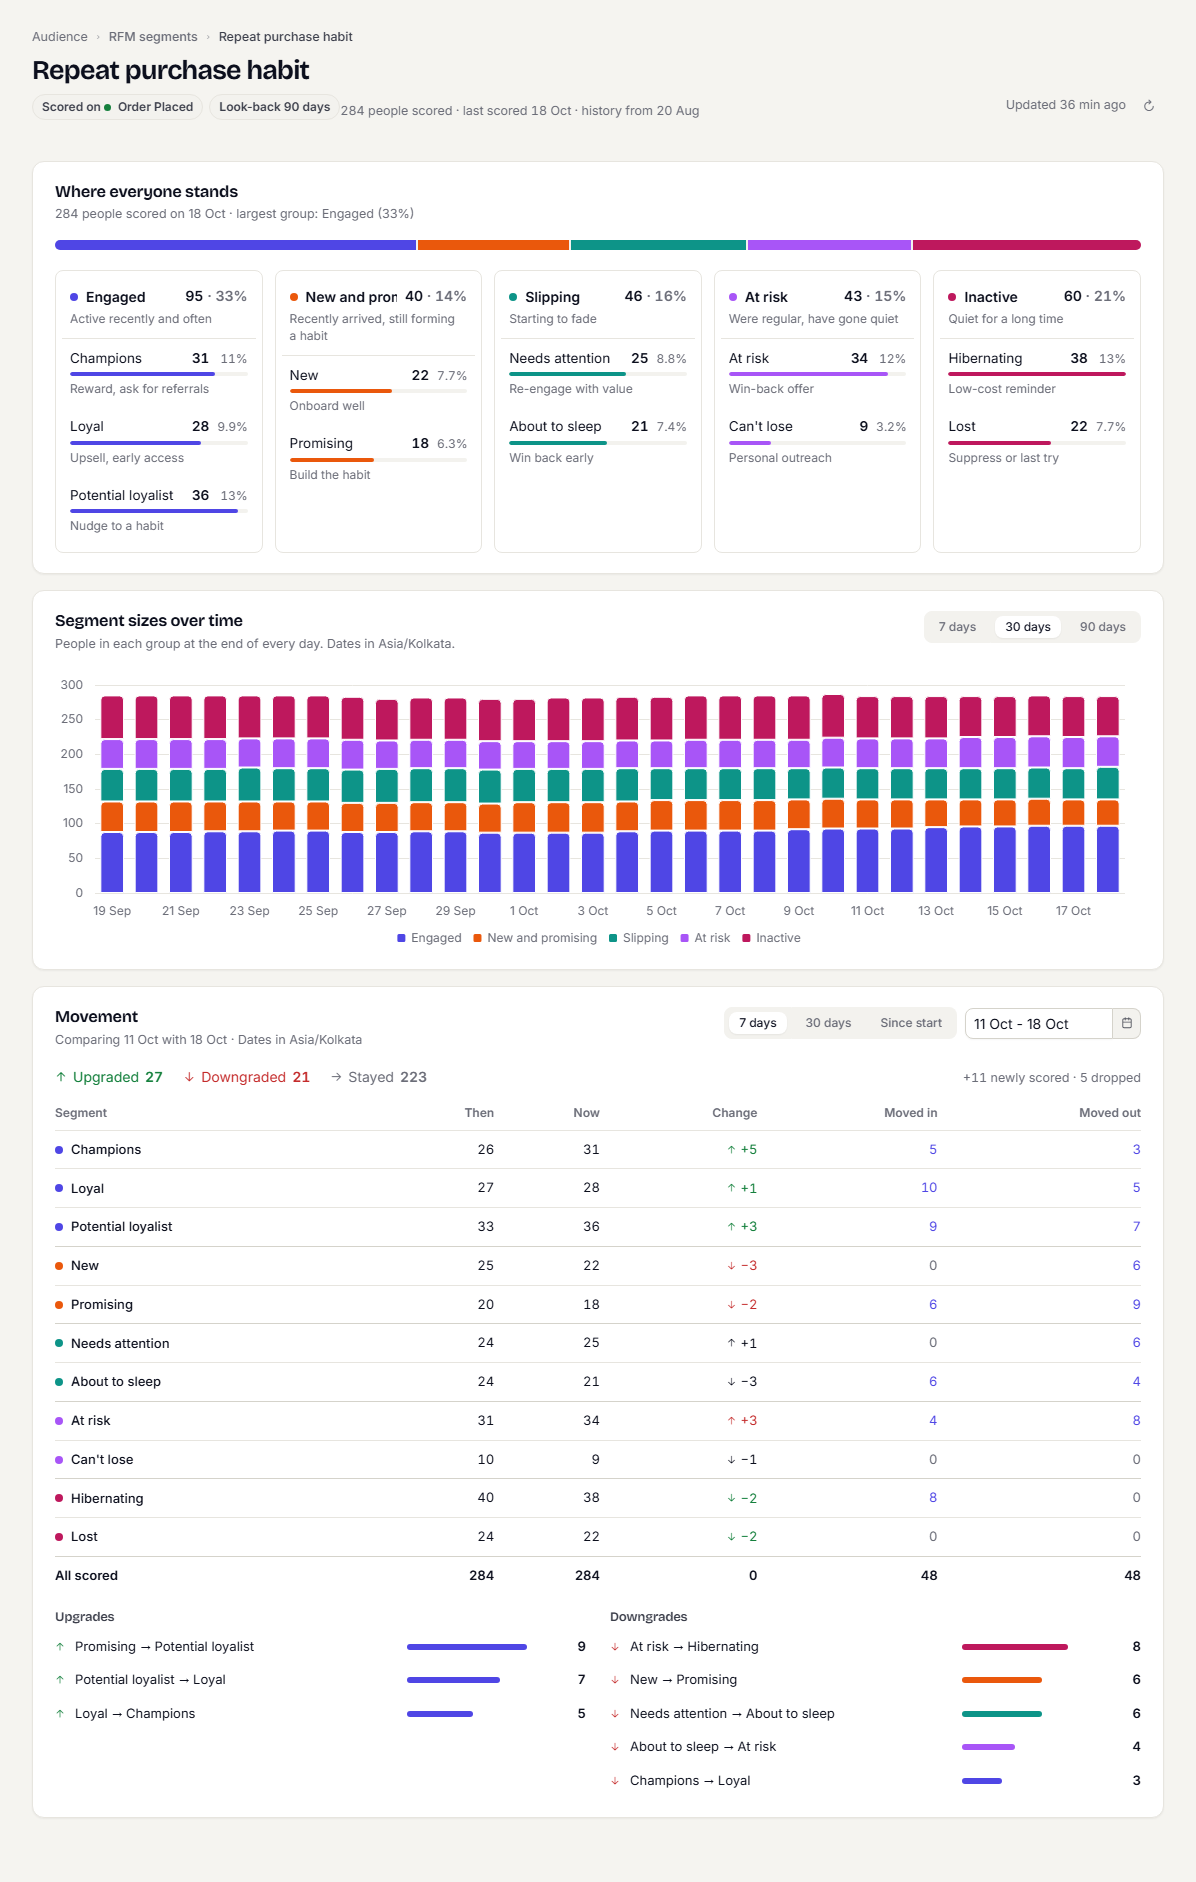
| Family | Groups | In short |
|---|---|---|
| Engaged | Champions, Loyal, Potential loyalist | Active recently and often |
| New and promising | New, Promising | Recently arrived, still forming a habit |
| Slipping | Needs attention, About to sleep | Starting to fade |
| At risk | At risk, Can't lose | Were regular, have gone quiet |
| Inactive | Hibernating, Lost | Quiet for a long time |
A group with no one in it reads No one yet.
Follow group sizes over time
The Segment sizes over time chart shows how many people were in each family at the end of every day. Use 7 days, 30 days or 90 days to change the range. Dates use your workspace's display time zone, shown under the chart title.
Compare two days with Movement
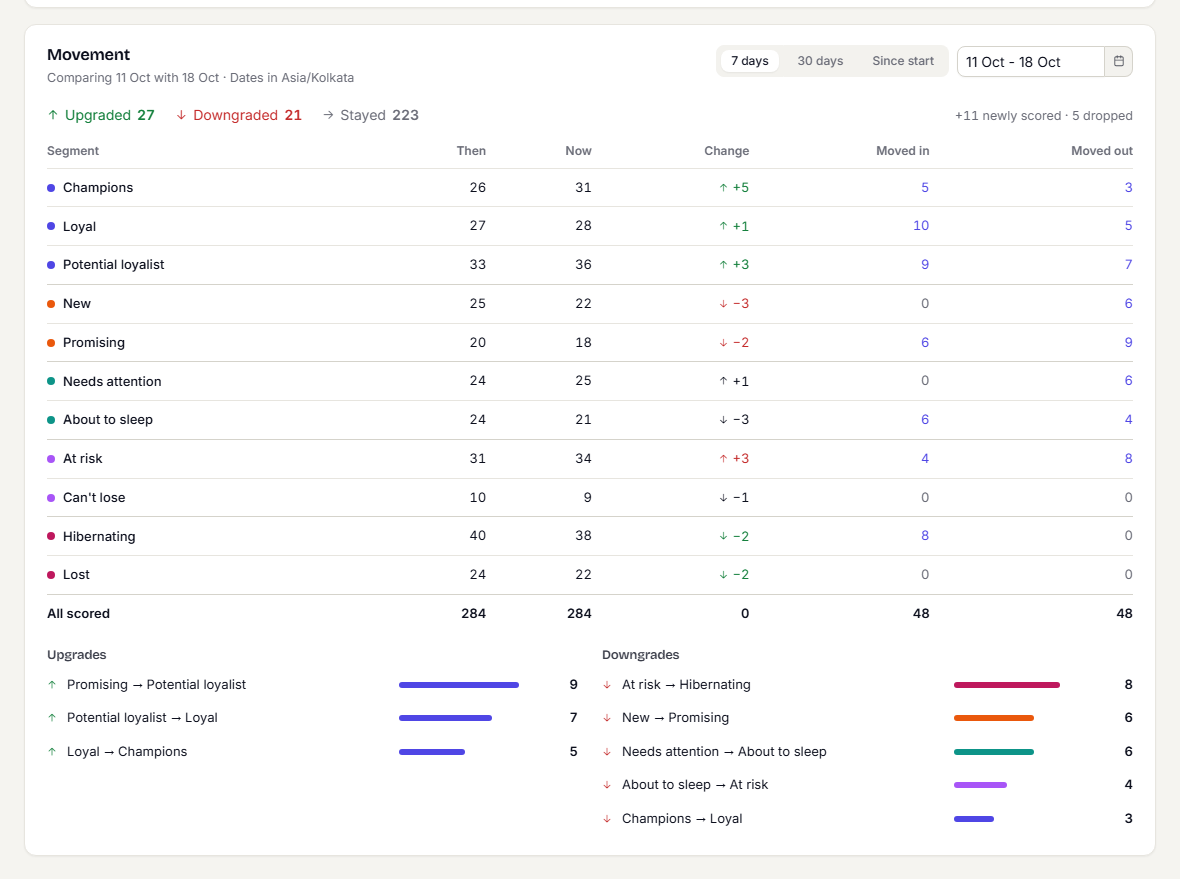
The Movement card compares two nightly snapshots.
- Choose 7 days, 30 days or Since start under Compare over, or pick your own two days in the date field.
- Read the headline: Upgraded, Downgraded and Stayed show how many people moved to a better group, a worse group or stayed. newly scored and dropped count people who entered or left the scored base.
- In the table, each group shows its size Then and Now, the Change, and how many people Moved in and Moved out. Green means good news for that group, red bad news.
- Below the table, Upgrades and Downgrades list the biggest paths, such as "Promising → Potential loyalist". Select Show all to see more.
If the model has only a day or two of history, the card says Not enough history to compare yet. Movement appears from the next night.
See the people in a group
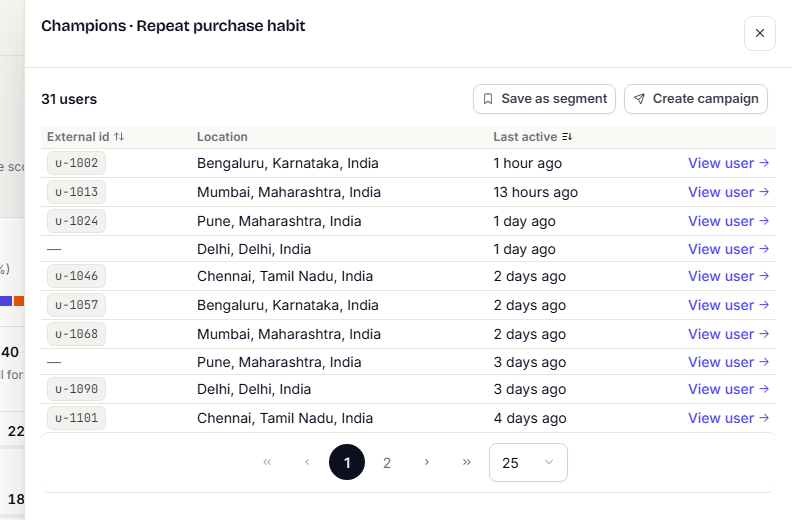
Select a group's row, a count in the Moved in or Moved out column, or a path in the lists. A panel opens with the people behind that number: their external id, location, and when they were last active. Select View user to open a profile, as described in Read a user profile. If someone has no external id, they are anonymous and the id shows a dash.
Save a group as a segment
When the panel shows one current group, it offers Save as segment and Create campaign at the top.
- Select Save as segment.
- Under Segment name, keep the suggested name or enter your own.
- Choose how the segment is kept:
- Keeps updating (recommended) follows the nightly scores. It holds whoever is in this group when a campaign sends.
- Snapshot of today is a fixed list of who is in the group right now. It does not change as people move.
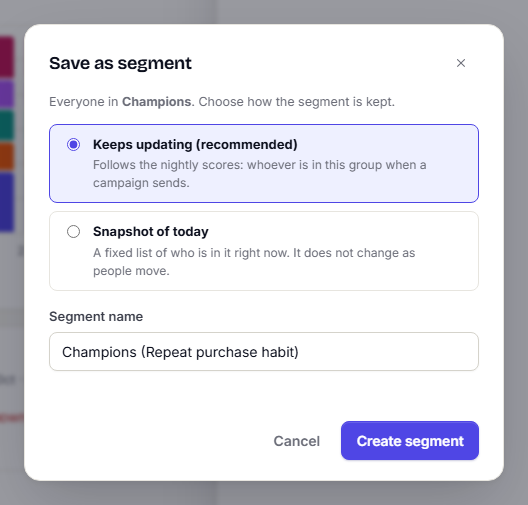
- Select Create segment.
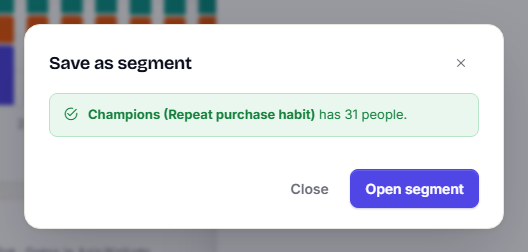
The dialog confirms the name and how many people it has. A snapshot is capped, and the dialog says so when the group was bigger than the limit. Select Open segment to see it, or Close to stay on the page. The segment appears in Browse your segments like any other.
Create a campaign for a group
- Open the group's panel as above.
- Select Create campaign.
TrueEngage saves the group as a Keeps updating segment with the suggested name, then opens the new campaign wizard with that segment already chosen as the audience. Finish the campaign in the wizard. Nothing is sent until you launch it.
Use RFM groups in other segments
In Build a segment, the RFM segment condition lets you combine an RFM model's groups with other rules, such as "Champions who live in Mumbai".
What happens next
- Edit, pause or delete the model: Group customers with RFM models.
- Check that the saved segment holds the people you expect: Open a segment.
Was this page helpful?