Add a custom provider
Connect a vendor that is not in the catalog, either with a request template or with a sandboxed script you can dry-run.
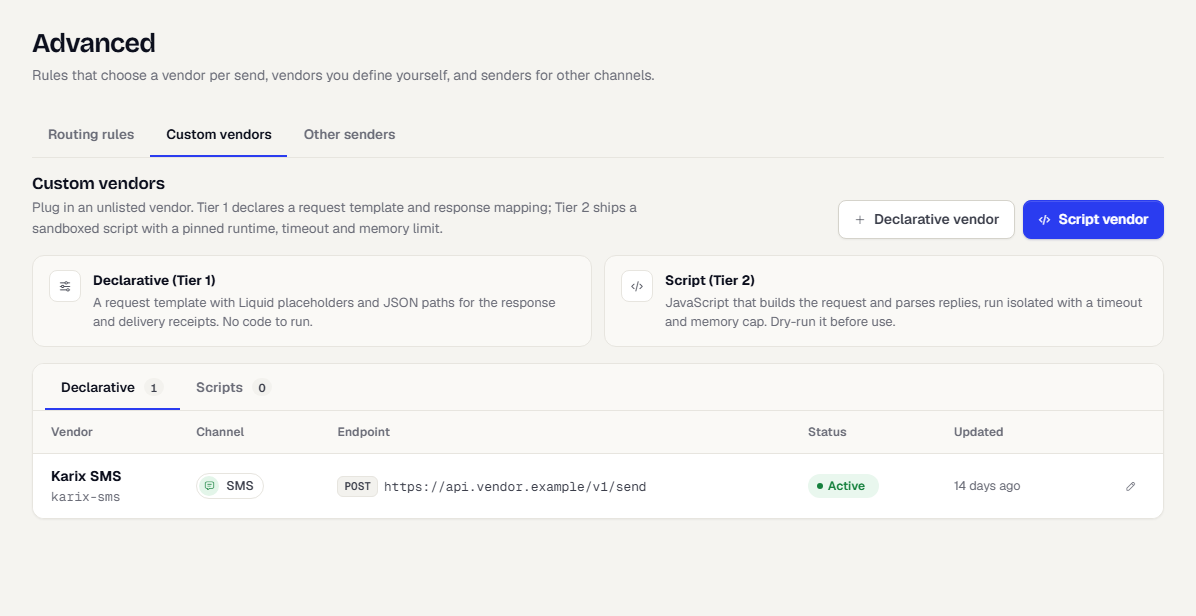
If your vendor is not in the provider catalog, you can define it yourself. There are two ways:
| Type | Best for | You write |
|---|---|---|
| Declarative | Vendors with a simple HTTP send API | A request template with placeholders, and JSON paths that read the replies. No code. |
| Script | Vendors that need signing, unusual payloads or reply parsing | Three JavaScript functions. They run in an isolated sandbox with a timeout and a memory limit. |
Once defined, a custom vendor appears in the vendor step when you add a provider. You then add a provider for it, enter its secrets and verify it like any other vendor.
Before you start
- You need permission to manage channels. If Declarative vendor and Script vendor are missing, ask an Owner or Admin.
- Have the vendor's API documentation open: the send URL, authentication and the shape of its replies.
- Never paste real secrets into a template. Reference them as
secrets.<name>and enter the values when you add the provider.
Add a declarative vendor
- In the sidebar, open Channels, then Advanced, and select the Custom vendors tab.
- Select Declarative vendor.
- Under Vendor, enter a Name such as "Karix SMS", pick the Channel and set the Timeout (ms), from 1,000 to 30,000. The send fails over when the vendor is slower. The channel cannot be changed later.
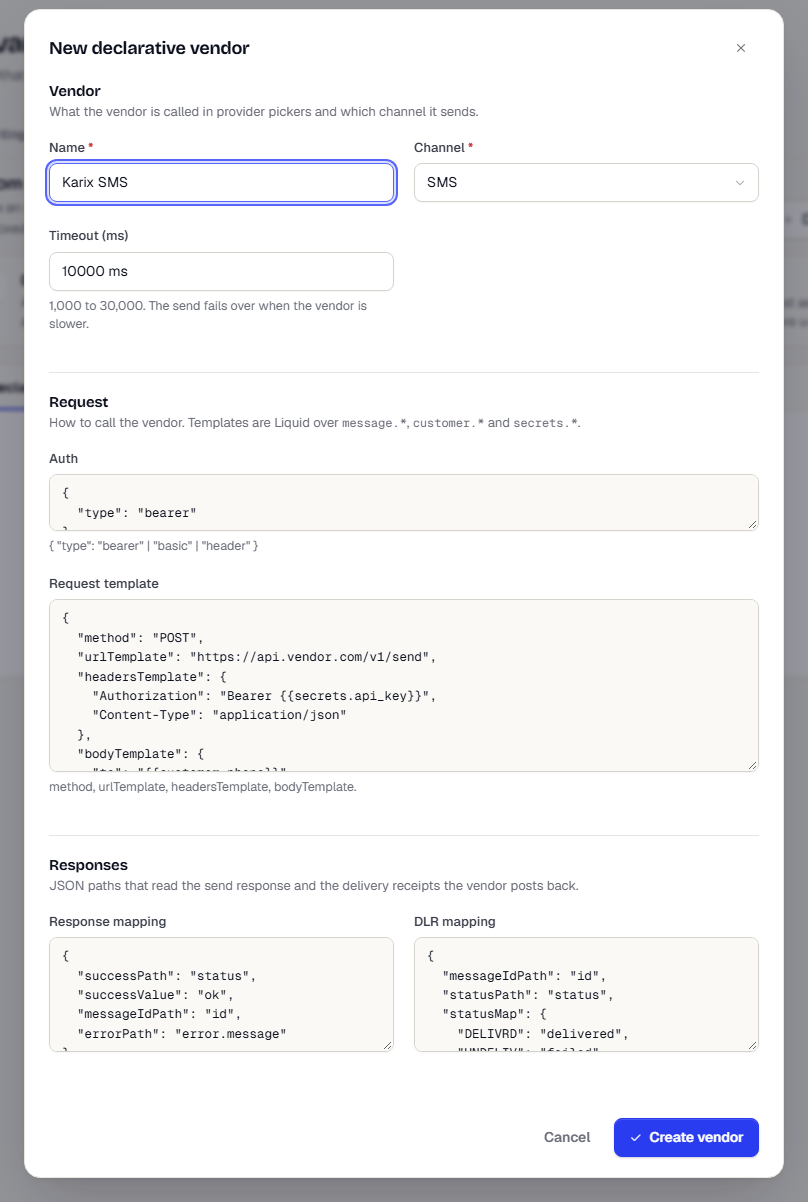
Under Request, set Auth to
{ "type": "bearer" },"basic"or"header".Edit the Request template:
method,urlTemplate,headersTemplateandbodyTemplate. Templates use Liquid placeholders over:message.*, the message content, for examplemessage.bodycustomer.*, the recipient, for examplecustomer.phonesecrets.*, the credentials you enter on the provider, for examplesecrets.api_key
Under Responses, fill in Response mapping, the JSON paths that tell success from failure and find the vendor's message ID:
{ "successPath": "status", "successValue": "ok", "messageIdPath": "id", "errorPath": "error.message" }Fill in DLR mapping to read delivery receipts the vendor posts back. It names the message ID and status paths and maps the vendor's status words to
deliveredorfailed:{ "messageIdPath": "id", "statusPath": "status", "statusMap": { "DELIVRD": "delivered", "UNDELIV": "failed" } }Select Create vendor. New vendors start as Draft. Edit the vendor and set Status to Active. Only active vendors appear when you add a provider.
Add a script vendor
Use a script when a template is not enough.
- Select Script vendor.
- Under Script, enter a Name, pick the Channel, and set the sandbox limits: Timeout (ms) from 500 to 20,000 and Memory limit (MB) from 16 to 256.
- Under Code, write the functions. The sandbox has no network or filesystem access.
transform(message, customer, secrets)builds the request. It returnsmethod,url,headersandbody. Required.parseResponse(status, body)reads the vendor's reply. It returnsok,providerMessageId,failureReasonCodeandretryable.parseCallback(headers, body)reads delivery receipts posted back by the vendor. Optional.
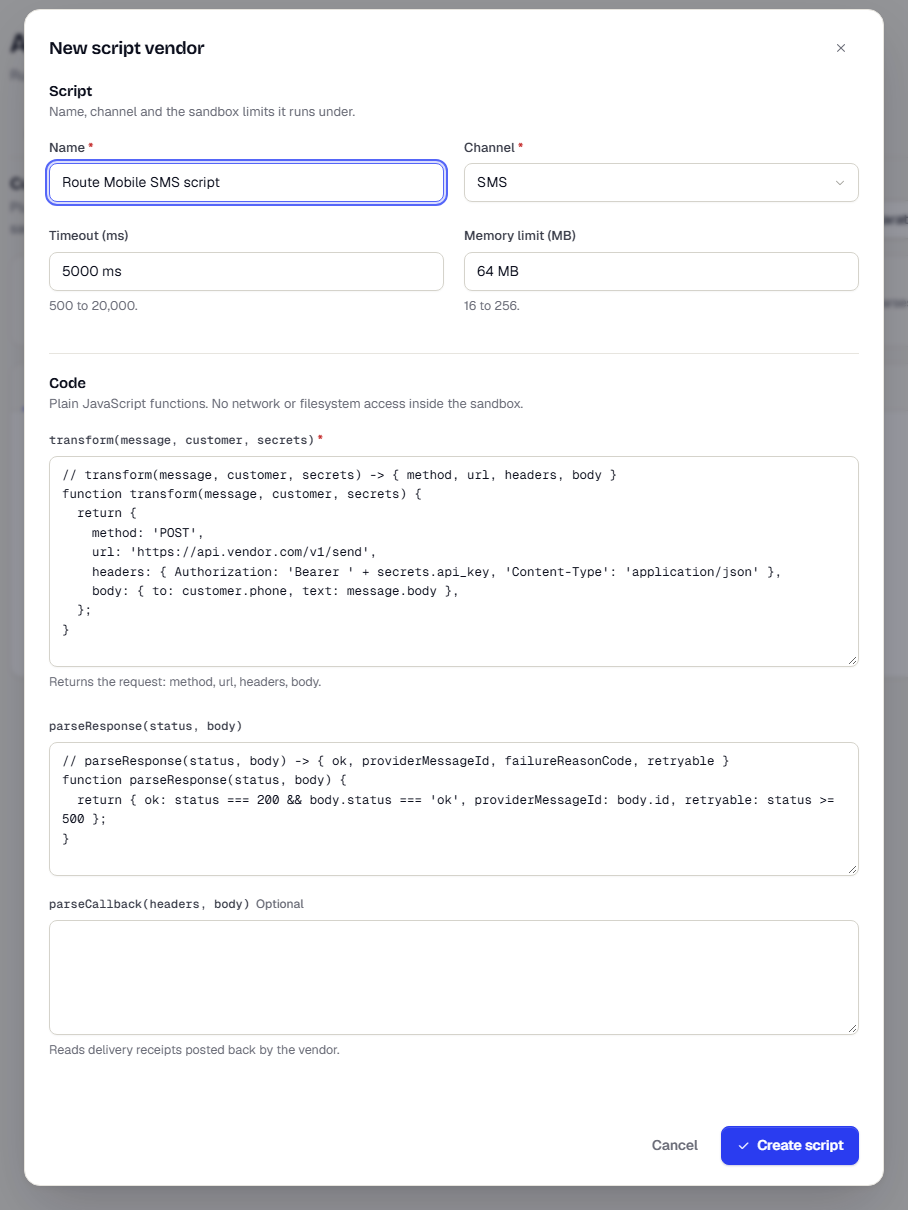
- Select Create script. Scripts start as Draft.
Test a script with a dry run
A dry run runs your script against sample data. Nothing is sent to the vendor, and the secrets you type are never stored.
- Open the Scripts tab.
- On the script's row, select Dry run.
- Under Input, edit the sample Message, Customer and Secrets. Use fake values.
- Select Run dry run.
- Read the Result. It shows the request your script built and how it parsed the sample reply. Fix the code and run again until the request looks right.
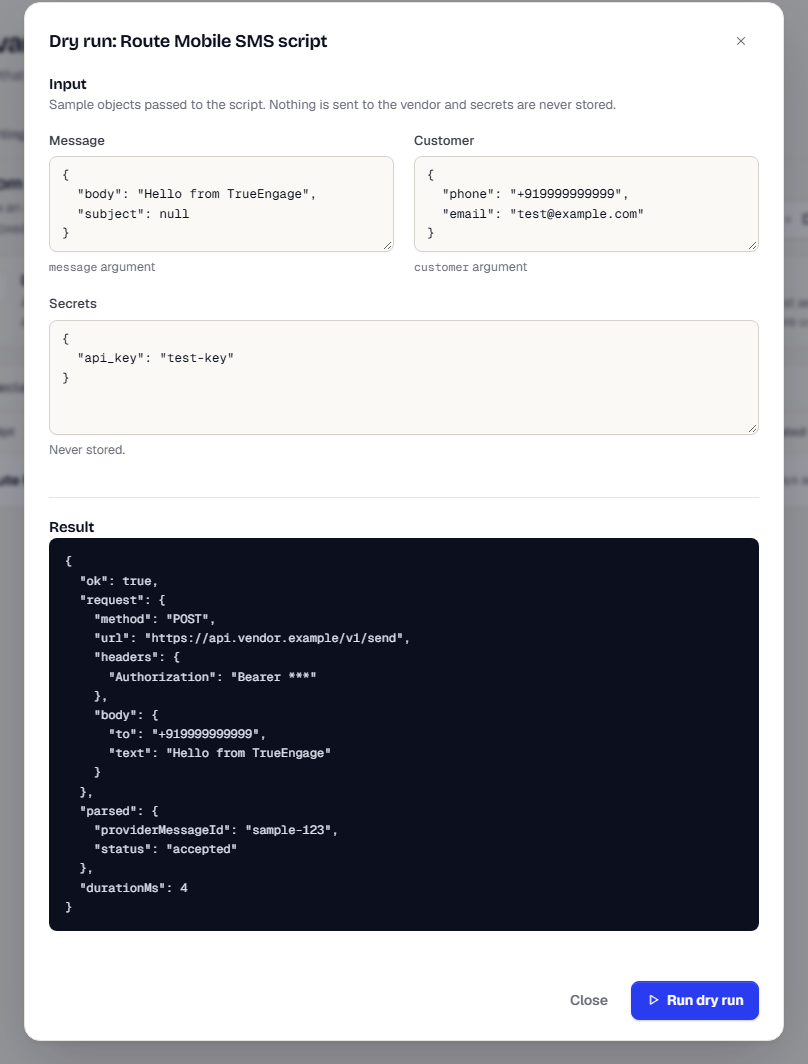
- When you are happy, edit the script and set Status to Active.
Use the vendor
- Go to Channels, open the channel (for example SMS & RCS), and select Add provider on the Senders tab.
- Choose the channel, then pick your custom vendor in Pick the vendor.
- Enter the secrets your template or script reads from
secrets.*, then verify the provider. See Add and verify a provider.
What happens next
Your custom vendor works anywhere a catalog vendor does: as the channel default and in routing rules.
Was this page helpful?